Removal and Replacement 6-6 Opening the Instrument Case
Model MS20xxB MM PN: 10580-00303 Rev. D 6-15
3. Place the VNA Master face down on a stable work surface that will not scratch the display.
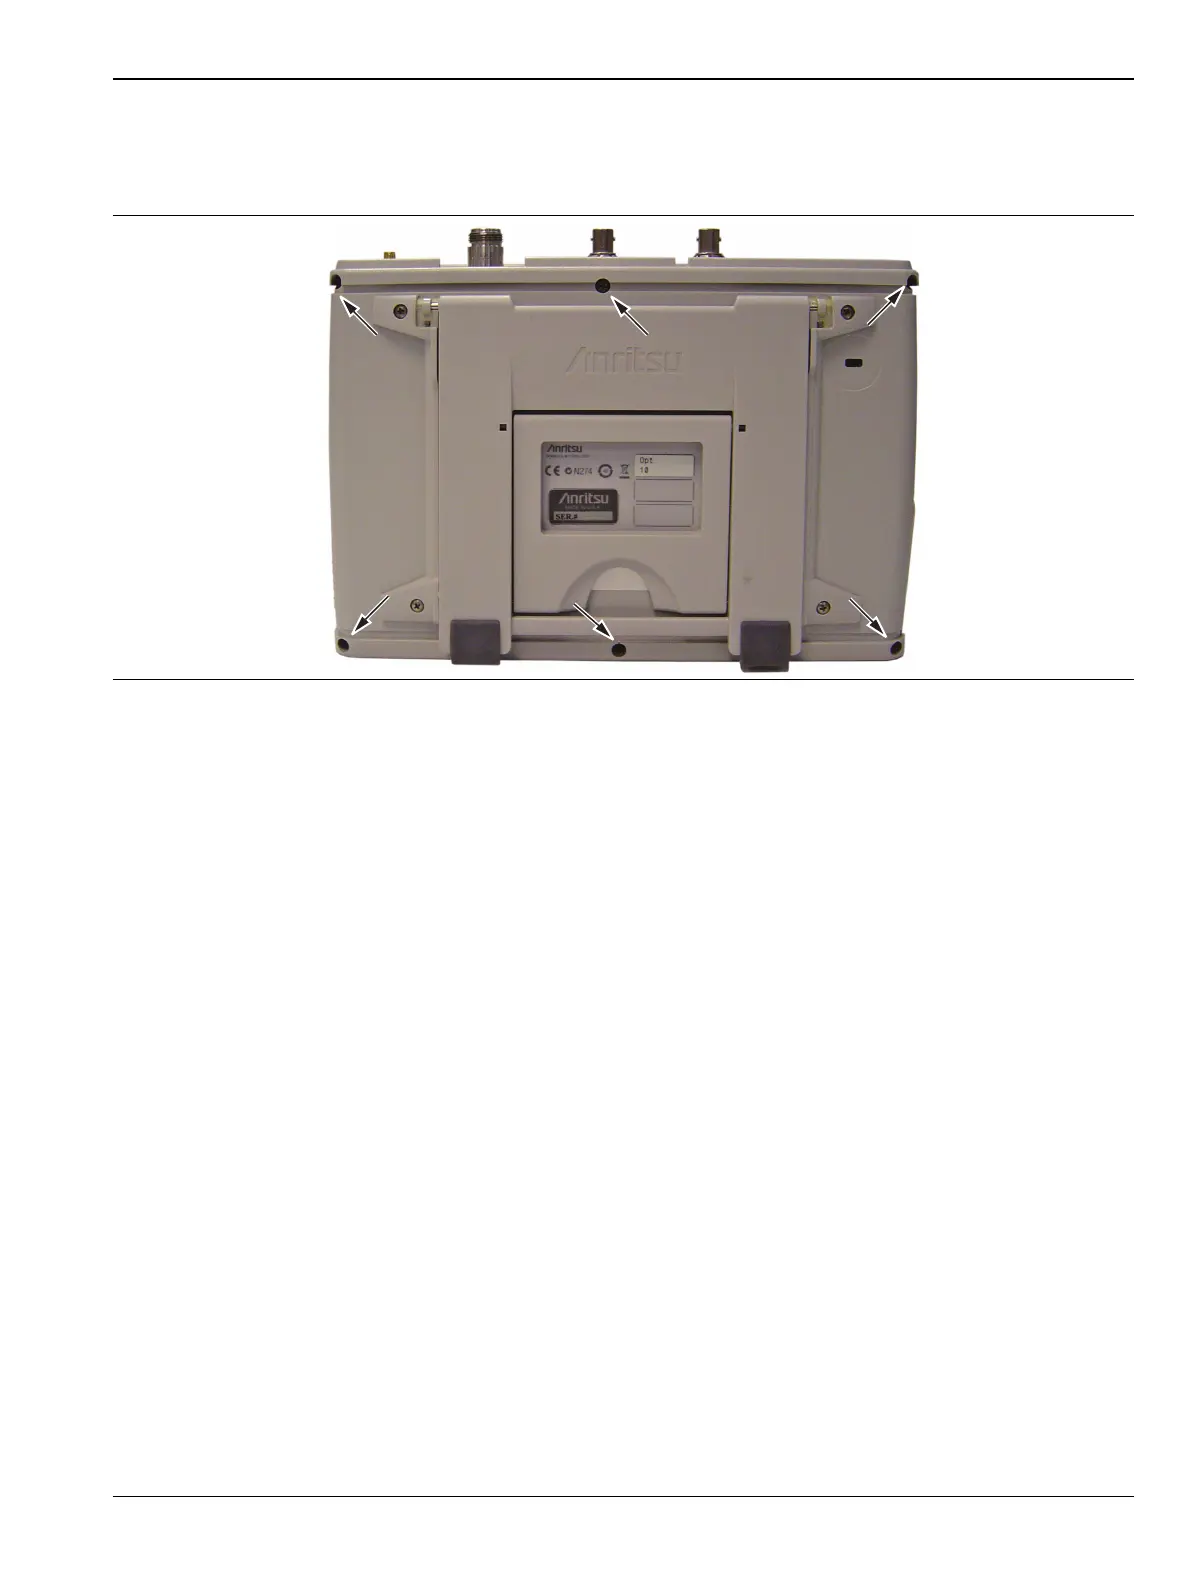
4. Use a Phillips screwdriver to remove the six screws securing the two halves of the case together. The
instrument that is shown in Figure 6-12 is not a VNA Master, but the case is the same.
5. As you begin to separate the two halves of the case, carefully lift up a small amount first on the right side
of the case (as viewed from the back, in other words, the side opposite the keypad when viewed from the
front). Then lift the entire case back away from the case front far enough to clear the internal parts and
the vent grills. Open the case as if opening a book, laying the back to the left, hinging the two case halves
on the one cable (battery power) that links the two case halves together (refer to Figure 6-13). Take care
to avoid damage to the cable or the connector.
6. With the VNA Master back case laying flat beside the front case, remove the battery cable connector from
the Mother Board (item 1 in Figure 6-13). The two halves of the case may then be separated.
Figure 6-12. Remove the Six Screws

 Loading...


