A7 Plus – OPERATOR'S MANUAL
• The main icon buttons available on the TOUCH DISPLAY are:
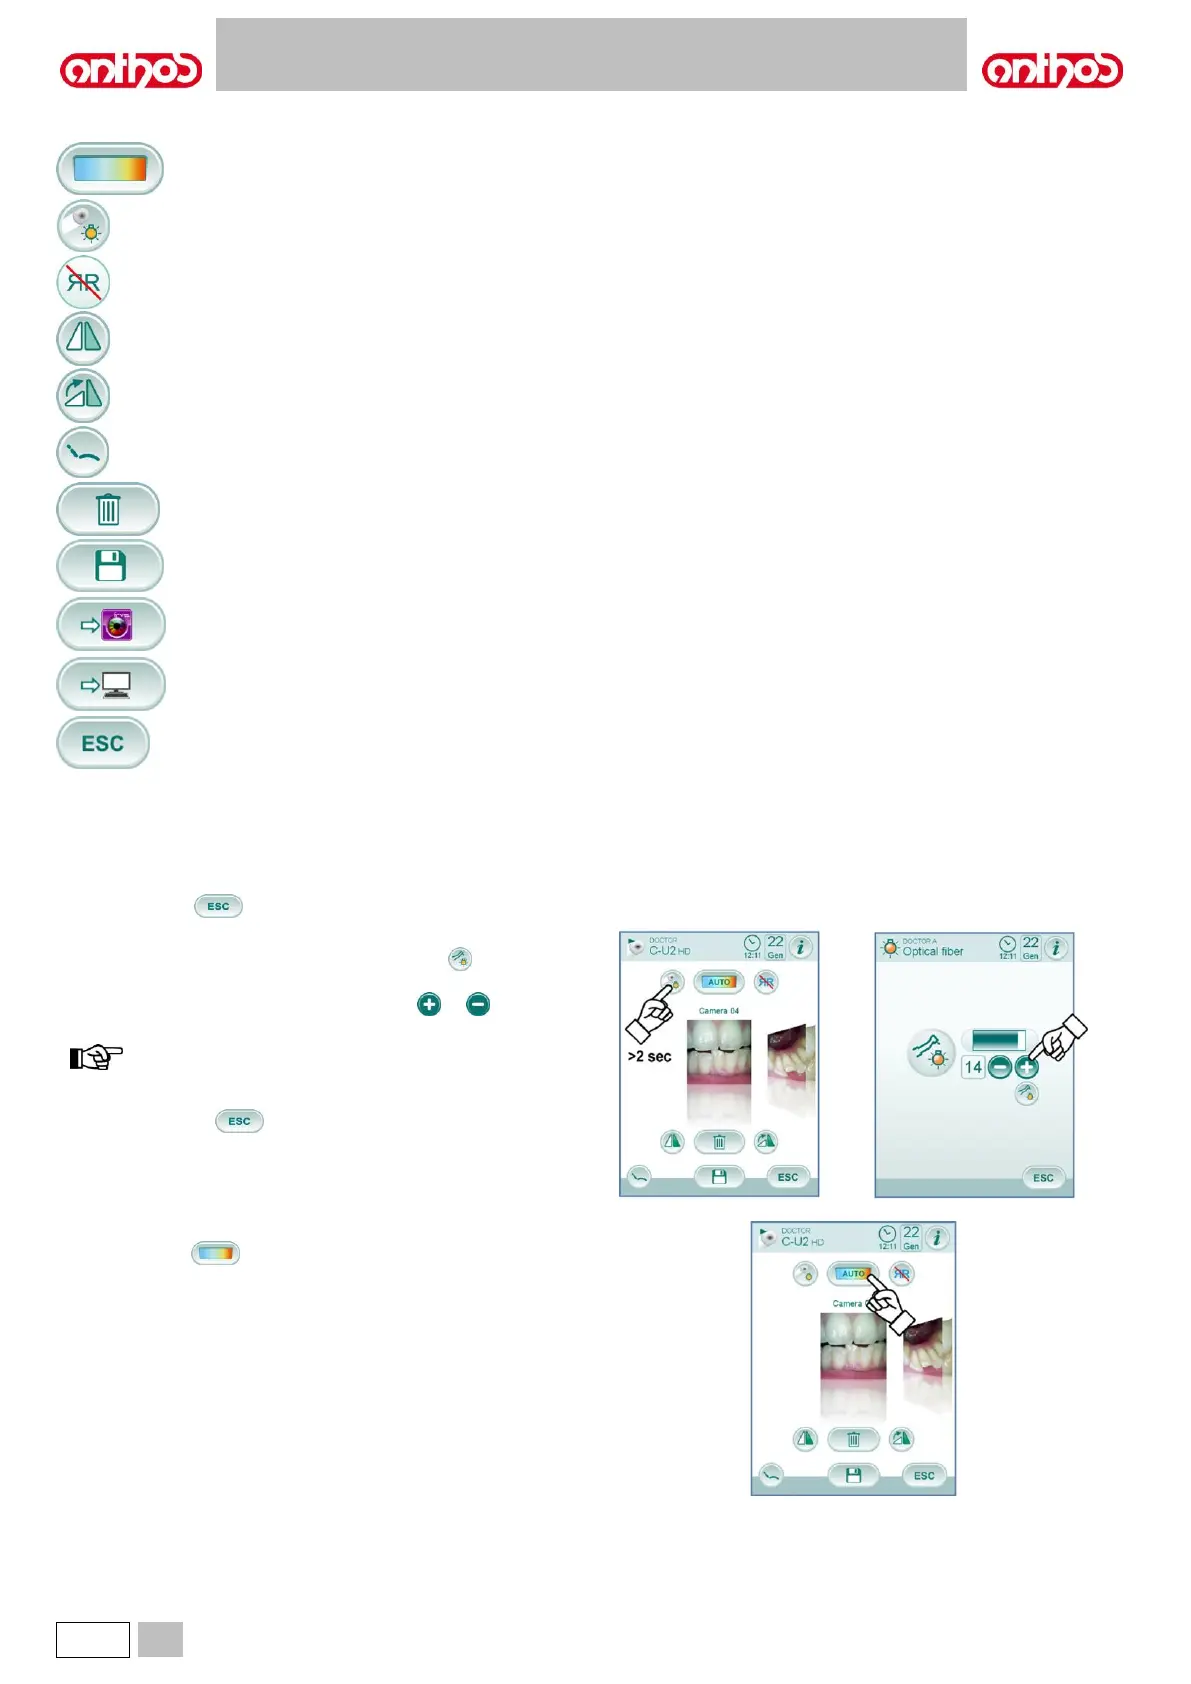
Colour profile adjustment
(only with camera extracted and set to LIVE).
Camera LED turning on/off
(only with camera extracted).
Activation/deactivation of MIRROR function
(only with camera extracted and set to LIVE).
Overturn the captured image.
Turn captured image clockwise.
Recall main controls of main screen.
Delete the captured image.
Move the captured images to a folder of the internal
memory or USB ( only with camera in rest position ).
Move the captured images to an iRYS folder
( only with camera in rest position and PC connected
to IRYS ).
Move the captured images to the PC ( only with
camera in rest position and PC connected to iCapture
).
Go back to the main screen without moving the
captured images.
• Shortly press the touch key on camera handpiece or operate the foot
control to capture the image shown on the monitor.
To go back to "live" image, simply touch again the touch key on
camera handpiece or operate again the foot control.
• When camera is put back in place, the screen with captured images is
still shown on the TOUCH DISPLAY; to go back to main screen, simply
touch icon button .
Camera LED brightness adjustment.
• To adjust camera LED brightness, touch icon button (for at least 2
seconds) .
• Adjust brightness level by touching icon buttons or or scrolling
the bargraph with your finger.
value setting range: 1 to 16.
• To confirm the selected brightness, simply quit this sub-menu by
touching icon button .
Colour profile adjustment.
Touch icon button to gradually shift from a "colder" colour profile
to a "warmer" one.
“AUTO” status activates the automatic white balance function, which can
be used under particular conditions when the previous profiles are not
satisfactory.