Getting Started
QL-E100 User Guide 12
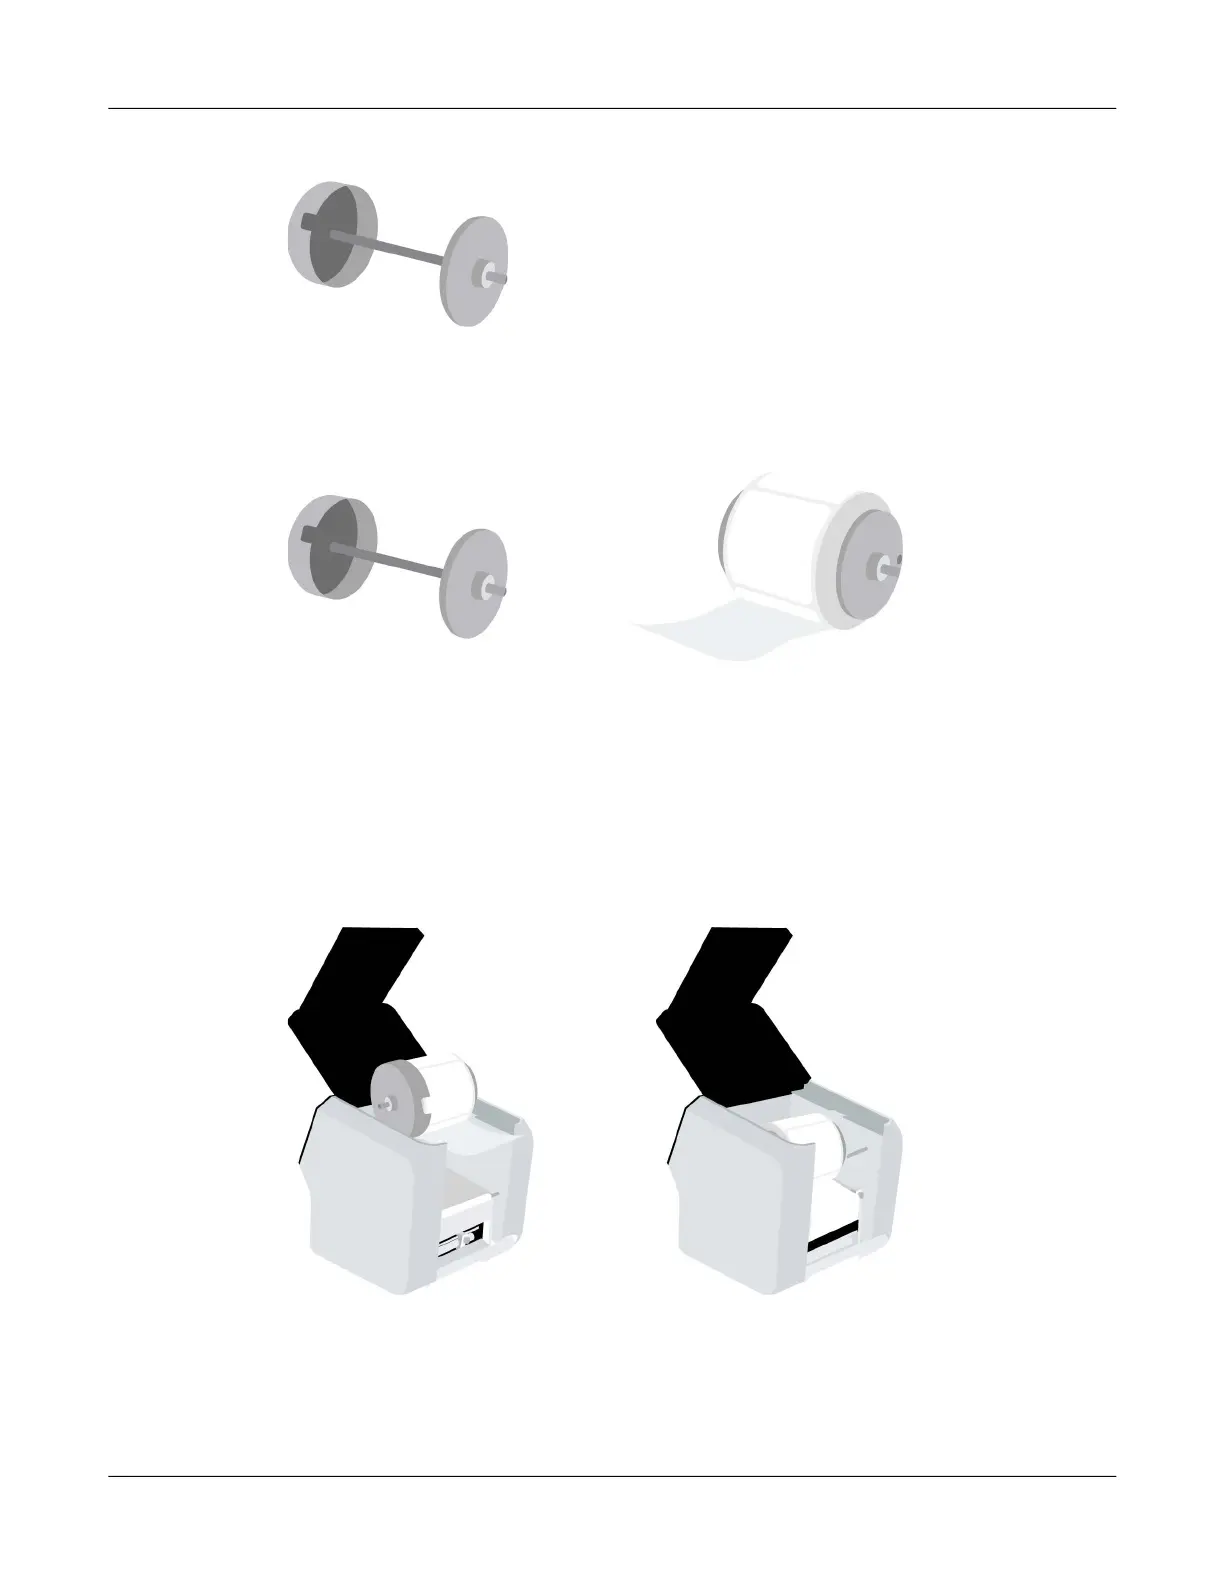
2. Lift the empty roll holder out of the printer.
The roll holder is made from two flanges connected by a spindle. The wide flange is not
removable. The narrow flange can be removed to allow for loading a media roll.
3. Loosen the screw on the narrow flange until the flange moves freely on the spindle. Remove
the narrow flange.
Orient the label roll as shown. Then install it on the roll holder. Make sure the side of the roll is
pressed flush against the wide flange.
Install the narrow flange. Make sure the narrow flange is pressed flush against the side of the
roll. Tighten the screw on the narrow flange to secure the flange.
Important: Make sure the roll is oriented as shown. With the wide flange on the left side of the
roll, the labels must be unwinding from the bottom of the roll. If labels are unwinding from the
top of the roll, repeat this step and turn the roll around.
4. Set the roll holder in the printer as shown.
5. Close the upper lid.
Before printing, you will feed the media into the printer. See “Installing the Media Roll” on
page 30.