Installing and Setting Up the Printer Driver
QL-E100 User Guide 44
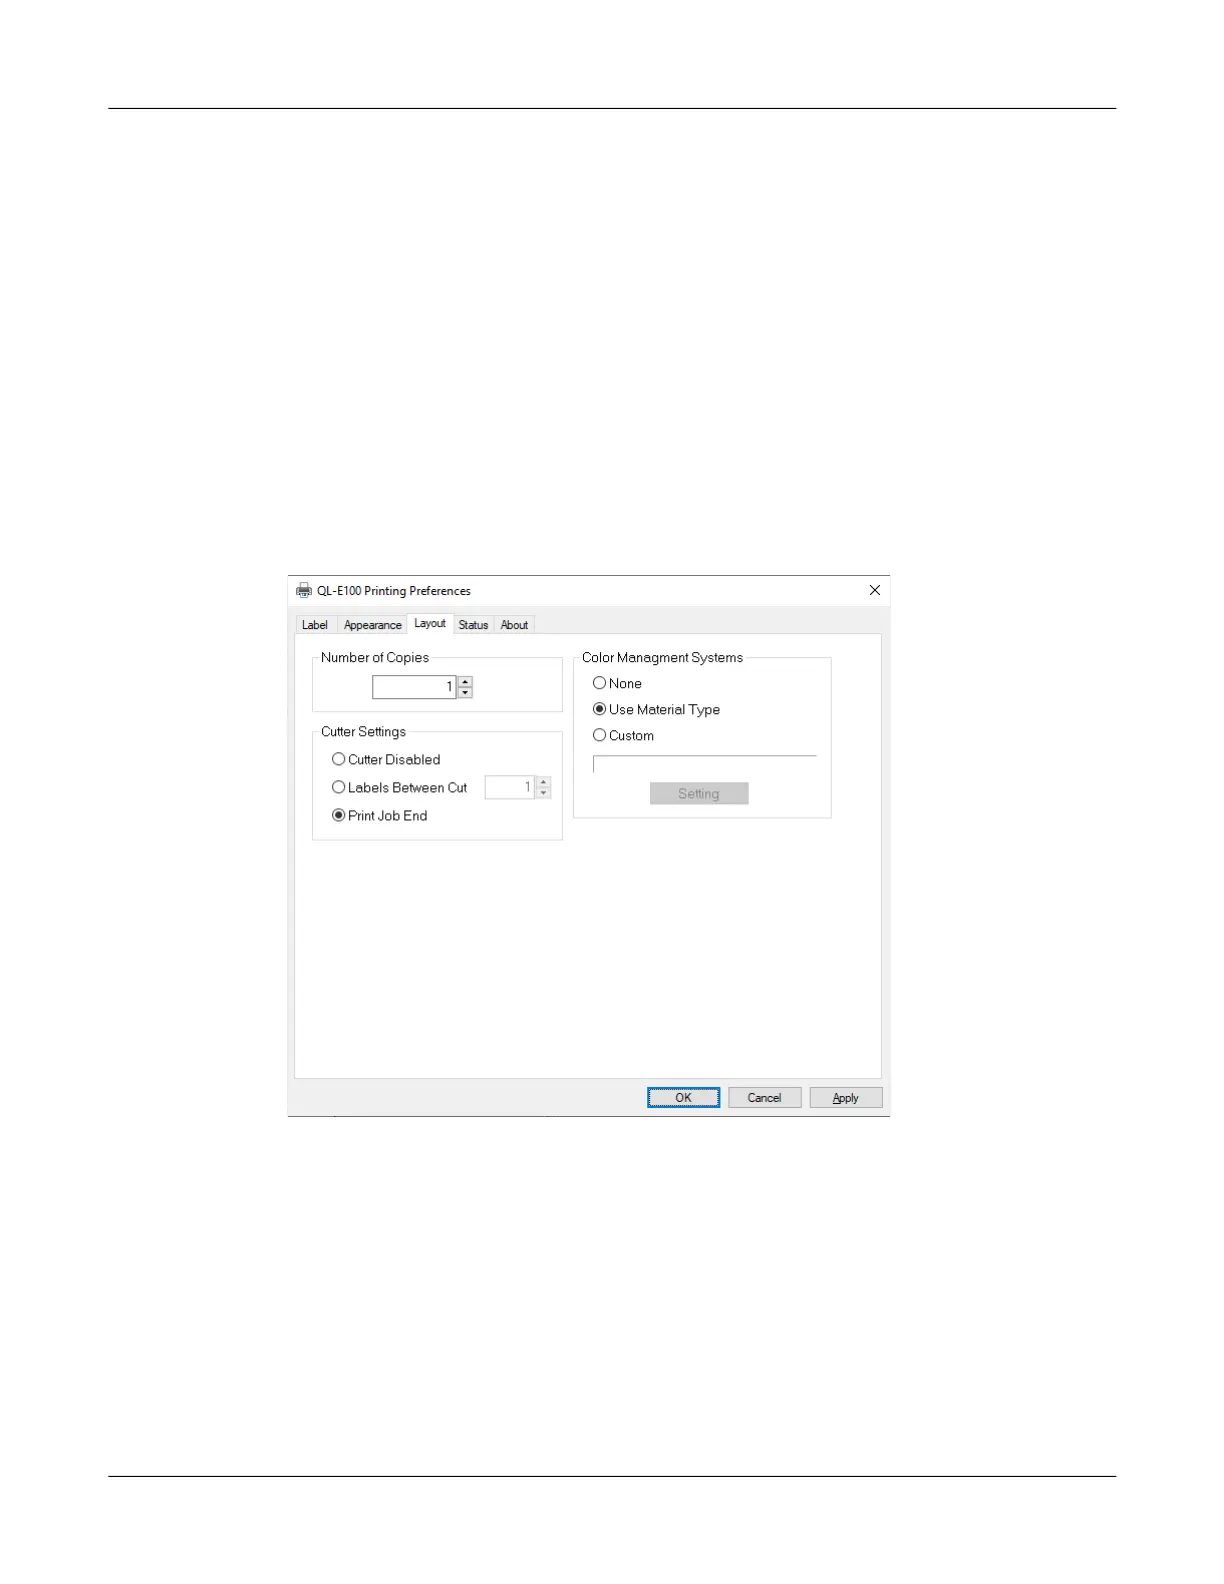
Setting up Layout Options
Before you print using a third-party application, you will need to select layout options to define how
your label will be printed.
Note: Driver instructions apply only to printing via third-party design applications. If you are using
CQL Pro, this process is not required.
1. In Windows 10 and later, choose the search box on the taskbar. Type “Control Panel”, and
then select the Control Panel icon. In the Control Panel window, click View Devices and
Printers.
Right-click the printer icon and choose Printing Preferences. The QuickLabel QL-E100
Printing Preferences window will open.
Note: You can also access the driver preferences via the application’s print dialog. From the
Print window in your software, select QuickLabel QL-E100 from the printer list and choose
Properties or Setup (varies based on program).
2. Choose the Layout tab.
3. If necessary, you can select a printing quantity. Print copies are specified within the application
before printing. However, you can override that value here, or use this setting if the application
does not provide a setting.
4. Set up the cutter options.
• Cutter Disabled - Select this option to disable the cutter.
• Labels Between Cut - Select this option to cut after your specified number of labels.
• Print Job End - Select this option to cut at the end of the print job.