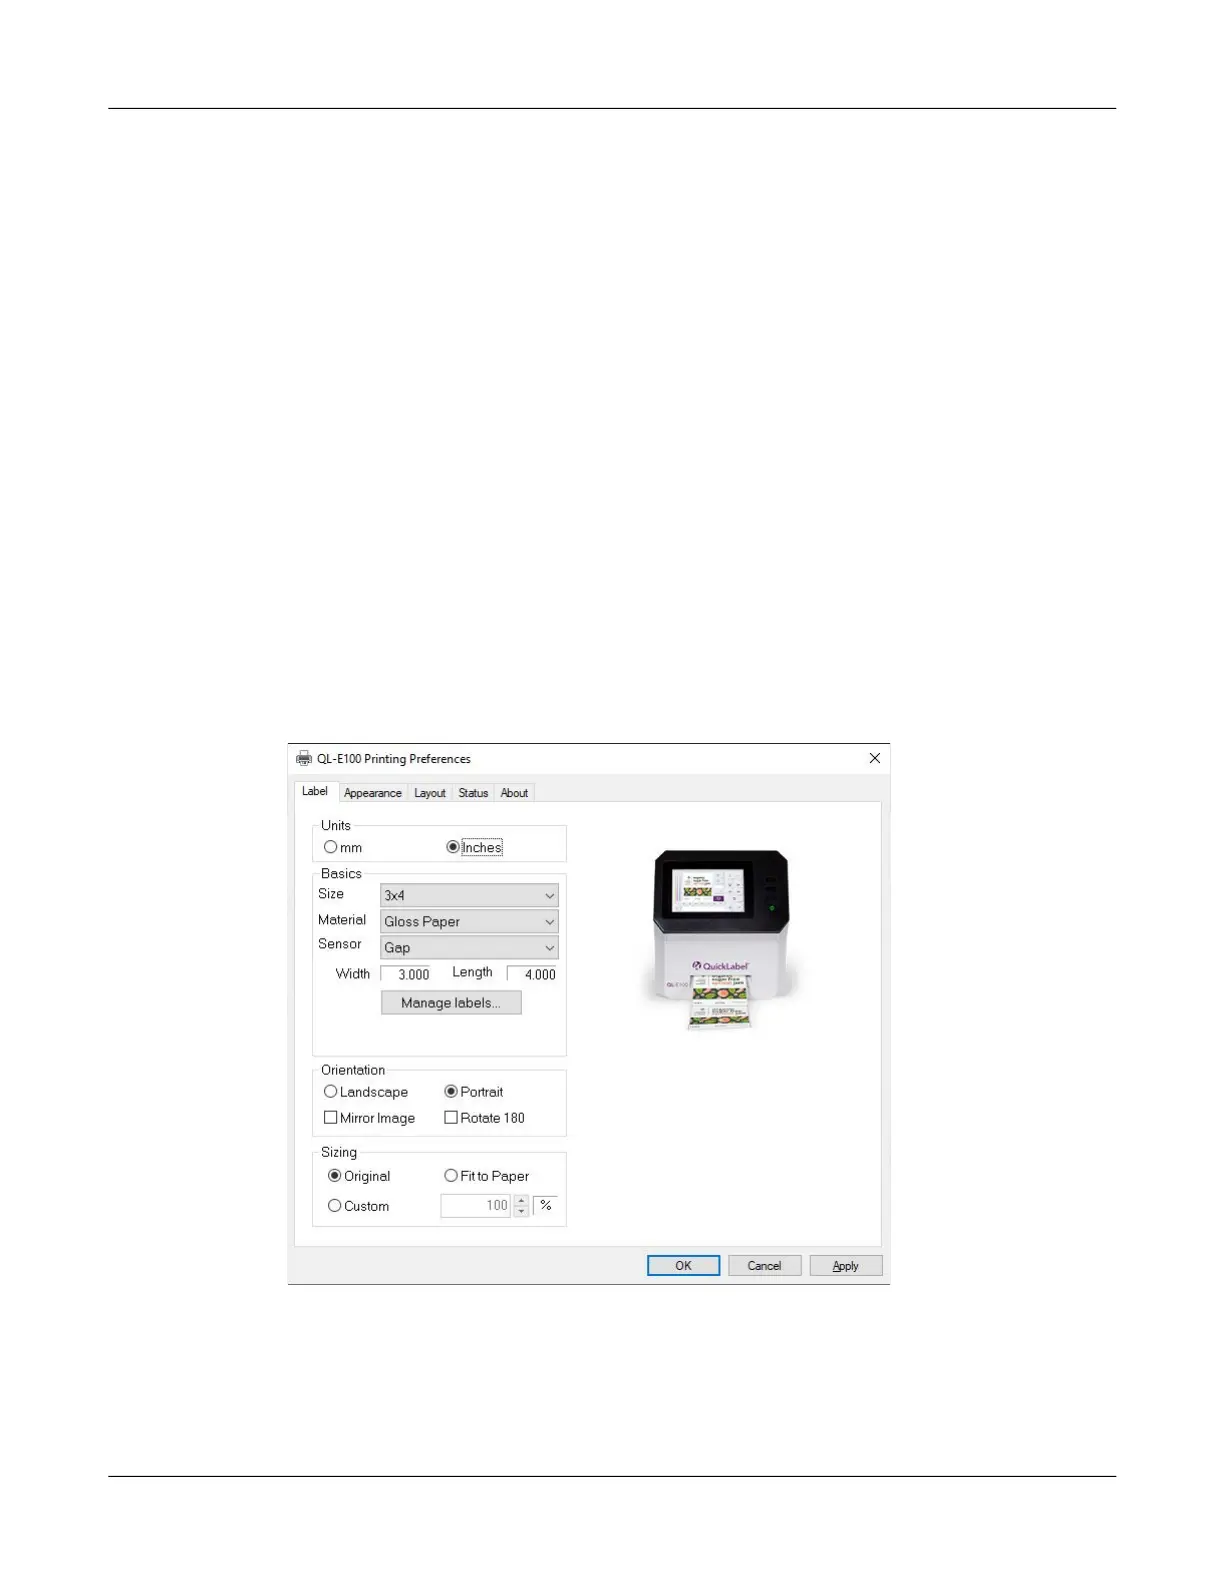
Installing and Setting Up the Printer Driver
QL-E100 User Guide 41
10. If necessary, you can adjust the sizing of the printed image.
• Original - Select this option to leave the sizing unchanged.
• Fit to Paper - Select this option to resize the printed image to fit the label size. This
feature requires selecting Auto Fit to Page as the Scaling option in the Media Settings
tab on the touchscreen. See “Media Settings Tab (QuickPrint Functions)” on page 64.
• Custom - Select this option to enter a custom resize percentage.
11. Choose OK.
Setting up Custom Label Sizes
You can add and modify custom label sizes in the printer driver.
1. In Windows 10 and later, choose the search box on the taskbar. Type “Control Panel”, and
then select the Control Panel icon. In the Control Panel window, click View Devices and
Printers.
Right-click the printer icon and choose Printing Preferences. The QuickLabel QL-E100
Printing Preferences window will open.
Note: You can also access the driver preferences via the application’s print dialog. From the
Print window in your software, select QuickLabel QL-E100 from the printer list and choose
Properties or Setup (varies based on program).
2. Choose the Label tab.