Installing and Setting Up the Printer Driver
QL-E100 User Guide 34
Chapter 3: Installing and Setting Up the
Printer Driver
Initial Driver Installation
The initial driver installation is discussed earlier in this user guide. See “Installing the Printer
Driver” on page 14.
Upgrading the Driver
New versions of the QL-E100 printer driver will be made available as needed. Use the following
instructions to download and upgrade the printer driver on your computer.
Important: This procedure requires administrator rights in Windows.
1. Make sure that the printer is powered off. If the printer is on, press the power button for
two seconds and then release it. The power button will light red and the printer will shut down.
2. Disconnect the USB cable from the printer.
3. Download the updated QL-E100 printer driver from the AstroNova Product Identification
website. See AstroNovaProductID.com/QL-E100support. Save the file to your desktop for
convenience.
The file will be named Setup_QL_E100_WindowsDriver_V#.##.exe. The last part of the file
name indicates the version number of the driver.
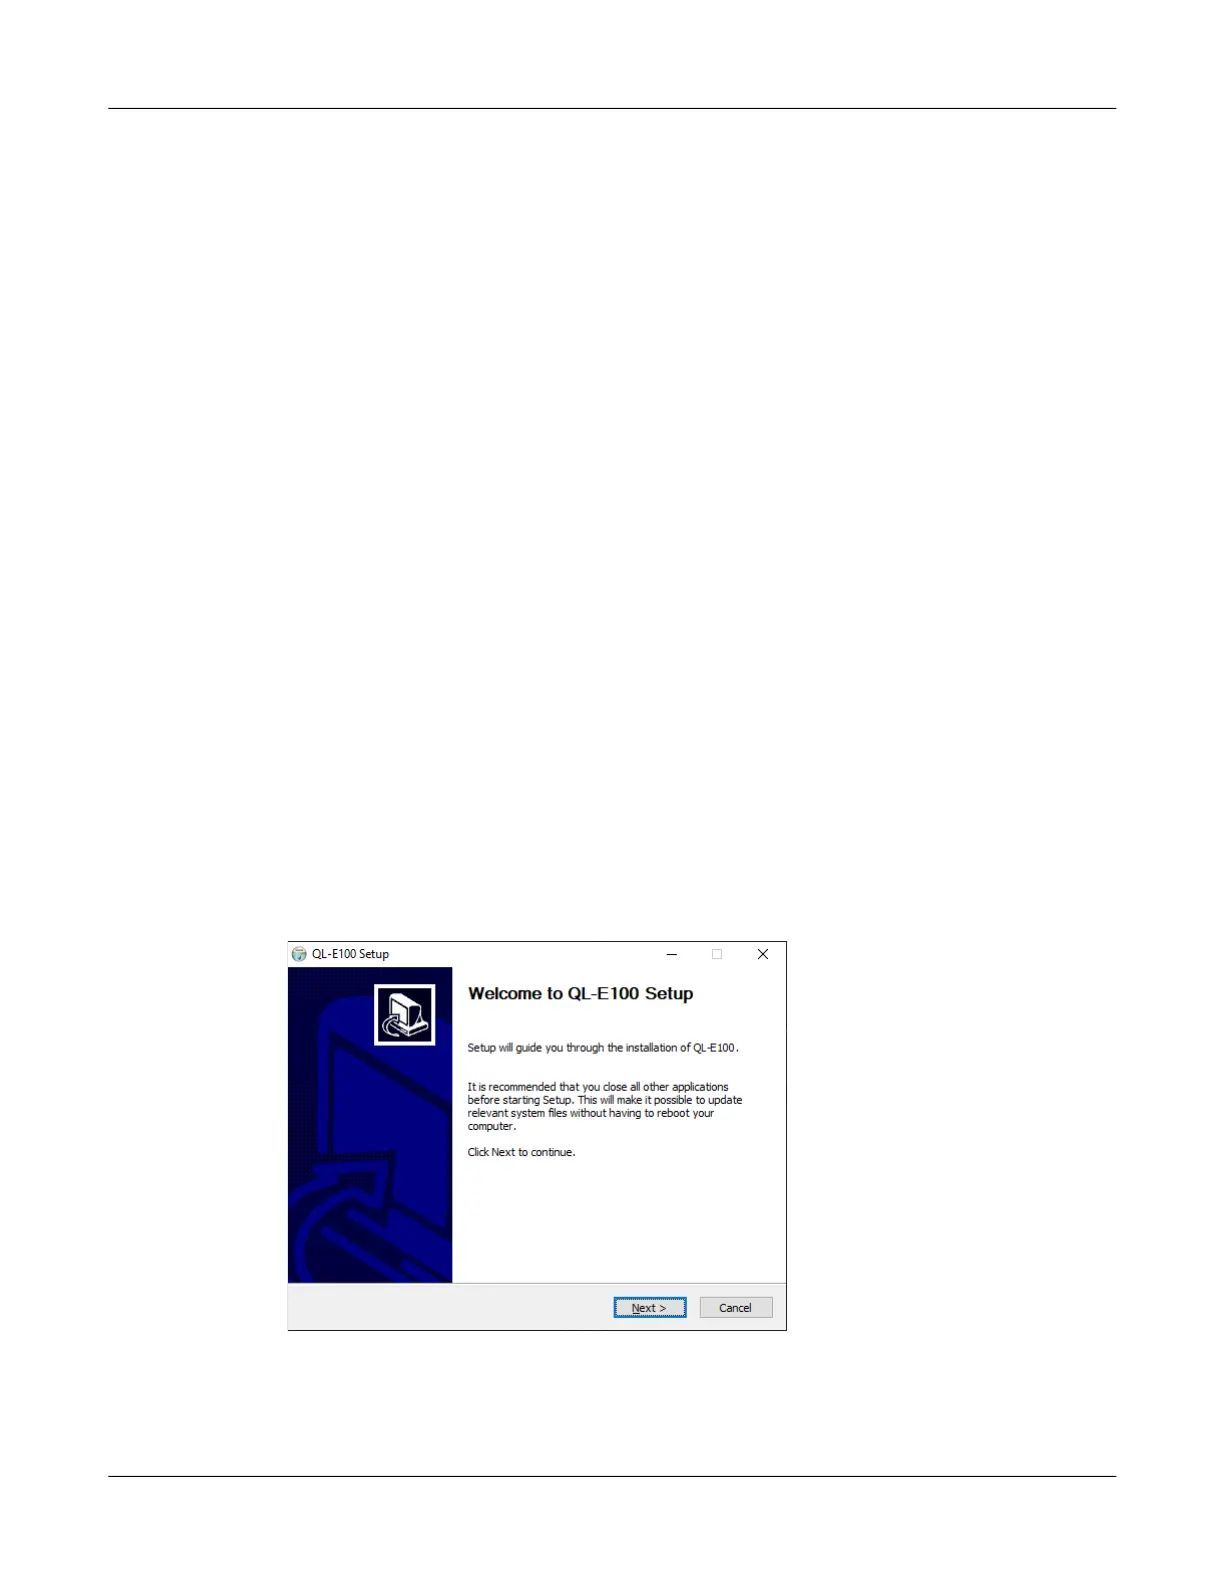
4. Double-click the installer file. The installation process will begin.
5. The first screen shows the printer model and software version number.
Choose the Next button.