Media and Ink Cartridges
QL-E100 User Guide 25
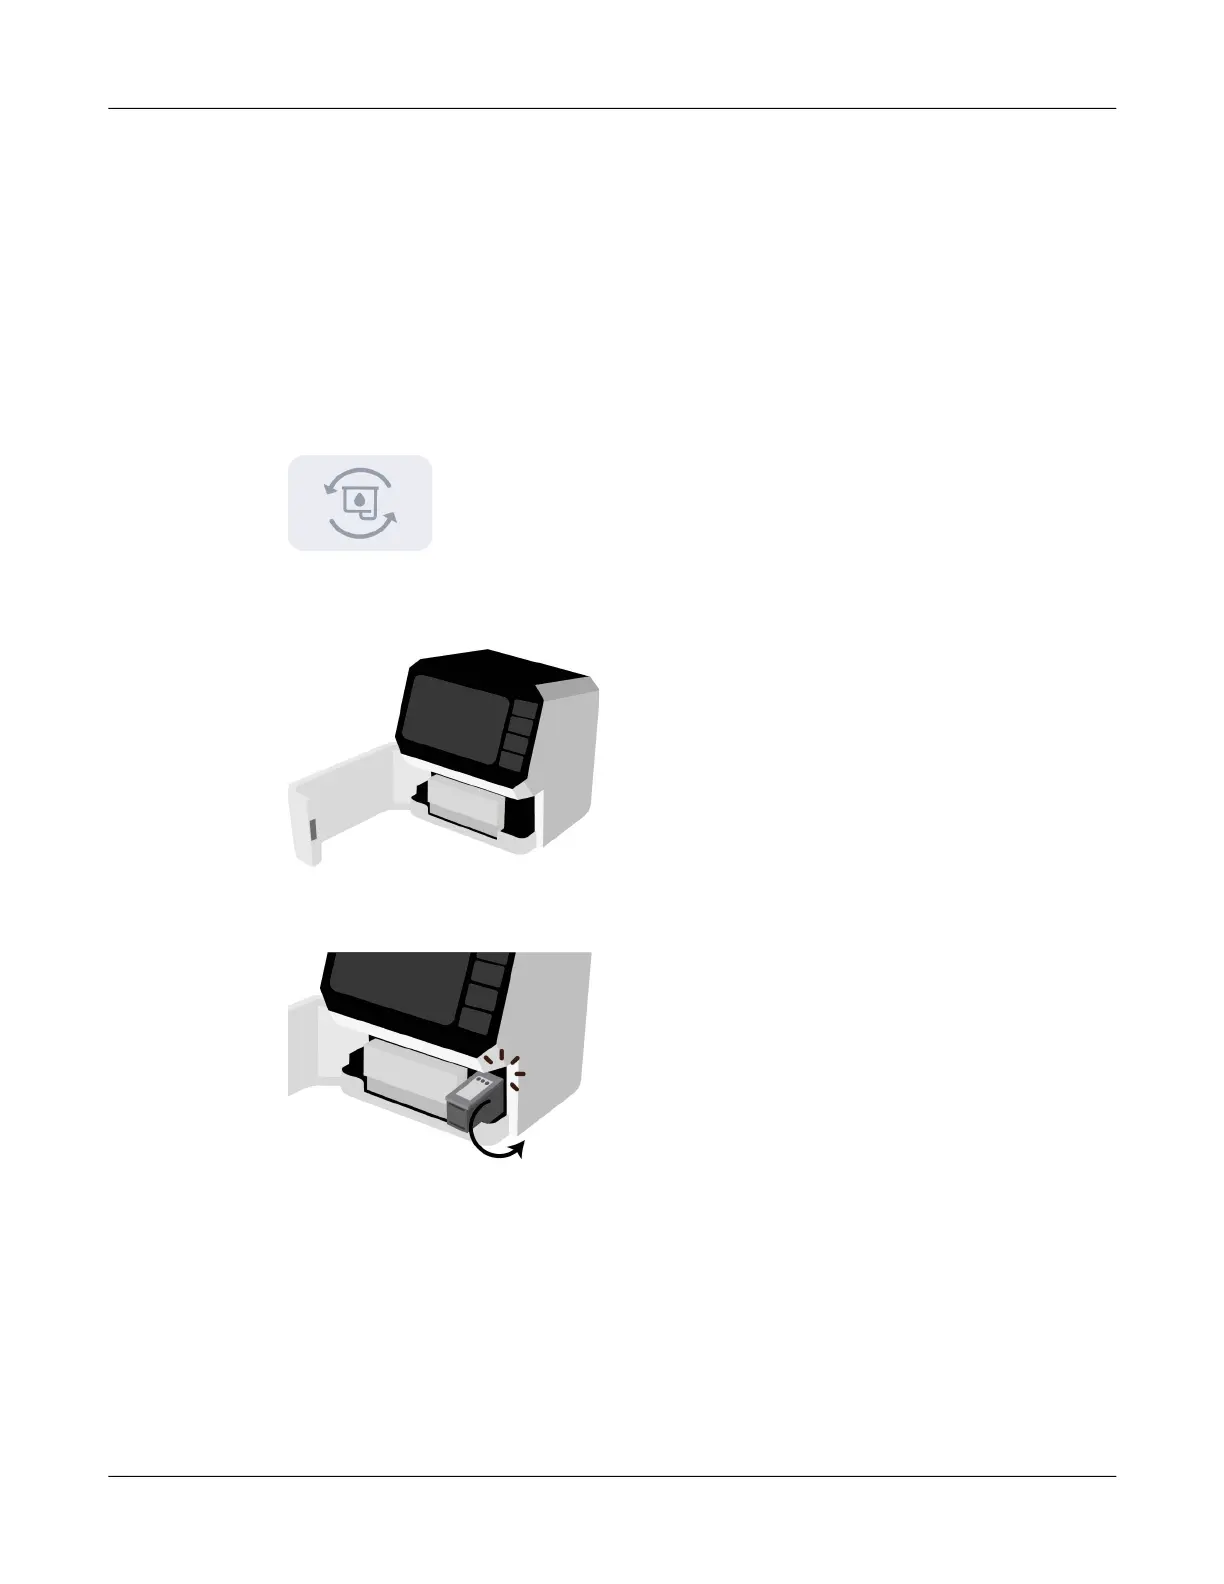
Replacing the Ink Cartridge
The ink level is displayed on the left side of the touchscreen. When the ink cartridge is empty, an
out of ink message will be displayed. Use the following instructions to remove the empty ink
cartridge and install a new one.
Warning: Before attempting to remove the ink cartridge from the printer, you must first tap the
Change Ink Cartridge icon or press the F1 key as described below. If you attempt to remove the
ink cartridge without activating one of these functions, printer damage may occur.
1. Ink cartridges have special handling precautions. Follow these precautions when you work
with ink cartridges. See “Handling Ink Cartridges” on page 24.
2. Tap the Change Ink Cartridge icon or press the F1 key.
The maintenance tray under the ink cartridge will move backward into the printer.
3. Open the front lid. The ink cartridge cradle is located on the right side of the printer.
4. Gently pull the cartridge down and outward until you hear it detach from the cradle. Remove
the ink cartridge from the cradle as shown.