Installing and Setting Up the Printer Driver
QL-E100 User Guide 40
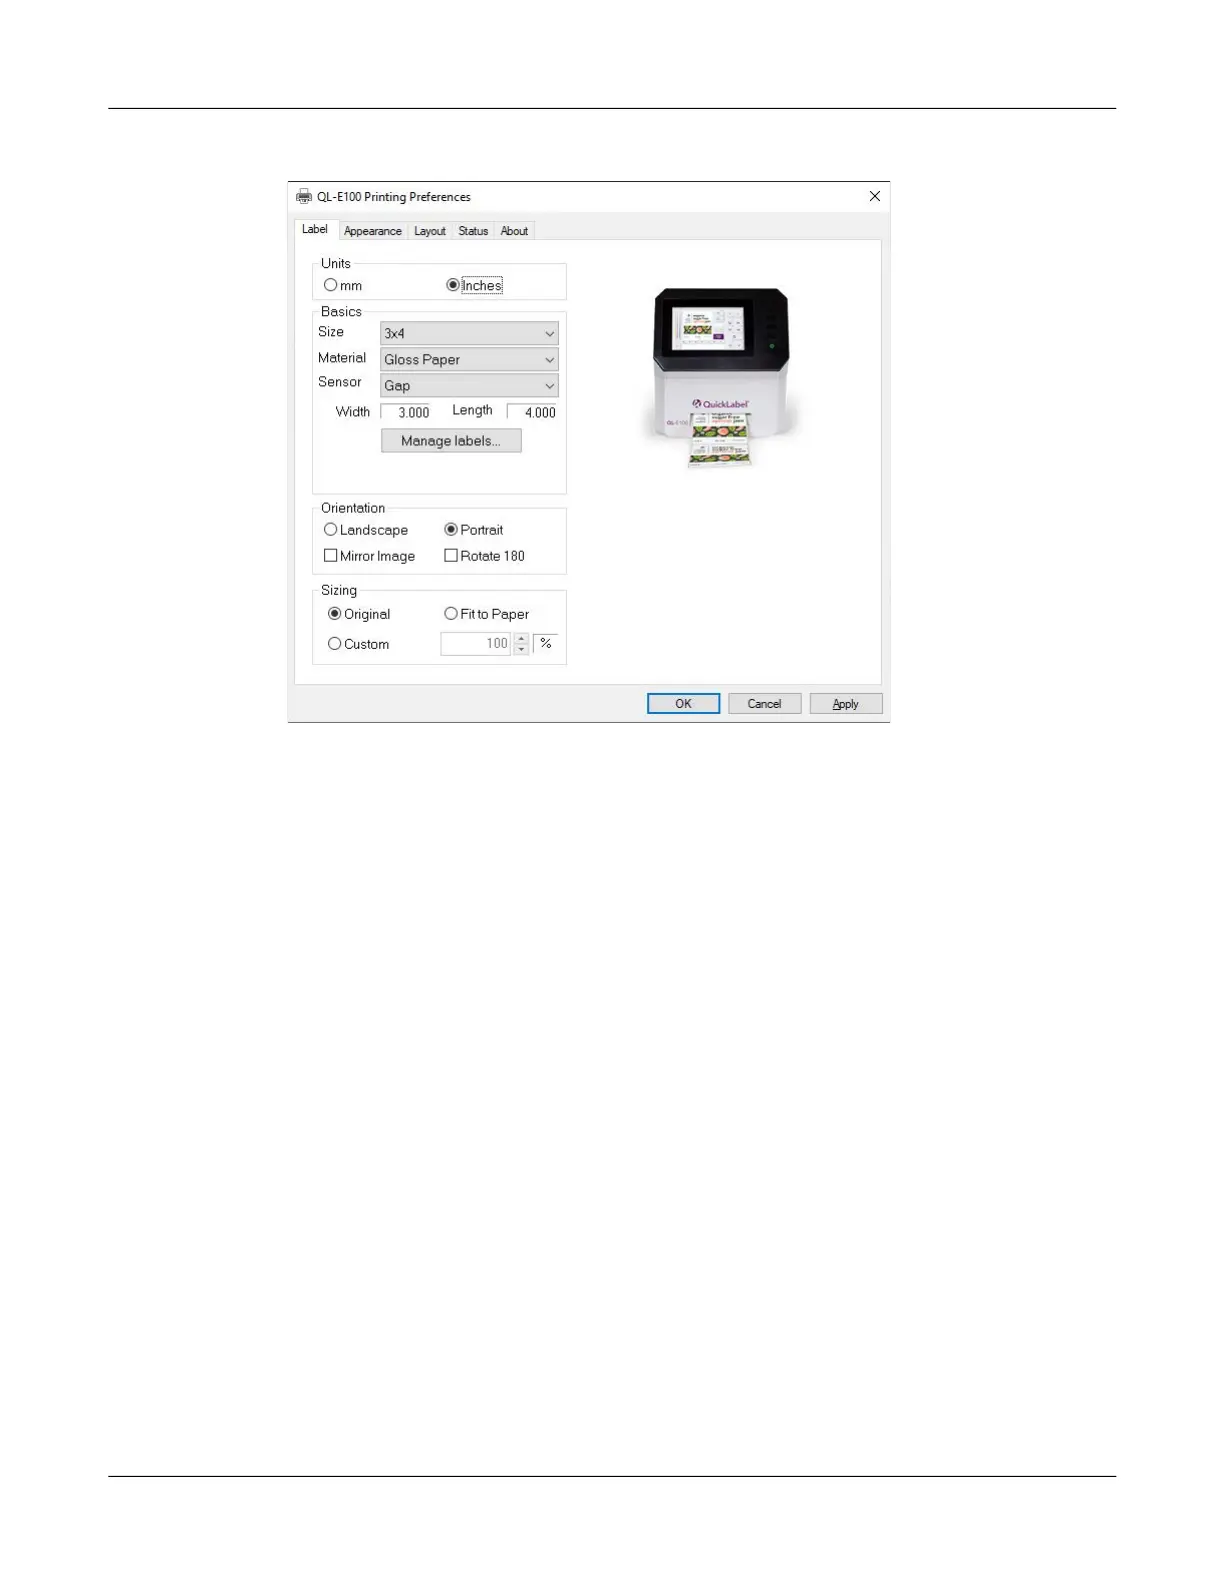
2. Choose the Label tab.
3. Select whether to display sizes in millimeters or inches.
4. Select a label size from the Size list.
If necessary, you can set up a custom label size to meet your needs. See “Setting up Custom
Label Sizes” on page 41.
5. Select a Material type.
6. Select a Sensor type.
• Continuous - Choose this option if you are using media without gap or reflective marks.
• Gap - Choose this option if you are using gap media.
• Black Mark - Choose this option if you are using reflective mark media.
If you selected Gap or Black Mark, enter the length of the gap or reflective mark.
7. Select a printing orientation. Orientation is often set within the design application. However, if
you cannot select an orientation in the design application, choose from the following options:
• Landscape - Select this option if you want to print the label in a landscape orientation on
the label roll.
• Portrait - Select this option if you want to print the label in a portrait orientation on the
label roll.
8. If necessary, you can print the image in a mirrored orientation (flipped left-to-right) by choosing
Mirror Image.
9. If necessary, you can rotate the printed image 180 degrees by choosing Rotate 180.