2. General
2.4 Installation process overview
Let the projector acclimate to t he amb ient temperature after u npacking. Neglecting this may resu lt in a startup
failure of the light processor unit.
Set up from A to Z
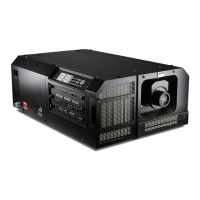
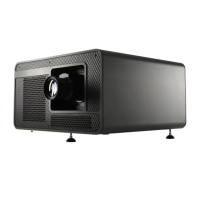
After you have unpacked and checked th e projector, y ou can start with the installation process of your DP2K -23B digital projector.
This chapter gives you an overview of all the different stages in the installation proc ess which you have to follow to s et your DP2 K-23B
digital projector up and running. Each stage is briefly described and refers to more detailed step by step pro cedures in this manual.
Use this overview as a checklist to ensure that y ou have followed all stages in the setup process of your DP2K-23B d igital projector.
Set up from A to Z
1. C heck if all installation requireme nts a re fulfilled such as the environment cond itions of the installation area, capacity of the
exhaust system, elec trical facilities, etc. Note that a solid pedestal is required to support the projector head. For more info see
chapter "Installation requirements", page 1 0.
2. Ph ysical installation o f the projector u pon its pede stal and connecting the air outlet of the projector with the exhaus t sy stem.
Note that the e xhaust system is M ANDATORY. See chapters "Positioning the DP2K -23B at port window", page 18, and "Instal-
lation of the exhaust s ystem ", page 21.
3. Electrical connection with the power net. S ee chapter "Connecting the projector with the power net", page 24.
4. Installation of a suitable UPS unit or bypass the power in and outlet for the projector electronics. See chapters "Power loop
through to the projector electronics", page 25 or "Connecting a UPS to the projector electronics", page 26.
5. Installation of the xenon lamp in ca se the xe non lamp is not installed in the lamp hous e yet. To install the xenon lamp the lamp
house has to be removed from the projector. To install t he xenon lam
p correctly and in a safe manner, s ee the detailed step by
step procedures in the chapter "Lamp & lamp house", page 27.
6. Installation of t he lens. First s elect an appropriate lens which throw ratio cov ers the screen s ize and the pro jector - screen
distance. Then install the lens in the lens holder of the projector. For more information about available lenses, lens selection and
lens installation see chapter "Lens installation", page 49.
7. Installation o f the Communicator Touch Panel. See chapter "Com munic ator Touch Panel", pa ge 67.
8. A lignment of the p rojected image on the screen. The p rojector can now be switched on to project its first image (test pattern)
on the screen. Then the image can be a ligned with the screen s ize of the application. Follow the next steps to ach ieve that:
a) P lace the ON/OFF switch of the projector in the ”I” position. As a result the projector starts to initialize. T he status lights of
the projector lights up GRE EN once the projector is initializ
ed.
b) P ress the STANDBY bu tton on the local keypad to activate the lamp.
c) P ress the DO WS ER button on the loca l keypad to open the dows er of the projector. The dowser is open if the color of the
DOWS ER bu tton is GREEN.
d) Press the TEST PATTERN button on the local keypad to project one of the internal test patterns of the projector on the screen.
e) Us e the lens ZOOM, SHIFT and FOCUS buttons on the local keypad the match the pr ojected image with the screen. Tilt the
projector in case you can not SHIFT the image complet
ely upon the screen. See "Lens shift, zoom & focus", page 52.
9. R esetting the lam p parameters. The “LAMP INFO” parameters which are stored on the con troller board of the projector MUST
be updated after each installation of an xenon lamp inside the lamp house. Neglecting this update will result in poor performance
and short life time of the xenon lamp . See chapter "Resetting the lam p pa rameters", page 42.
10.R ealignment of the xenon lamp in its reflector. For optimal performance of the xenon lam p it is required to realign the lamp
after installation in th e lamp house. See "Realignment of the lamp in its reflector", pag e 43 for more information.
11. Adjusting the light path. Normally the lens holder and the convergence of the projector is perfectly a djusted at the factory.
Nevertheless, some applications require a readjustment of the lens holder, convergence or both. See procedure "Scheimpflug
adjustment", page 53, to adjust the Scheimpflug and s ee "Conv ergence", pag e 113 to adjus t the convergence of the light path.
12.Registration of the projector. The DP 2K- 23B digital projector is DCI compliant and should be regis tered by Barco. Therefore,
the digital c ertificate inside the projector will be used to secure encryption key com munication between the projector and the rest
of the t heatre system (server and thea
tre management system). For more info see c hapter "Pr ojector registration", page 77.
13.Projection of a digital cinema movie. Apply a single or dua l channel SMPTE or DVI source to the input ports of the projector
and start up the projector. See "Source input ports of the DP2K-23B projector", page 64 and chapter "Starting up", page 73. Us e
the Comm unicator Touc h P anel to configure the applied source. See the user guide of the C omm unicator Touch Panel for mo re
detailed information.
16
R59770495 DP2K-23B 30/04/2010
 Loading...
