5. Lenses & lens holder
3
F
Image 5-20
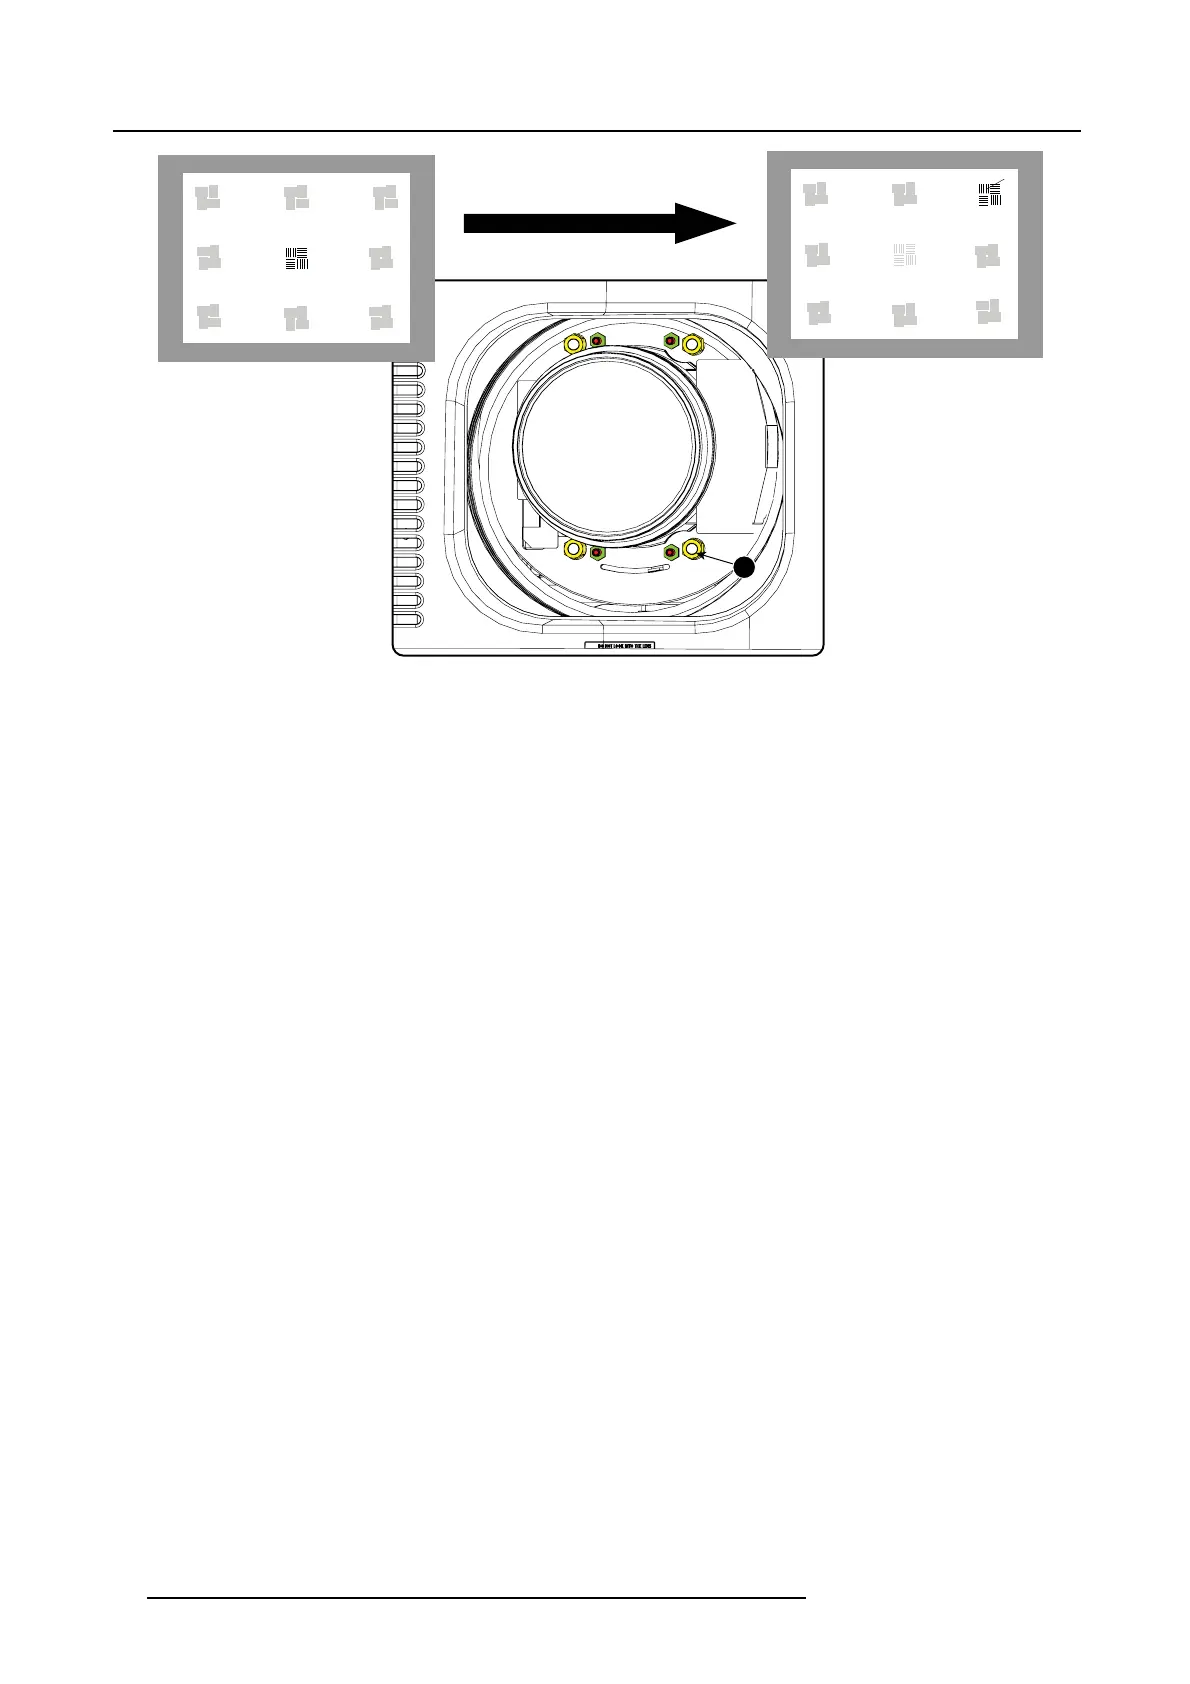
Corner focusing
10.R epeat from step 6 until the projected focus pattern is as sharp as possible in the ce nter, left, right, top and bottom of the s creen.
Start the fixation as follows:
a) Turn in set screw A, B and C until you feel a small resistance (set screws are jus t against the lens plate).
b) Fasten lock nuts a, b and c.
c) Turn in set screw D until the image moves slightly. (This m ovem ent of the image will re quire tighter fixation in st e p e , as the
nut m ust return the image to its original position.)
d) Fasten lock nut d.
e) Turn in nut 4 u ntil the image returns to its or iginal position.
56
R59770495 DP2K-23B 30/04/2010

 Loading...


