4. Getting Started
The keys are equipped with white and blue backlit LEDs. Power button is equipped with white, blue and red bac klit. The L EDs are
controlled according to the features a vailable.
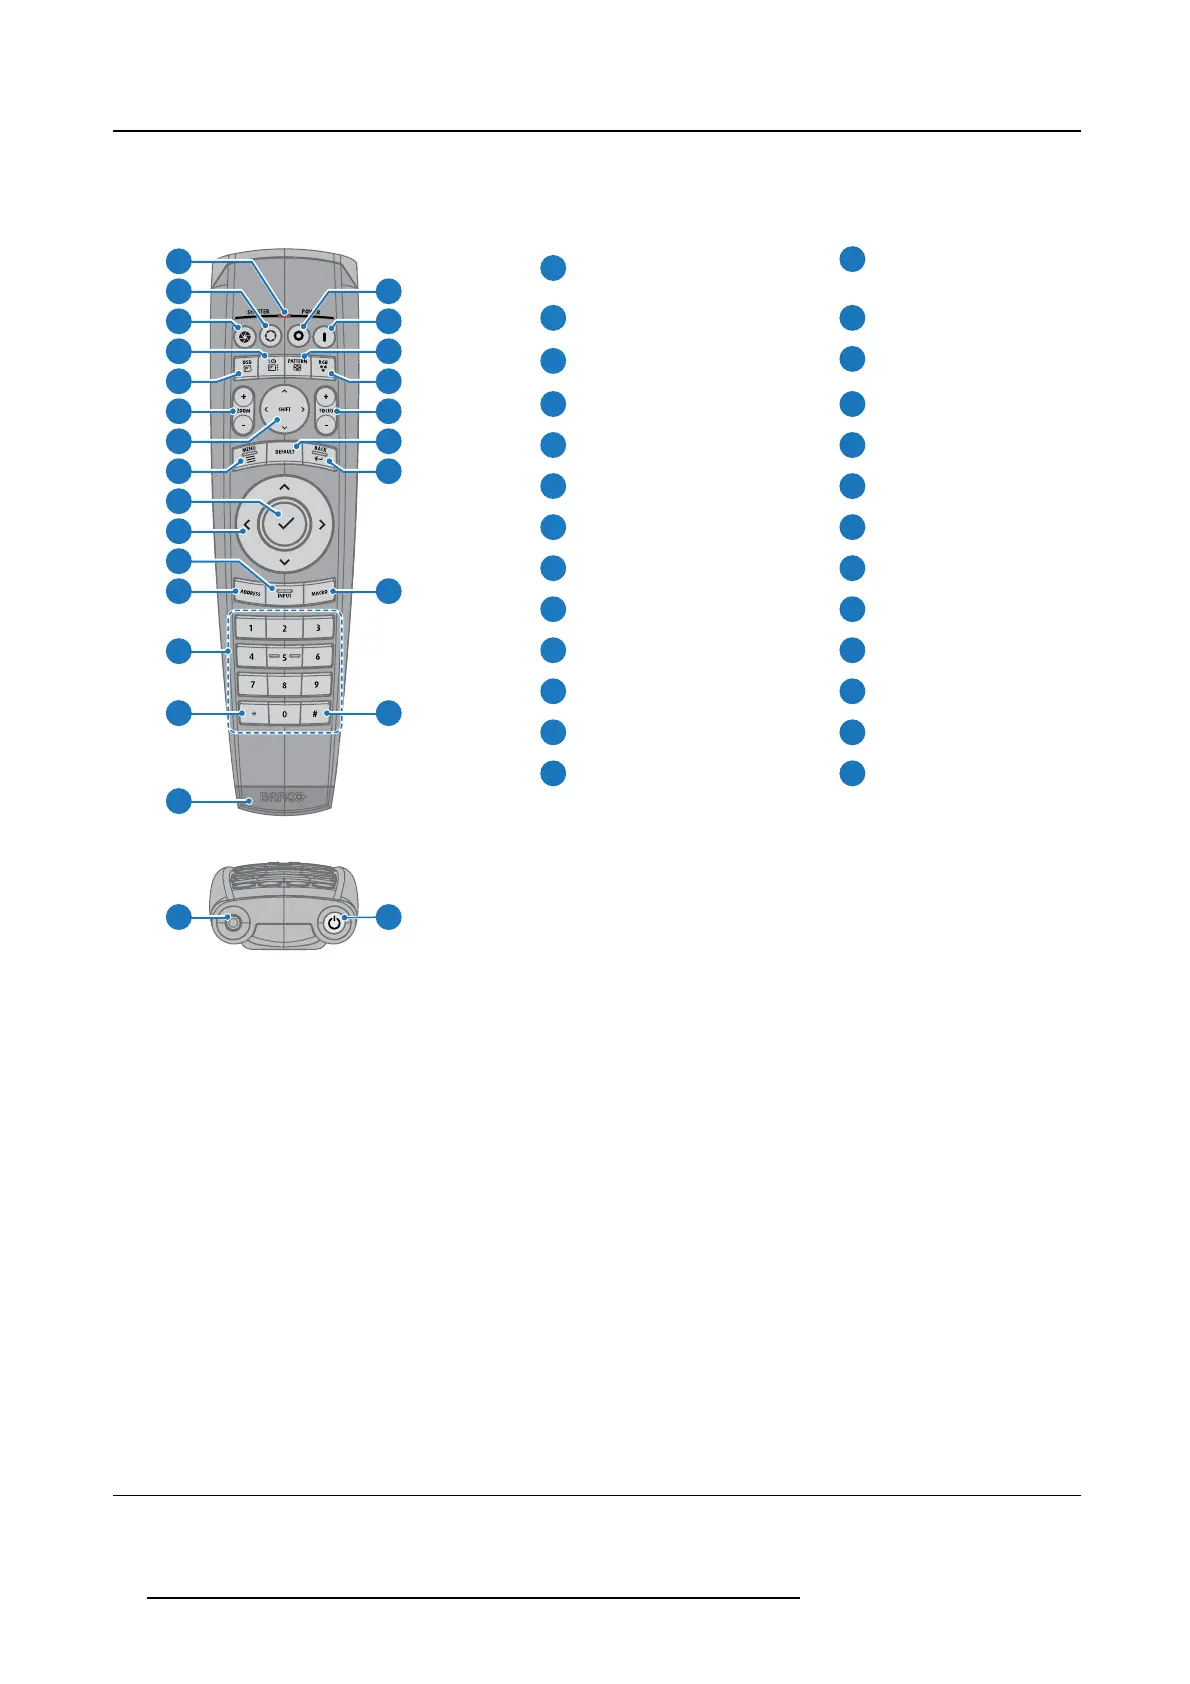
Remote Control Unit buttons
1
Button pres sed indicator.
14
Backspace (while entering
values)
2
Shutter Open.
15
XLR connector.
3
Shutter Close.
16
Decimal mark (while entering
values)
4
Touch Panel O n/Off.
17
Macro button.
5
OSD On/Off.
18
Menu Back.
6
Lens Zoom.
19
Default button.
7
Lens Shift.
20
Lens Focus.
8
Menu A ctivation.
21
Color On/Off.
9
Menu Selection, OK button.
22
Test P atterns.
10
Menu Navigation.
23
Power On.
11
Input Selection.
24
Power Off.
12
Address button.
25
Stereo Jack.
1
2
3
4
5
6
7
8
9
10
11
12
15
24
23
22
21
20
19
18
17
16
13
14
2625
13
Numeric buttons.
26
RCU On/O ff.
The projector remote control is a full feature wireless rem ote control, powered by two (2 ) standard AA batteries. The battery com -
partment is on the back s ide of the remote control.
The remote control is backlit for use in dark environments. It also has an X LR connector for wired connection to the projector. When
the wire is connec ted, the IR beam i
s switched off.
LCD panel
The LCD pan el has two main functions:
1. Sho wing the menus and adjustme nt information. and also a m irror of the OSD, (On Screen Display) described in User Interface
when this is enabled.
2. Information regarding the status of the projector show ing this data:
- Projector status
- Network address
- Active source
- Current firmware version
- Operation Data
- Active f unctions (Enabled F unctions).
Toggle between the two indications by using the Menu button on the keypad, or on the r emote control
The LCD Display will fade out 30 seconds after the last key operation.
4.2 Power modes
General
The t able below details the F80 po wer modes.
24
R5906852 F80 SERIES 21/09/2017