7. GUI – Image
Image 7-7
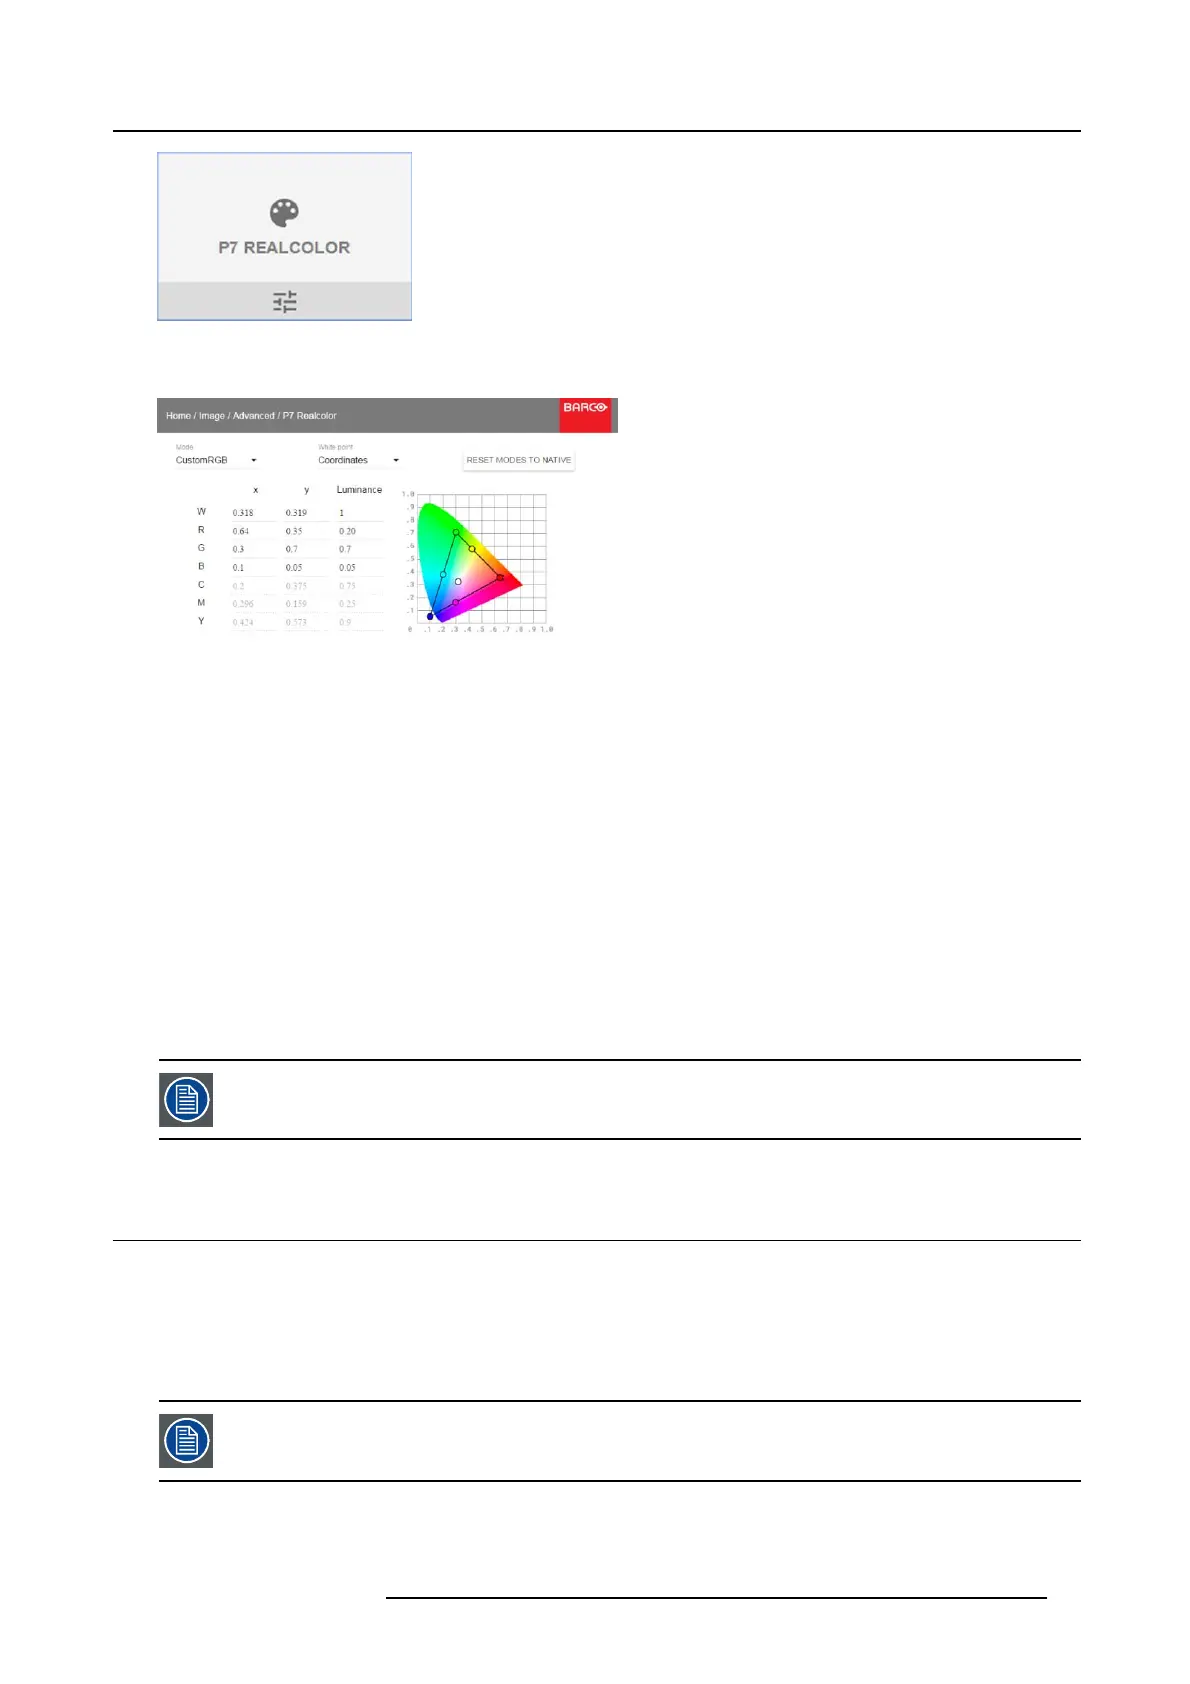
Advanced menu — P7 Realcolor
The P7 menu is displayed.
Image 7-8
P7 Realcolor menu
2. Select the desired Mode. Choose one of the following:
- Native: Default m ode, with default values. All other op tions in the P7 menu are dis abled.
- Custom RGB: 3–point color c onfiguration. In RGB mode, the C, M and Y c
oordinates will be calculated automatically based
on the R , G and B coordinates.
- Custom RGBCMY: 6–point color configur ation (both RGB and CM Y). In RGBCMY mode, ea ch color c an be given a specific
coordinate within the m easured color triangle.
- Custom WHITE:Configure only t he White tem perature.
3. Define the coordinates for each available color.
Click o n a coordinate value and select the current value. Enter the d e sired v alue with the numeric keys.
Note: You can only pick coordinates within the measured color triangle.
4. For Custom White, click on W h ite point and choose one of the following:
- Coordinates:Config ure the white point via specific coordinates. T he white point is specified using an x, y coordinate in the
CIE 1931 Chart.
- Tem perature:Configure the white point via a color temp erature slider. The white po int is specified on a Kelvin scale between
3200K and 13000K tracking along the black body curve.
You can reset all coordinates t o the default values (to native) by selecting Reset modes to native. Press OK
button to reset.
7.3 HDR – Perceptual Quantizer (PQ)
About PQ
Perceptual Quan tizer (PQ) is a, electro-optical transfer function (EOTF ) that allows for the display of High Dynamic R ange (HDR)
content with a luminance level of u p to 10 000 cd/m² and can be used with the Rec. 2020 color space.
If your provided HDR content has been m astered w ith Pe rceptual Quantzier (e.g. Dolby Vision or HDR10) , you can adapt the
luminance on screen to adapt to the provided content.
For op timal d isplay of HDR content, this is just o ne value that will influence the projected image. When enter-
ing the desired screen luminance, take into accou nt the distance of the pro jector to t he screen and the q uality
of the scree n used.
How to set the P Q?
1. In the main menu, selec t Ima ge → Advanced → PQ.
R5906852 F80 SERIES 21/09/2017
41