5. Graphic User Interface (GUI)
To start up the menu structure, p ress MENU (1).
Use the arrow k eys (Menu Navigation buttons) to navigate to the desired menu item (2). The background color changes to light
blue.
Press the Menu Selection button (center key of the arrow keys), also called OK button, to activate that item and to jump one level
deeper (3).
Use the nu meral keys to enter values, or use the arrow keys to m ove the bar scale up or down.
Press the Back button to go up one level (4).
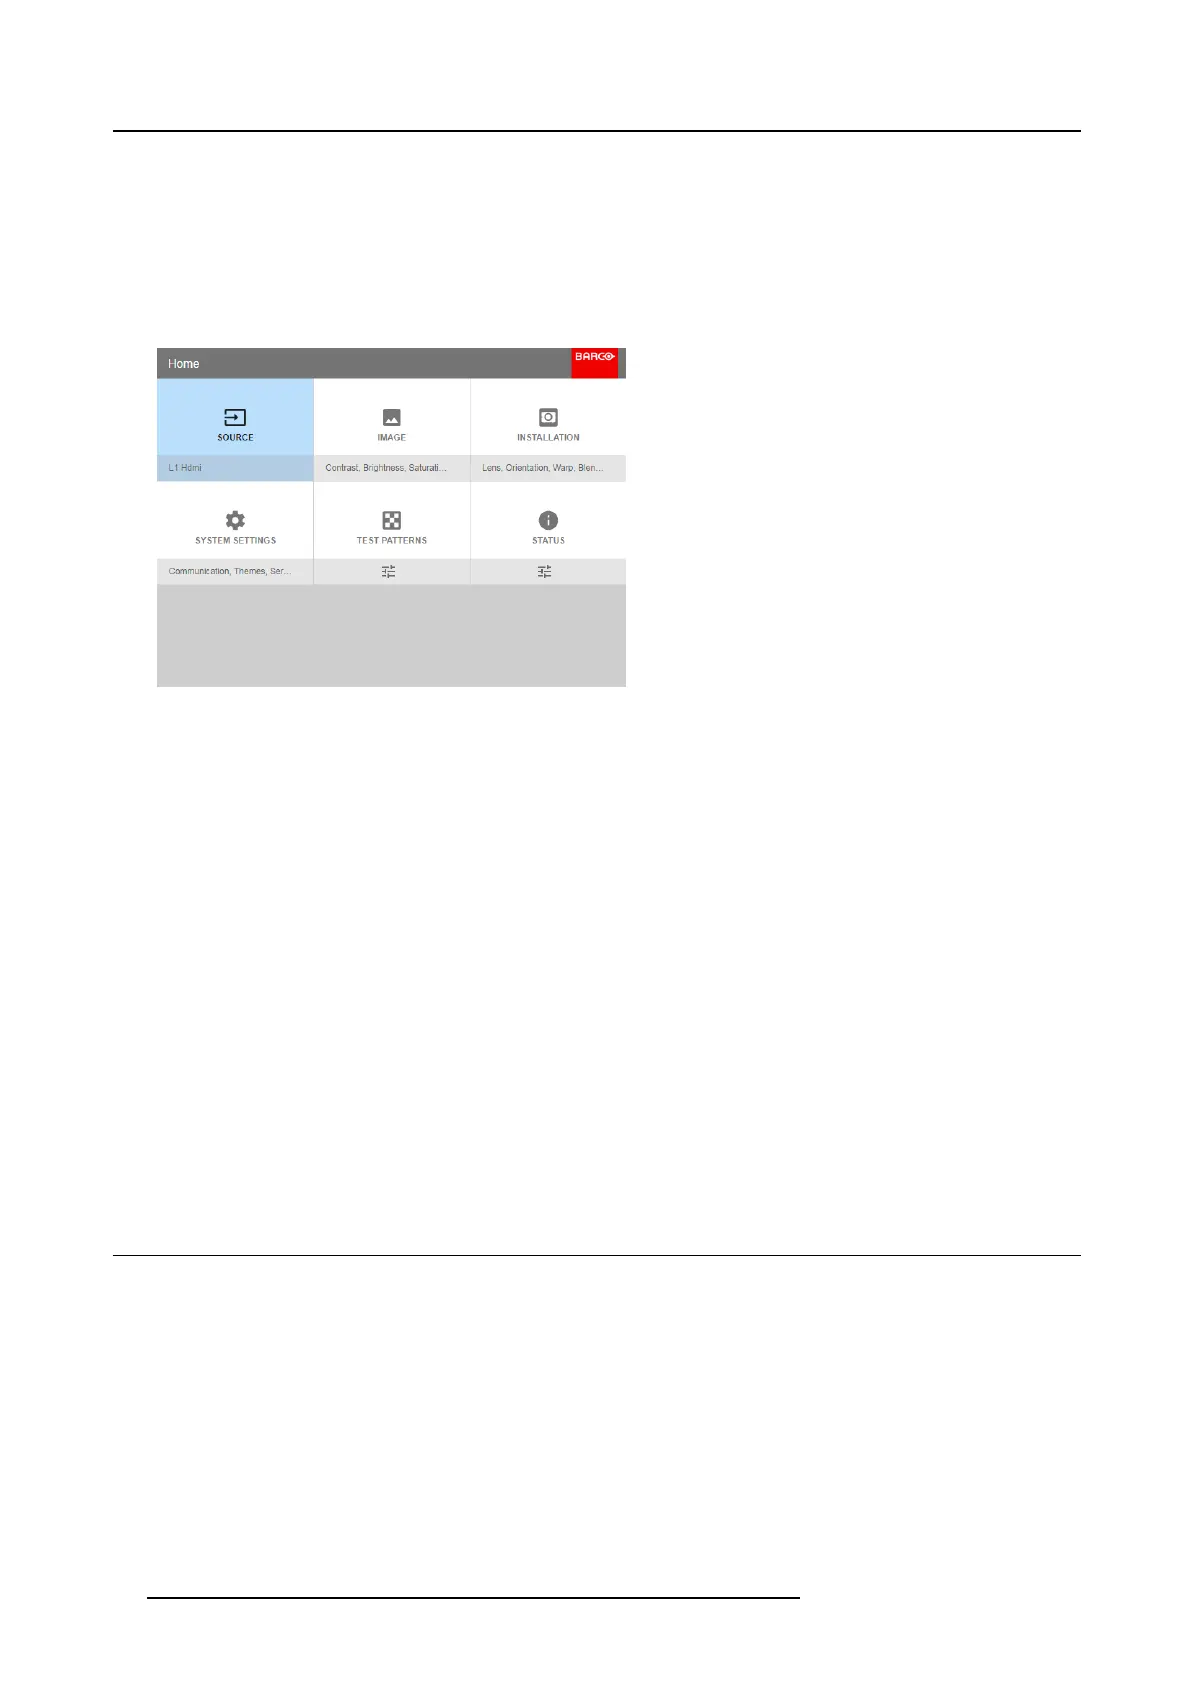
Image 5-3
Home menu
Remark: a blue s lider bar on the right side of the window m eans that there are m ore items to show than those currently displayed.
Define values
Menu settings are displayed us ing chec k boxes , bar s cale sliders, a nd drop-down lists.
To se t a value:
•PressOK to select or deselect a checkbox (turn a function ON or OFF).
• Use the arrow keys to move the b ar scale slider up or down on the value line. F or a bar scale 0-9, each step will equal 10% of
the total value.
• To enter the value as a direct number, pr ess OK, input the digit(s), and then press OK again to execute and exit cursor m ode
e.g. OK 79 OK.
Within an input field, use the * button as backspace button to remove an entered digit. Us e t he # button to enter a dot (.).
Changes to values are impleme nted dynamically.
To enter values with the local k eyboard, use the arrow keys to select the first digit, press OK. Select the second digit and press OK.
Continue u n til all digits are entered. C lose the action b y selecting the enter (↵) button and press OK. Select the backspace button
and press OK to remove the las t entered digit.
Menu memory
The O SD m enu remembers the last selected sub-item as long as the projector is running. The m enu mem ory is reset when restarting
the projector from standby.
5.3 Test P atterns
How to use test patterns
1. In the main menu, select Test Patterns.
34
R5906852 F80 SERIES 21/09/2017