Sewing preparation
34
2019-02 EN 5020079.00A.04
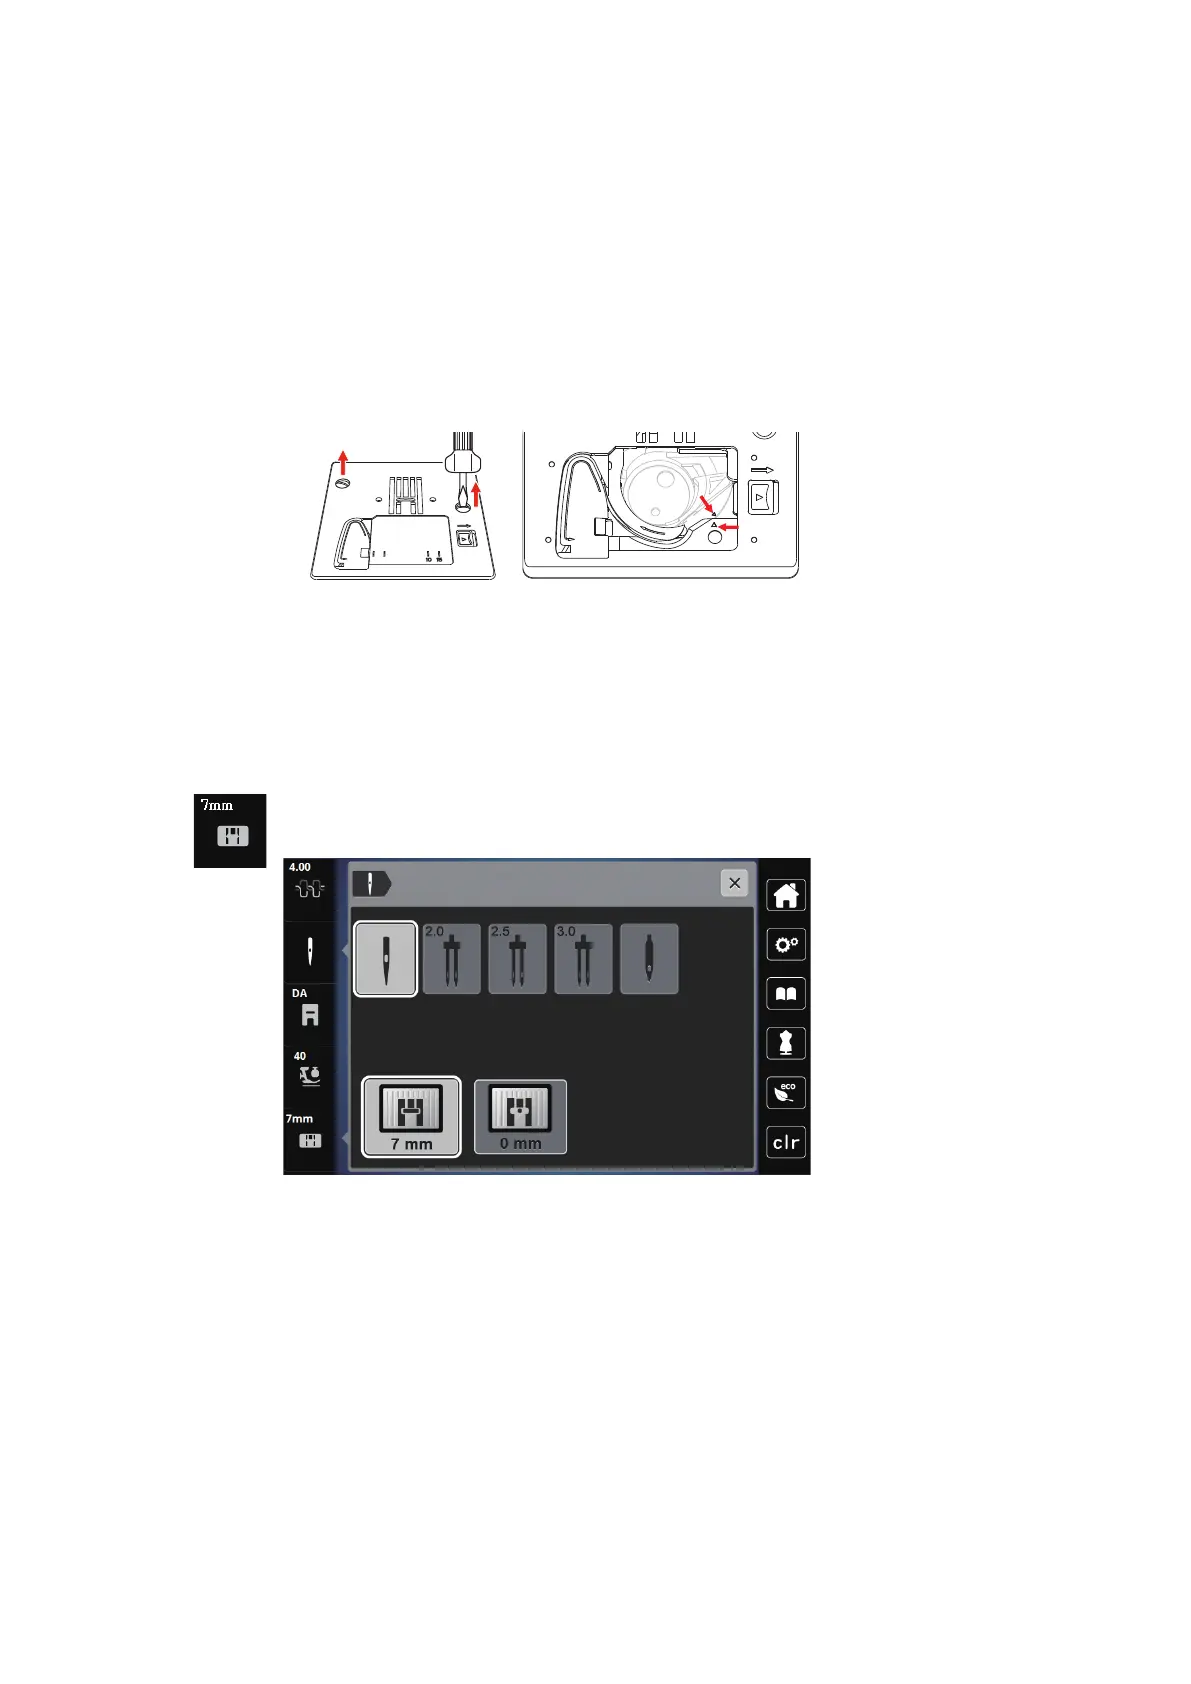
Changing the stitch plate
The stitch plate is marked with vertical lines in millimeters (mm) and inches (inch). These lines help to guide
the fabric when sewing seams or precise topstitching.
Prerequisite:
• The feed dog is lowered.
• The machine is switched off and disconnected from the power supply system.
• The bobbin cover, the needle and the presser foot are removed.
> Remove the screws of the stitch plate with a screwdriver.
> Remove the stitch plate.
> Insert the new stitch plate and tighten the screws with the screwdriver.
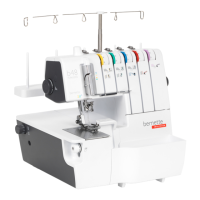
Checking the stitch plate in the user interface
After having changed the stitch plate, it can be checked whether or not it is suitable to be used together
with the selected needle.
> Touch the icon «Needle selection» or «Stitch plate selection».
– The stitch plate is detected automatically and displayed.
– If the selected stitch plate is suitable in combination with the needle, sewing can be started.
– Stitch width will be set to its allowed value automatically.
– If the selected needle does not match with the stitch plate, the machine will stop and sewing will not
be allowed.