Practical stitches
74
2019-02 EN 5020079.00A.04
6.7 Manual darning
Used for darning holes or worn areas in all fabric types.
If the thread is lying on top and a poor stitch formation results, slow down the movement of the sewing
project. If there are knots on the wrong side of the fabric, move the sewing project faster. When the thread
breaks, guide the sewing project more consistently.
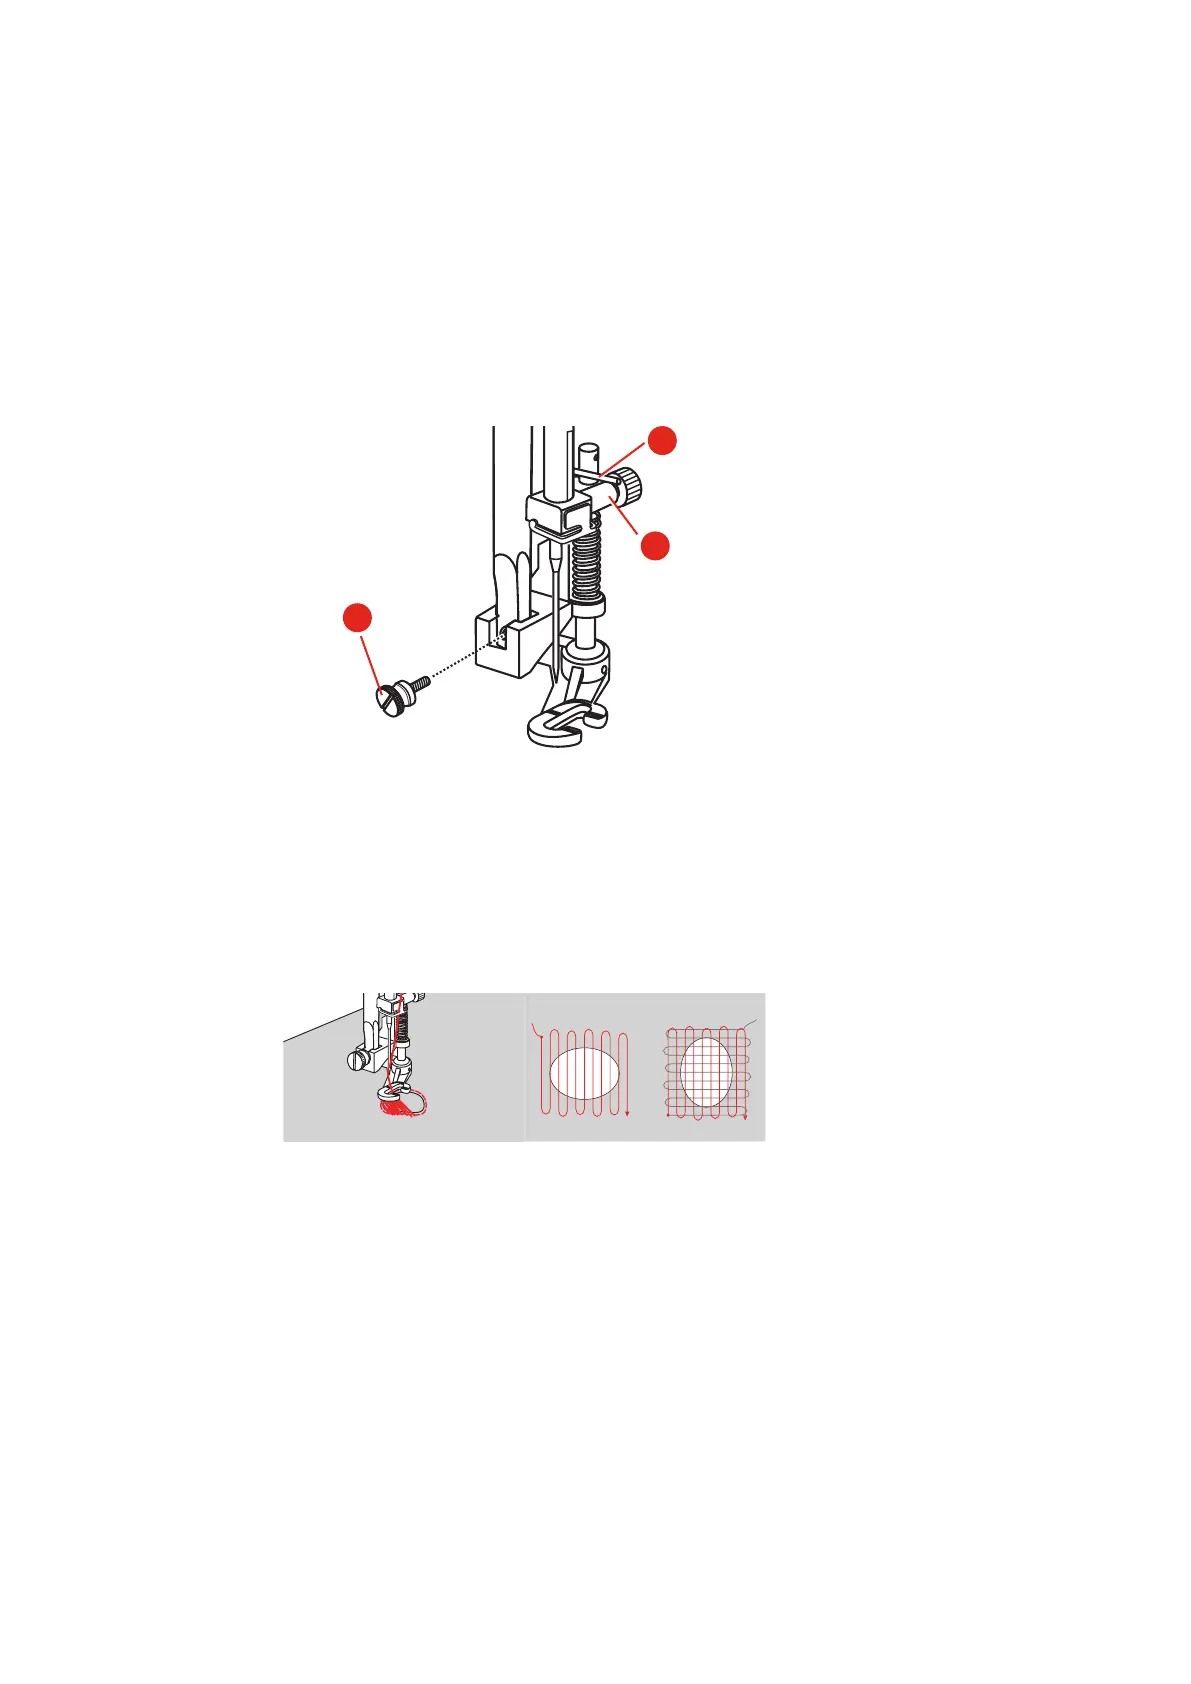
> Remove the presser foot holder and attach the free motion foot (RX) to the presser foot holder bar.
– The pin (1) of the Darning-/Embroidery foot should lay on the top of the needle clamp screw (2).
> Press the free motion foot (RX) on firmly from behind with your index finger and tighten the screw (3).
> Touch the icon «Practical stitches».
> Select the Straight stitch No.1.
> Lower the feed dog.
> Attach the slide-on table.
> Hoop the sewing project in the round embroidery hoop (optional accessory).
– The darning area stays evenly taut and cannot be distorted.
> Sew from the left to the right, guide the fabric evenly by hand without using pressure.
> Move in curves when changing the direction to avoid holes and thread breakage.
6.8 Automatic darning and Reinforced darning
The simple Darning Program No. 22 is especially suitable for quick darning of worn or damaged areas. It is
recommended to use fine material as a backing for the worn and damaged areas or to stick an adhesive
interlining. The simple Darning Program No. 22 replaces threads along the lengthwise grain in all materials. If
the darning area becomes distorted, correct with the balance.
The reinforced Darning Program No. 23 is especially suitable for quick darning of worn or damaged areas.
The reinforced Darning Program No. 23 replaces threads along the lengthwise or transverse grain in all
materials.
Prerequisite:
• The underlay material is fixed with basting stitches.
> Attach the Buttonhole foot with slide (RJ).