5-7
Confidential
(9) Upon completion of scanning, the machine displays the "Write Head Calib" on the
LCD, creates the head calibration data, and writes it into the flash ROM on the
main PCB.
Upon completion of writing, the "Complete" appears. Press the Stop key to return
to the initial stage of the maintenance mode.
Note: If an error occurs, the machine beeps and displays "Error No **" on the LCD.
Press the Stop key to return to the initial stage of the maintenance mode and
then recover the machine from the error state, following the table given
below. Then go back to step (4).
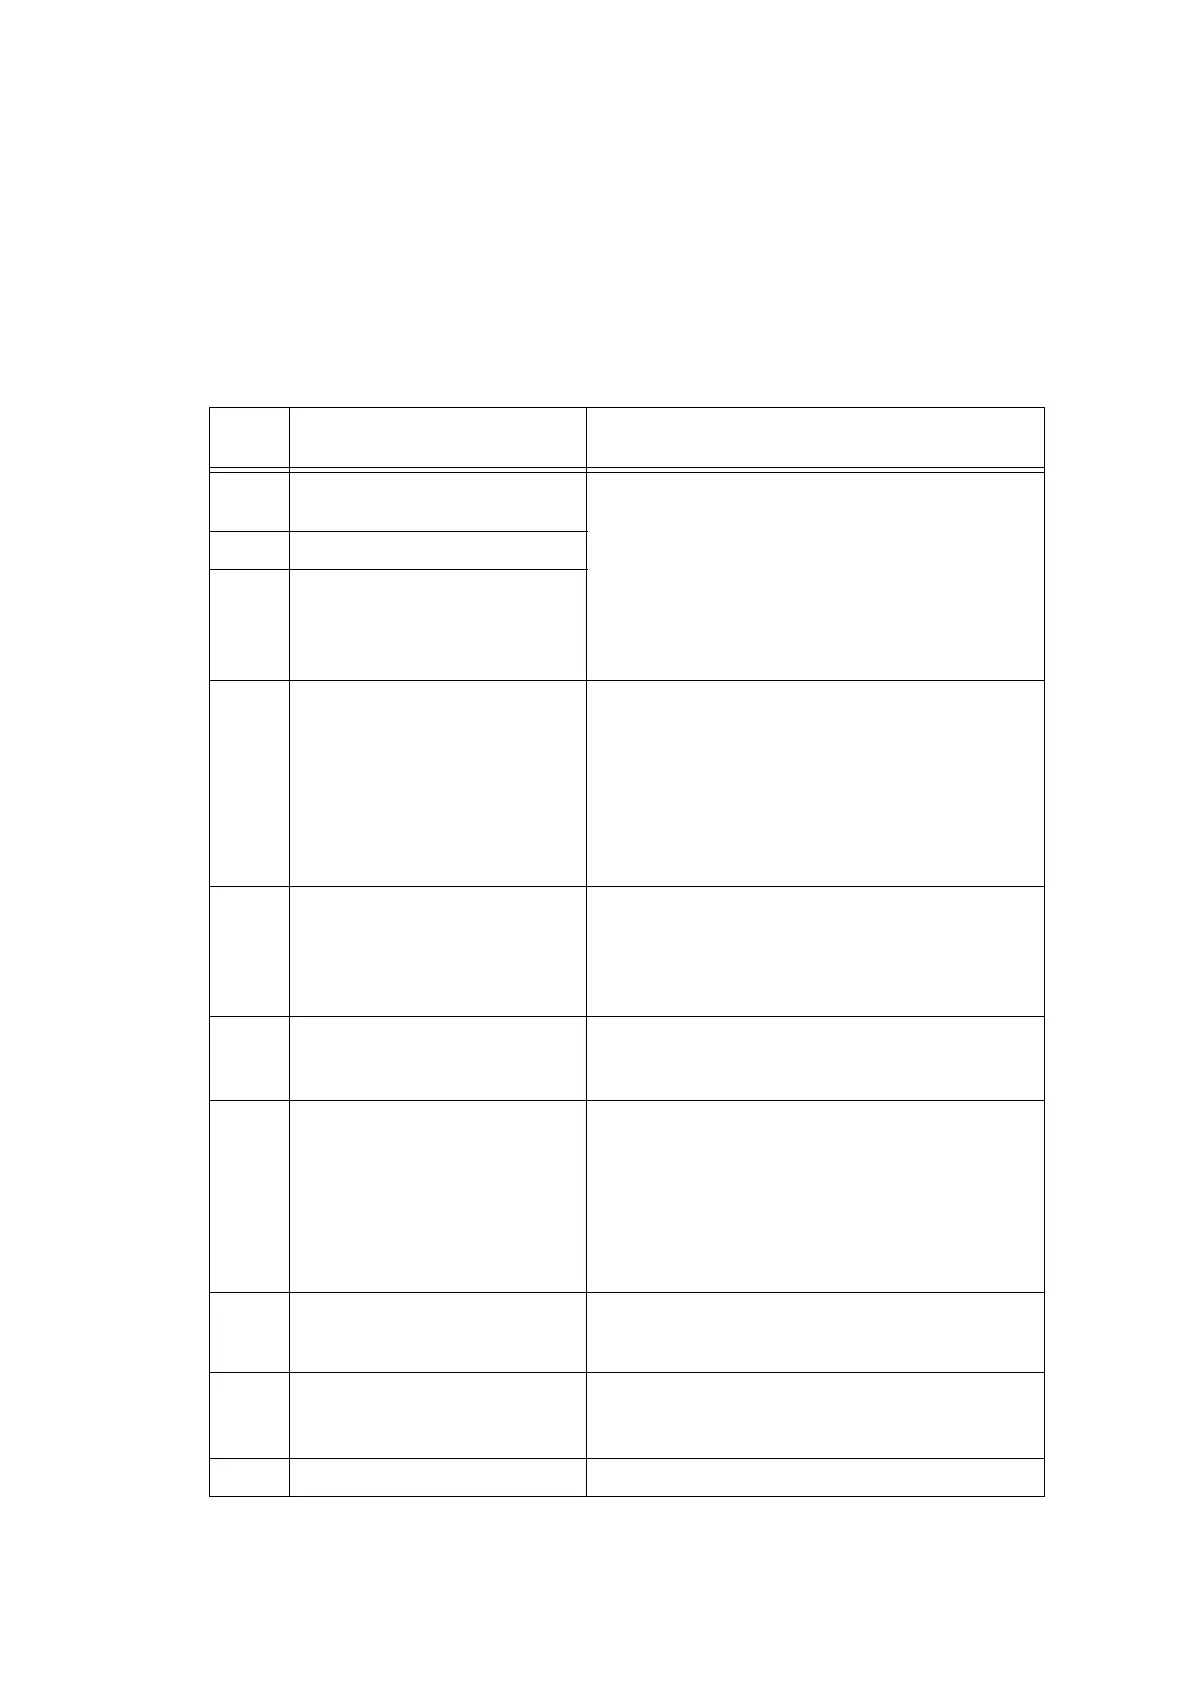
Error
code
The following error has
occurred.
Do the following:
01
Failed to detect the external
frame.
- Clean the document cover glass.
- Reset the print pattern so that the ▲ mark
is aligned with the left rear of the document
cover without tilt.
- Check that there is no block missing.
- Go back to step (2) and print out "Print
pattern for creating head calibration data"
again.
02
Internal image inclined.
03
Failed to detect position.
04
Failed to write head
calibration data.
- Clean the document cover glass.
- Reset the print pattern so that the ▲ mark
is aligned with the left rear of the document
cover without tilt.
- Check that there is no block missing.
- Restart the machine and perform the
procedure from the beginning again.
- Replace the main PCB.
05
The uneven printing
correction function for upper
and lower ends of the nozzle
is disabled with Maintenance
88.
- Set selector 1 on AMS05 to "0" (ON) in
“1.3.33 Assurance Mode Switch Setting
(Maintenance mode 88)”
in this chapter.
06
Cannot get data due to
memory full.
- Delete fax data and other data stored in the
memory.
- Replace the main PCB.
07
The document scanner unit
is open.
- Close the document scanner unit.
- Reconnect the document scanner sensor
harness.
- Replace the document scanner if the boss
that presses the document scanner sensor
is broken.
- Replace the main PCB.
09
Scanning errors other than
the above.
- Use “1.3.15 Acquisition of White/Black
Level Data (Maintenance mode 55)” in this
chapter.
10
With a media being inserted,
the USB cable or LAN cable
is connected.
- Disconnect the USB cable or LAN cable.
11
The scanner cover is open.
- Close the scanner cover.
 Loading...