2006 Buell Lightning: Chassis 2-41
HOME
REAR BRAKE LINE 2.14
REMOVAL
1. Remove seat. See 2.43 SEAT.
11WARNING1WARNING
To prevent accidental vehicle start-up, which could
cause death or serious injury, disconnect negative (-)
battery cable before proceeding. (00048a)
2. Disconnect battery by unthreading fastener removing
negative cable (black) from battery first. See 1.4 BAT-
TERY MAINTENANCE.
3. See Figure 2-55. Disconnect brake light connector from
under seat in the front of the battery.
4. Remove right side heel guard. See 2.32 FOOTPEG,
HEEL GUARD AND MOUNT.
5. Drain brake fluid into a suitable container. Discard used
fluid according to local laws.
a. Install a length of plastic tubing over caliper bleeder
valve. Place free end in a suitable container.
b. Open bleeder valve (metric) about 1/2-turn.
c. Pump brake foot pedal to drain brake fluid.
d. Tighten bleeder valve to 36-60 in-lbs (4-7 Nm).
6. On XB12Ss models only, remove rear fender. See 2.34
FENDERS.
NOTE
All models except for the XB12Ss Lightning Long use a p-
clamp to secure the rear brake line to the swingarm. The
Lightning Long utilizes the rear fender to capture and secure
the rear brake line.
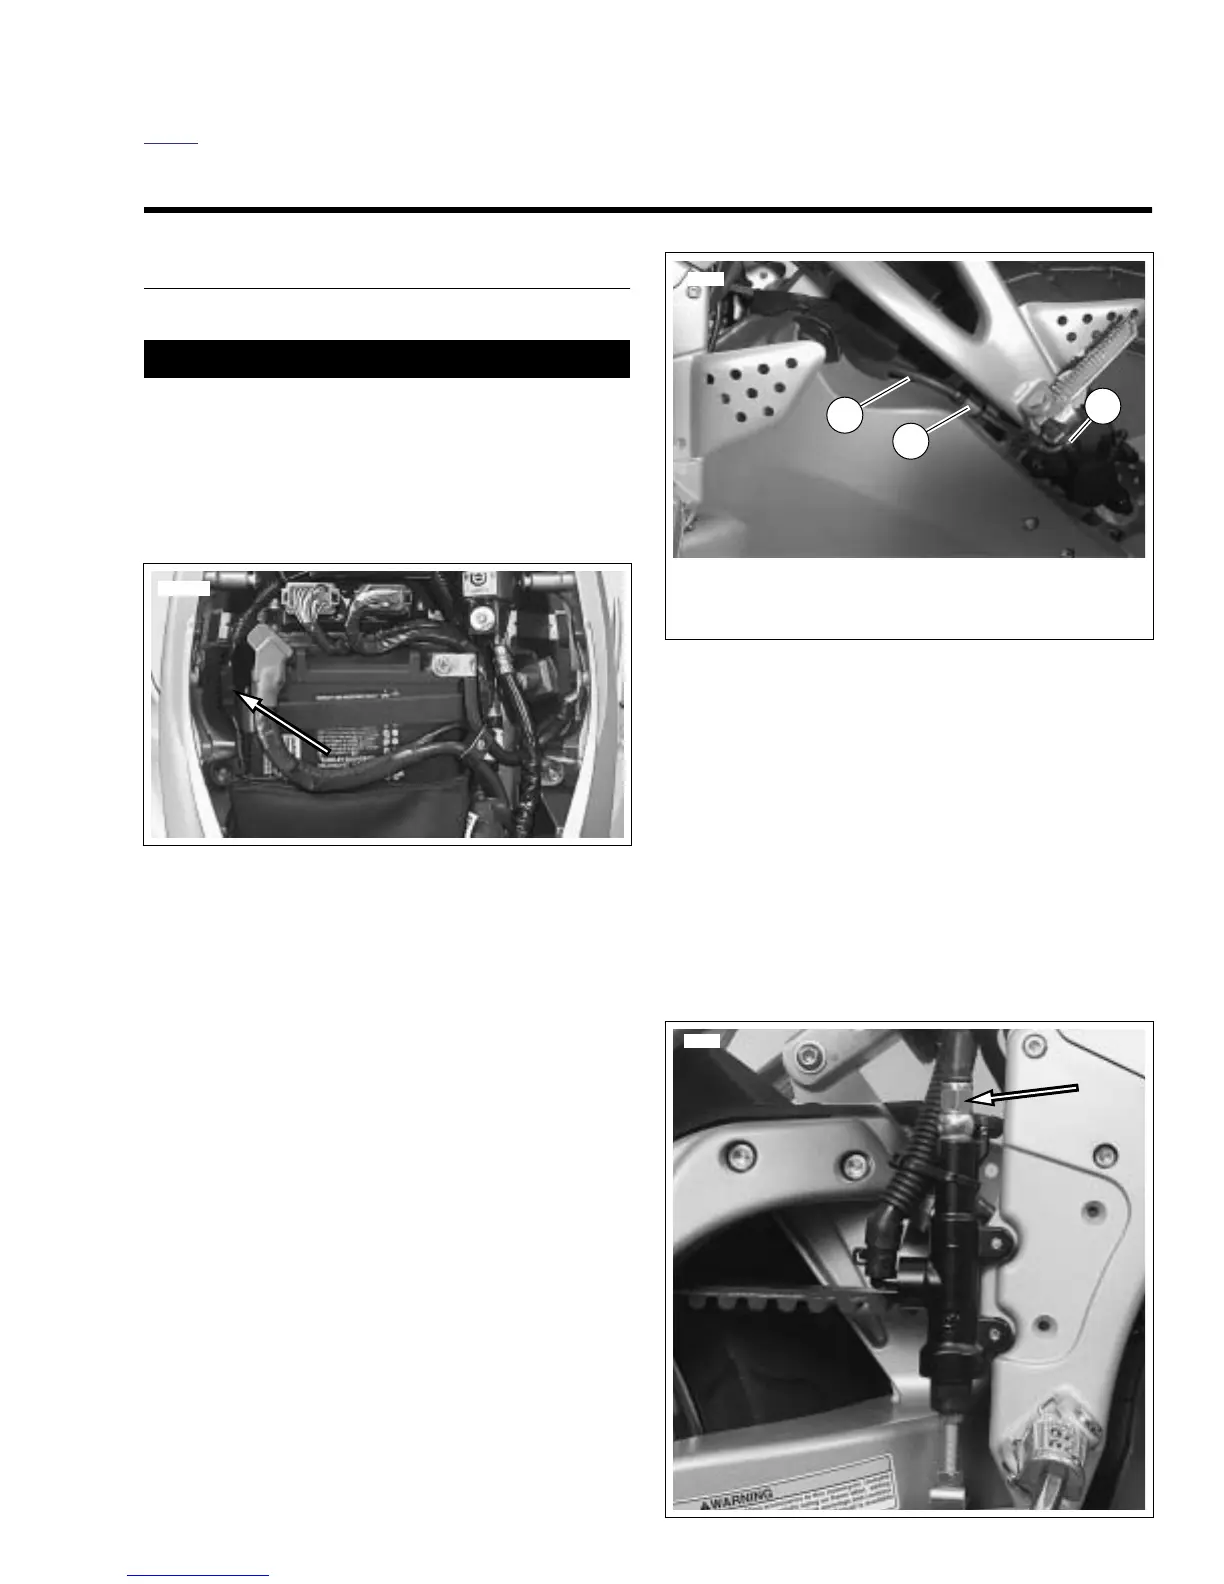
7. See Figure 2-56. Remove p-clamp (2) securing brake
line (1) to the left side of swingarm.
NOTE
Damaged banjo bolt seating surfaces will leak when reas-
sembled. Prevent damage to seating surfaces by carefully
removing brake line components.
8. Remove banjo bolt (3) from rear caliper. Discard copper
washers.
9. See Figure 2-57. Remove brake line switch/banjo bolt
from rear master cylinder. Discard copper washer.
10. Remove brake line from motorcycle.
Figure 2-55. Brake Line Switch Connector (XB12S shown)
8907
Figure 2-56. Rear Brake Line
Figure 2-57. Rear Brake Line Switch/Banjo Bolt