2-34 2006 Buell Lightning: Chassis
HOME
FRONT BRAKE CALIPER 2.12
REMOVAL
1. Drain brake fluid into a suitable container. Discard used
fluid according to local laws.
a. Install a length of plastic tubing over caliper bleeder
valve. Place free end in a suitable container.
b. Open bleeder valve (metric) about 1/2-turn.
c. Pump brake hand lever to drain brake fluid.
d. Tighten bleeder valve to 36-60 in-lbs (4-7 Nm).
NOTE
Damaged banjo bolt seating surfaces will leak when reas-
sembled. Prevent damage to seating surfaces by carefully
removing brake line components.
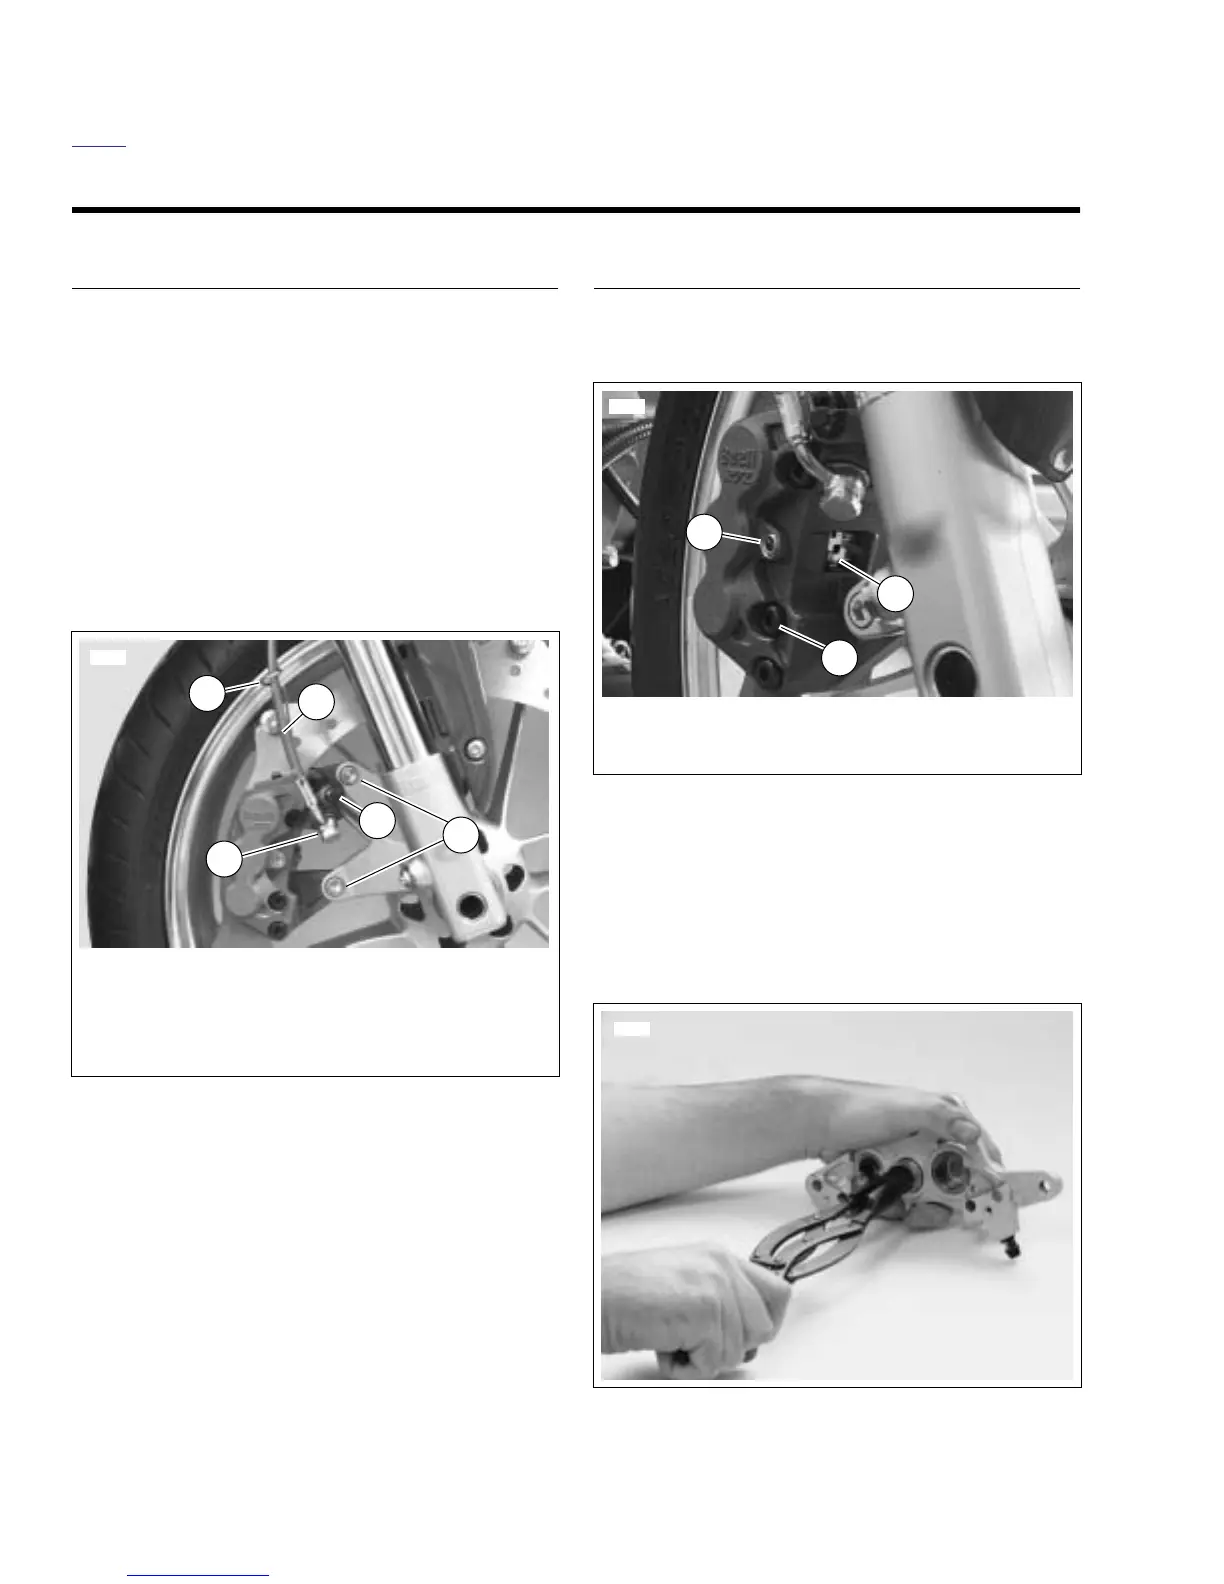
2. See Figure 2-45. Disconnect brake line at caliper. See
2.11 FRONT BRAKE LINE.
3. Remove caliper mounting fasteners (5).
4. Slide caliper down the rotor to clear fork lower and then
remove off rotor.
DISASSEMBLY
1. See Figure 2-46. Remove pin hanger set (1), brake pads
and caliper pad spring (2).
2. Split caliper by removing caliper fasteners (3).
3. See Figure 2-48. Remove and discard o-rings (8).
4. See Figure 2-47. Remove pistons using a BRAKE PIS-
TON REMOVER (Part No. B-42887).
5. See Figure 2-48. Remove and discard top and bottom
piston o-rings (6).
Figure 2-45. Front Brake Caliper Mounts
8346
2
1
4
1. Wire form
2. Brake line
3. Banjo bolt (metric)
4. Pin plug
5. Mounting fasteners (2)
5
3
Figure 2-46. Pad Spring (Typical)
Figure 2-47. Removing Pistons (B-42887)
1. Pin hanger set
2. Caliper pad spring
3. Caliper fasteners
8487
1
2
3
6495