2006 Buell Lightning: Drive/Transmission 6-47
HOME
TRANSMISSION INSTALLATION 6.14
INSTALLATION
NOTES
After re-installing the transmission assembly, verify that all
parts have been properly installed. See:
● 6.11 MAIN DRIVE GEAR
● 6.10 TRANSMISSION ASSEMBLY
● 6.13 TRANSMISSION LEFT CASE BEARINGS
● 6.12 TRANSMISSION RIGHT CASE BEARINGS
● Make sure crankcase does not begin to tilt when pressed
onto transmission assembly. It may be necessary to
place press ram on transmission installer closer to main-
shaft to keep the crankcase level.
● When removing crankcase and transmission assembly
from fixture, make sure mainshaft 1st gear does not fall
off shaft. Gear could be damaged if it strikes a hard sur-
face.
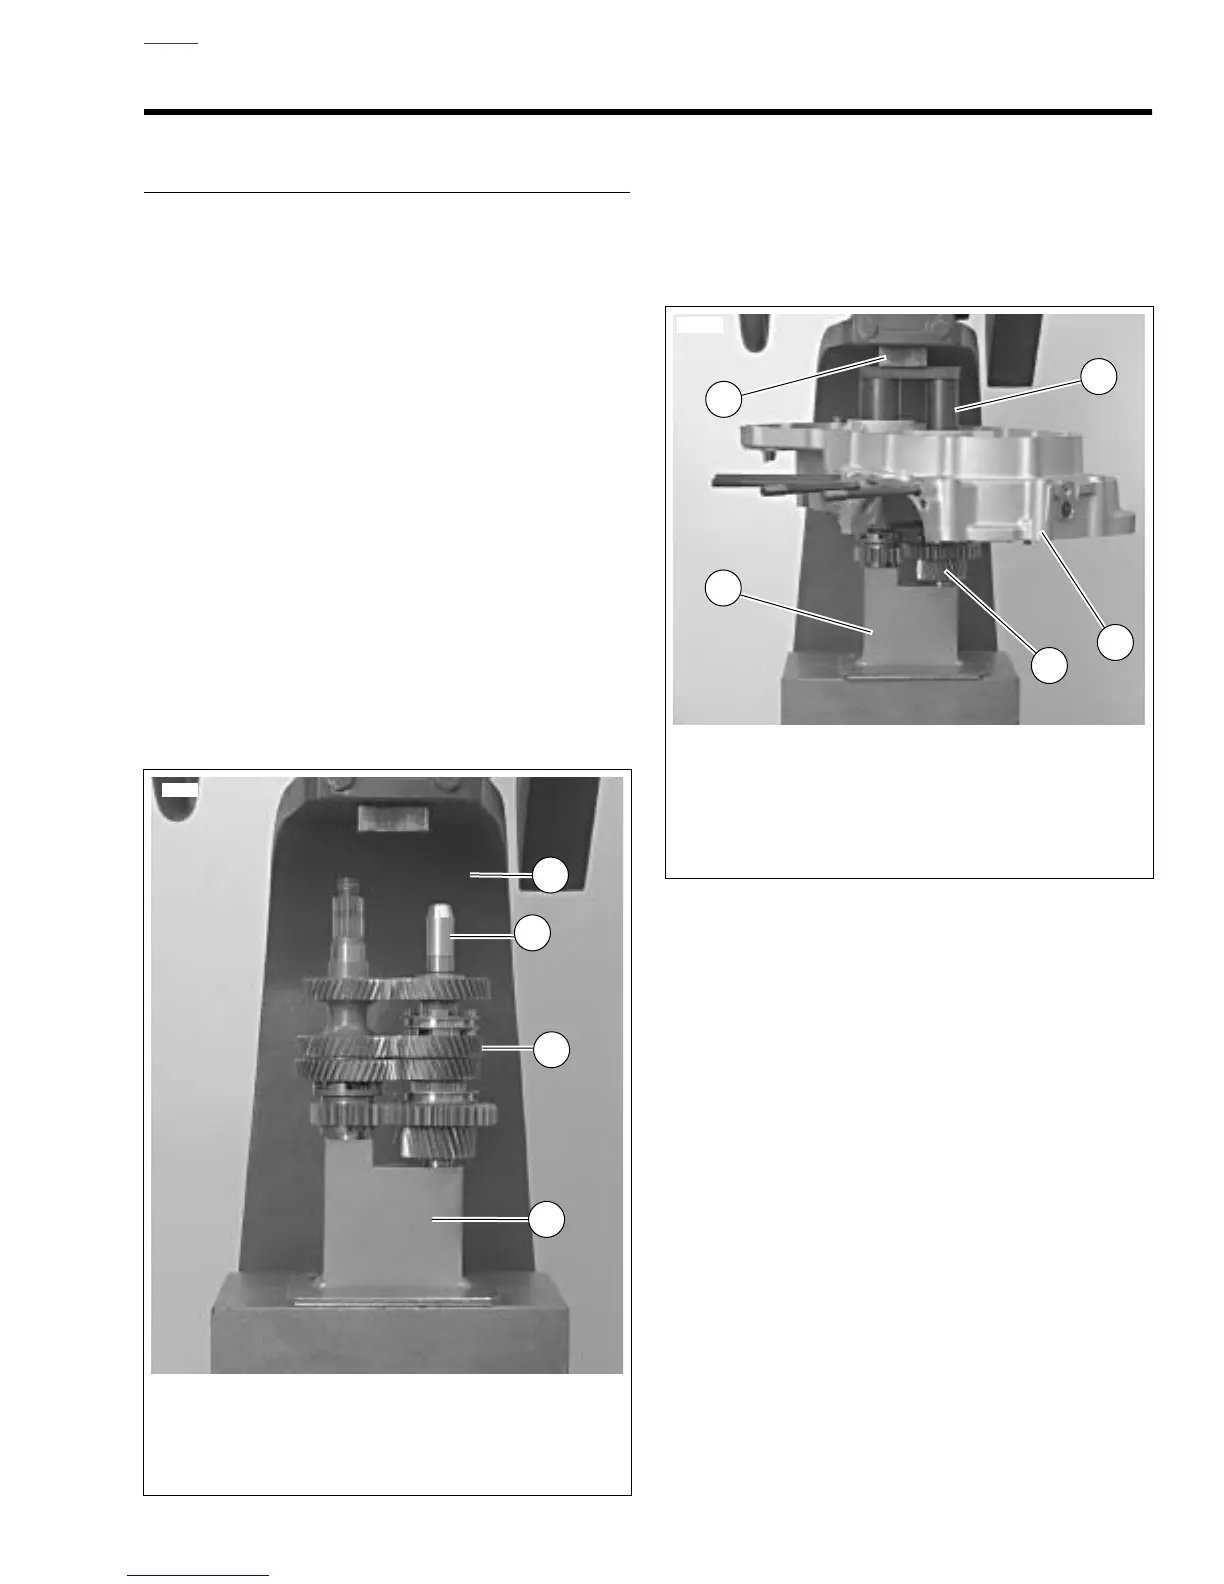
1. See Figure 6-87. Place transmission assembly onto
TRANSMISSION REMOVER/INSTALLER FIXTURE
(Part No. B-43985-2) on arbor press.
2. Install COUNTERSHAFT GUIDE ADAPTER
(Part No. B-43985-4).
3. See Figure 6-88. Place left case half over transmission
assembly and install TRANSMISSION INSTALLER
(Part No. B-43985-3) into crankcase.
4. Press crankcase onto transmission assembly into until it
bottoms out.
5. Remove COUNTERSHAFT GUIDE ADAPTER
(Part No. B-43985-4).
6. Remove transmission assembly and left crankcase half
from fixture.
7. Re-install transmission assembly and left crankcase half
in engine stand.
Figure 6-87. Transmission Assembly in Fixture (Typical)
1. Arbor press
2. Guide tool (Part No. B-43985-4)
3. Transmission assembly
4. Transmission Remover/Installer fixture
(Part No. HD-46285)
11534
3
1
2
4
Figure 6-88. Pressing Transmission Into Left Crankcase
(Typical)
1
3
2
1. Press ram
2. Transmission installer (Part No. B-43985-3)
3. Crankcase
4. Transmission assembly
5. Transmission assembly fixture
(Part No. HD-46285)
4
5
11535