2006 Buell Lightning: Electrical 7-45
HOME
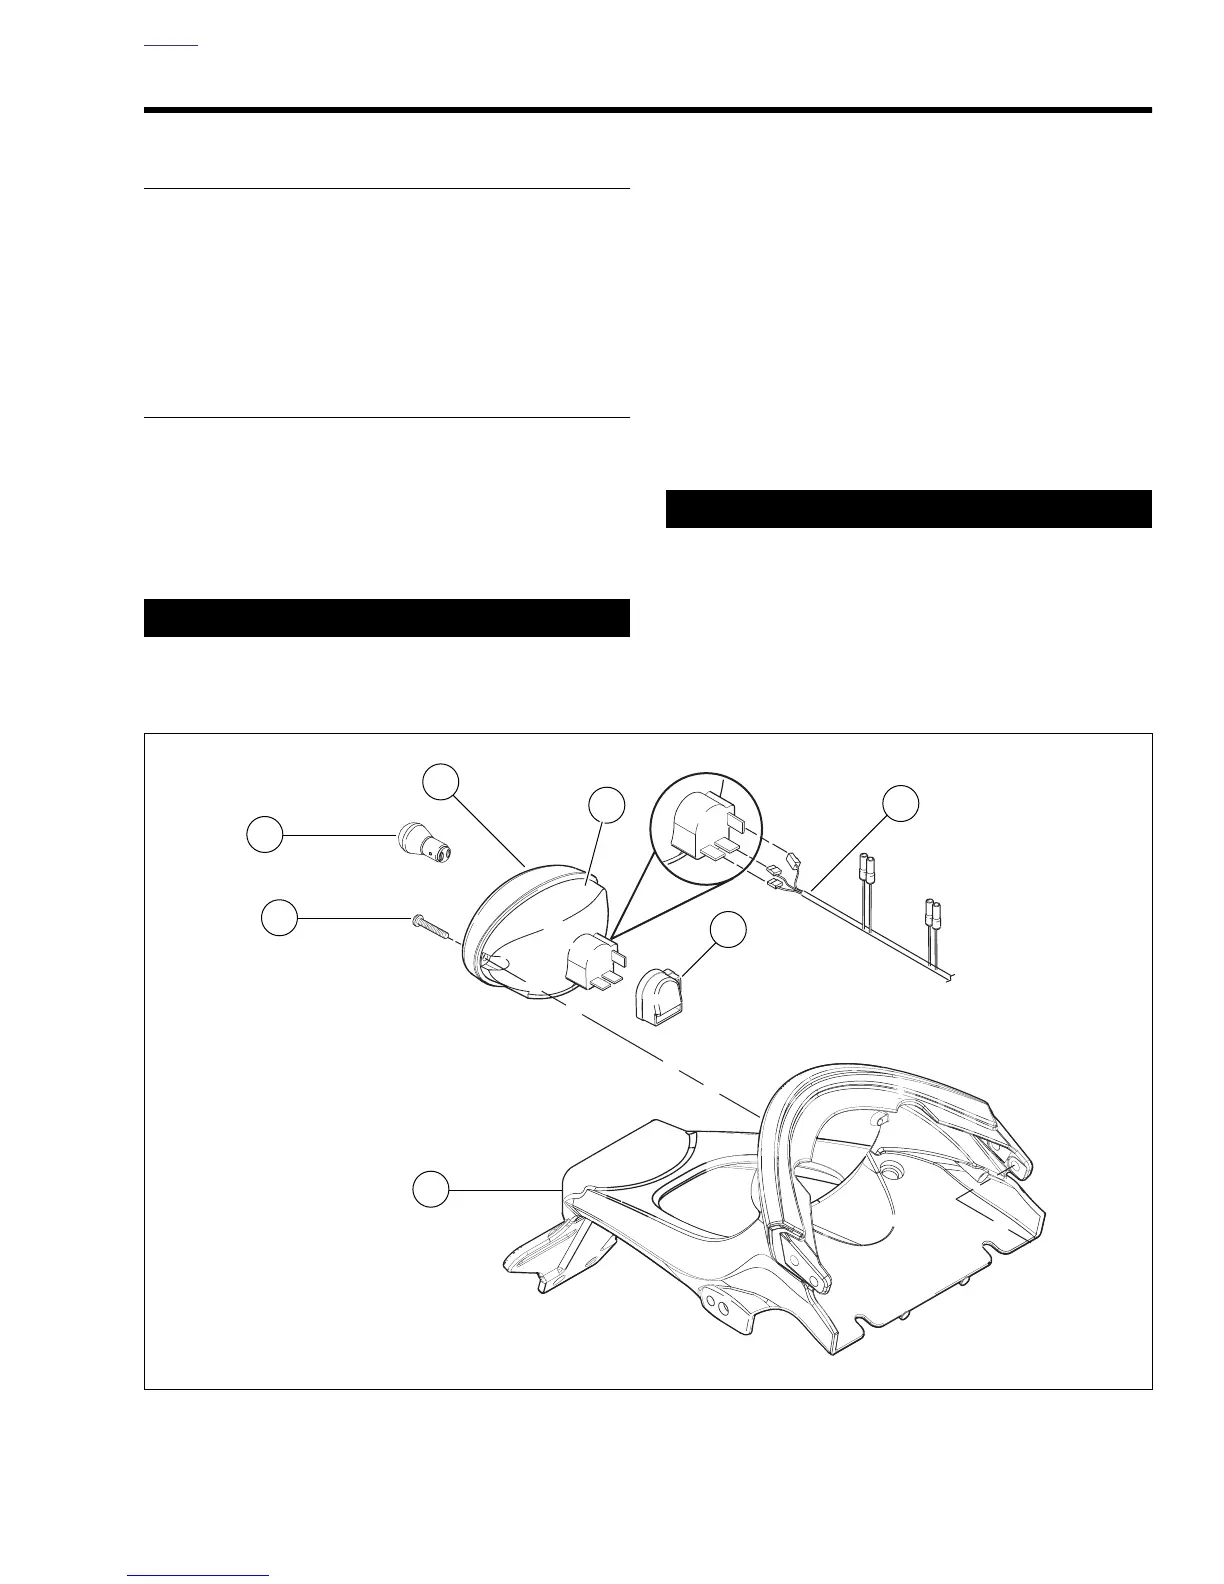
TAIL LAMP 7.13
REMOVAL/DISASSEMBLY
1. See Figure 7-54. Remove two screws (2) to detach tail
lamp lens (4) and tail lamp (5). If replacing bulb (3), turn
counterclockwise and remove.
2. Remove seat. See 2.43 SEAT.
3. Disconnect three connectors [93] from tail lamp harness
(6).
ASSEMBLY/INSTALLATION
1. See Figure 7-54. Attach the three tail lamp harness con-
nectors [93] (7).
2. If removed, install tail lamp bulb (3).
a. Turn bulb clockwise to install.
b. Install tail lamp lens (4) and tail lamp (5) with two
fasteners (2). Tighten to 6-7 in-lbs (0.7-0.8 Nm).
1WARNING1WARNING
Be sure that all lights and switches operate properly
before operating motorcycle. Low visibility of rider can
result in death or serious injury. (00316a)
3. Check tail lamp for proper operation. If operation fails,
reread procedure and verify that all steps were per-
formed.
a. Turn ignition key switch to ON.
b. Check for tail lamp illumination.
c. Squeeze front brake hand lever. Check for brake
lamp illumination. Release front brake hand lever.
d. Press rear brake pedal. Check for brake lamp illumi-
nation. Release rear brake pedal.
e. Turn ignition key switch to OFF.
After installing seat, pull upward on front of seat to be
sure it is in locked position. While riding, a loose seat can
shift causing loss of control, which could result in death
or serious injury. (00070a)
4. Install seat. See 2.43 SEAT.
Figure 7-54. Tail Lamp Assembly
1. Center tail section
2. Screws (2)
3. Bulb
4. Lens
5. Tail lamp
6. Tail lamp wiring harness
7. Tail lamp boot
b1139x7x
1
3
5
4
2
6
7