2006 Buell Lightning: Fuel System 4-99
HOME
IGNITION COIL 4.32
TROUBLESHOOTING
Follow the troubleshooting procedures listed under 4.8 INI-
TIAL DIAGNOSTIC CHECK if the engine will not start, is diffi-
cult to start or runs roughly. Also check condition of spark
plug cables. Insulation on cables may be cracked or damaged
allowing high tension current to short to metal parts. This
problem is most noticeable when cables are wet.
If poor starting/running condition persists, check resistance of
ignition coil primary and secondary windings using an ohm-
meter.
NOTE
The ignition coil cannot be repaired. Replace the unit if it fails.
Primary Circuit Test
1. Remove ignition coil.
2. Set ohmmeter scale to RX1.
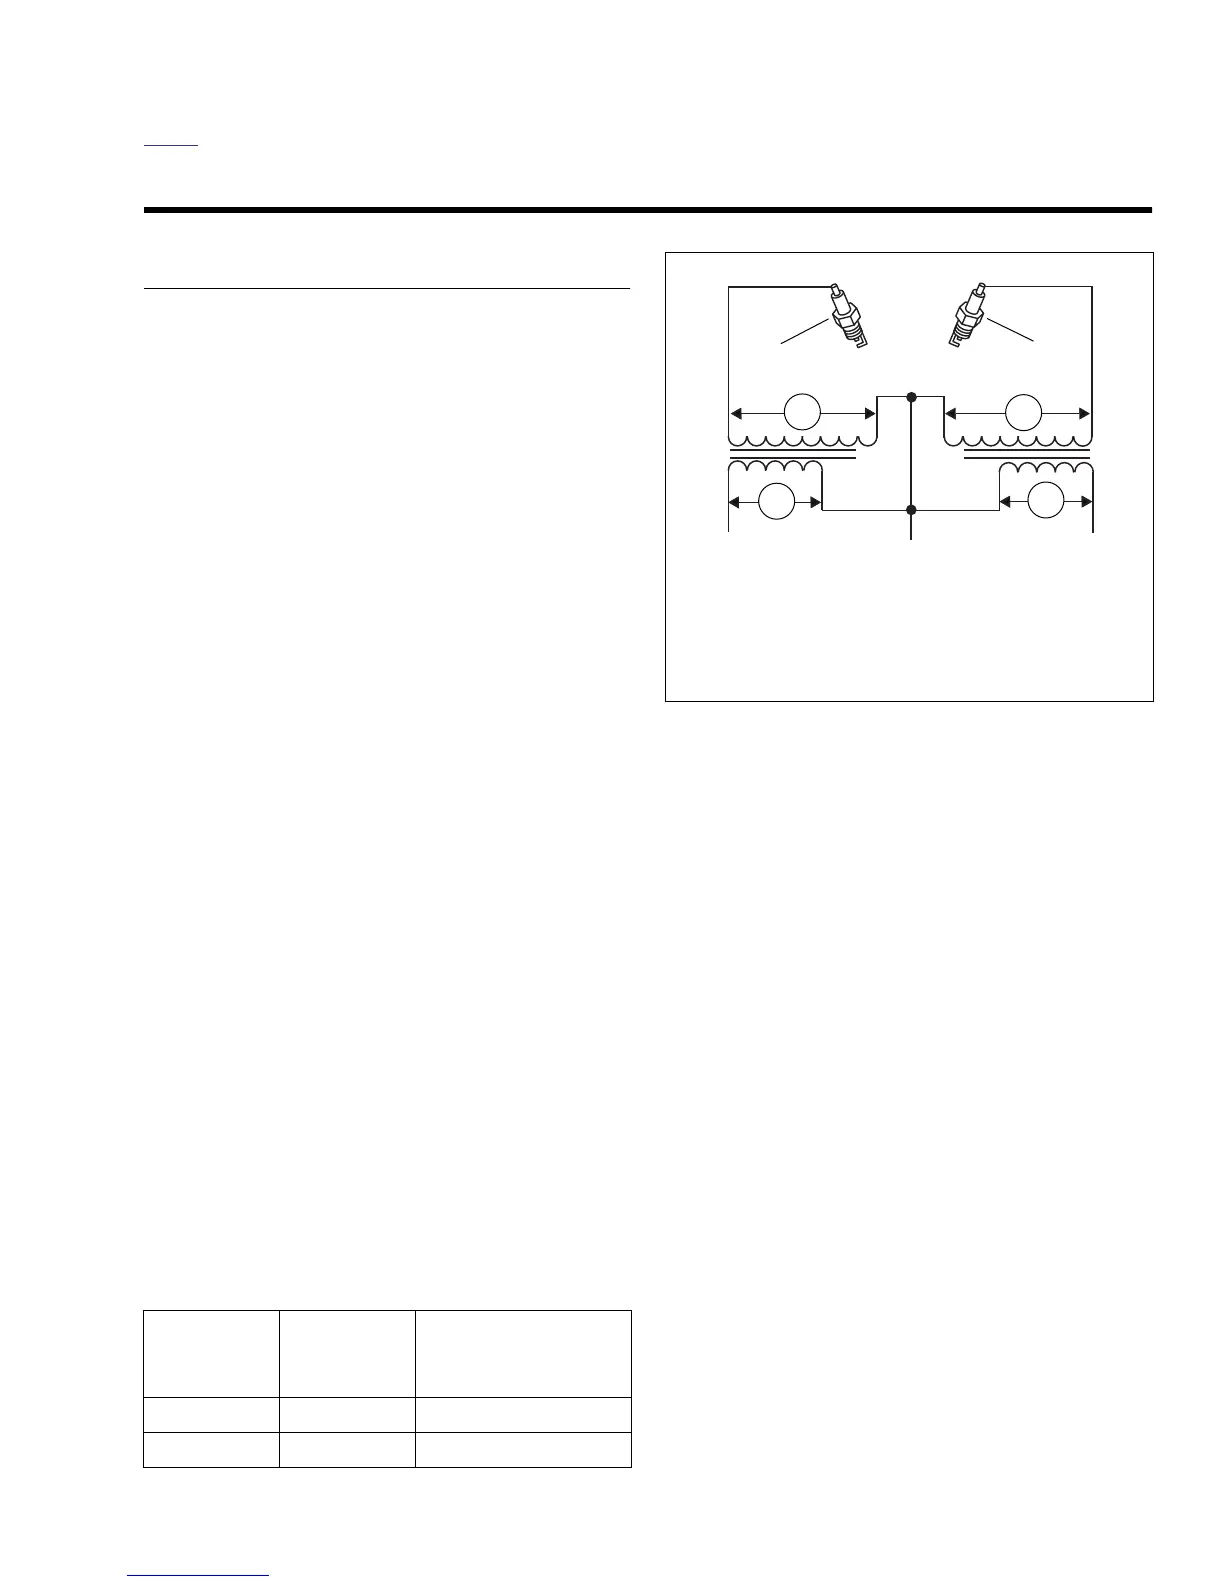
3. See Figure 4-77. Using HARNESS CONNECTOR TEST
KIT (Part No. HD-41404) gray socket probes, place multi-
meter wires on primary coil windings from terminal 1 to
2, and from terminal 2 to 3.
4. Refer to Ta ble 4-36. Check primary coil winding resis-
tance.
a. Normal resistance range is 0.5-0.7 ohms.
b. See TEST RESULTS which follows if resistance is
not within normal operating range.
Secondary Circuit Test
1. Remove ignition coil.
2. Set ohmmeter scale to RX1K.
3. See Figure 4-77. Place multimeter wires on secondary
coil windings from terminal 2 to R, and from terminal 2 to
F.
4. Refer to Ta ble 4-36. Check secondary coil winding resis-
tance.
a. Normal resistance range is 5.5-7.5K ohms.
b. See TEST RESULTS which follows if resistance is
not within normal operating range.
Test Results
1. A low resistance value indicates a short in the coil wind-
ing. Replace coil.
2. A high resistance value might indicate that there is some
corrosion/oxidation of the coil terminals. Clean the termi-
nals and repeat resistance test. If resistance is still high
after cleaning terminals, replace coil.
3. An infinite ohms (
∞
or OL) resistance value indicates an
open circuit (a break in the coil winding). Replace coil.
Ignition Coil Substitution
If a coil tester is not available, use the following test.
NOTE
Coil will function without being attached to frame.
1. Substitute a
new
ignition coil by attaching it to any con-
venient point near the old coil. Transfer connector [83] to
new
coil.
2. Attach
new
spark plug cables to coil and spark plugs.
3. Test system. If ignition trouble is eliminated by the tem-
porary installation of a
new
coil, carefully inspect old coil
and cables for damage. The insulation on the cables may
be cracked or otherwise damaged allowing high tension
current to short to metal parts. This is most noticeable in
wet weather or after the motorcycle has been washed.
Table 4-36. Ignition Coil Winding Resis-
tance
WINDING
OHMMETER
SCALE
NORMAL
RESISTANCE RANGE
(IN OHMS)
Primary R x 1 0.5-0.7
Secondary R x 1K 5.5K-7.5K
Figure 4-77. Ignition Coil Circuit