2006 Buell Lightning: Chassis 2-37
HOME
REAR BRAKE MASTER CYLINDER 2.13
REMOVAL
1. See Figure 2-49. Drain brake fluid into a suitable con-
tainer. Discard used fluid according to local laws.
a. Install a length of plastic tubing over caliper bleeder
valve. Place free end in a suitable container.
b. Open bleeder valve (metric) about 1/2-turn.
c. Pump brake foot pedal to drain brake fluid.
d. Tighten bleeder valve to 36-60 in-lbs (4-7 Nm).
2. Remove brake pedal. See 2.9 BRAKE PEDAL.
3. Remove heel guard. See 2.32 FOOTPEG, HEEL
GUARD AND MOUNT.
NOTE
Damaged banjo bolt seating surfaces will leak when reas-
sembled. Prevent damage to seating surfaces by carefully
removing brake line components.
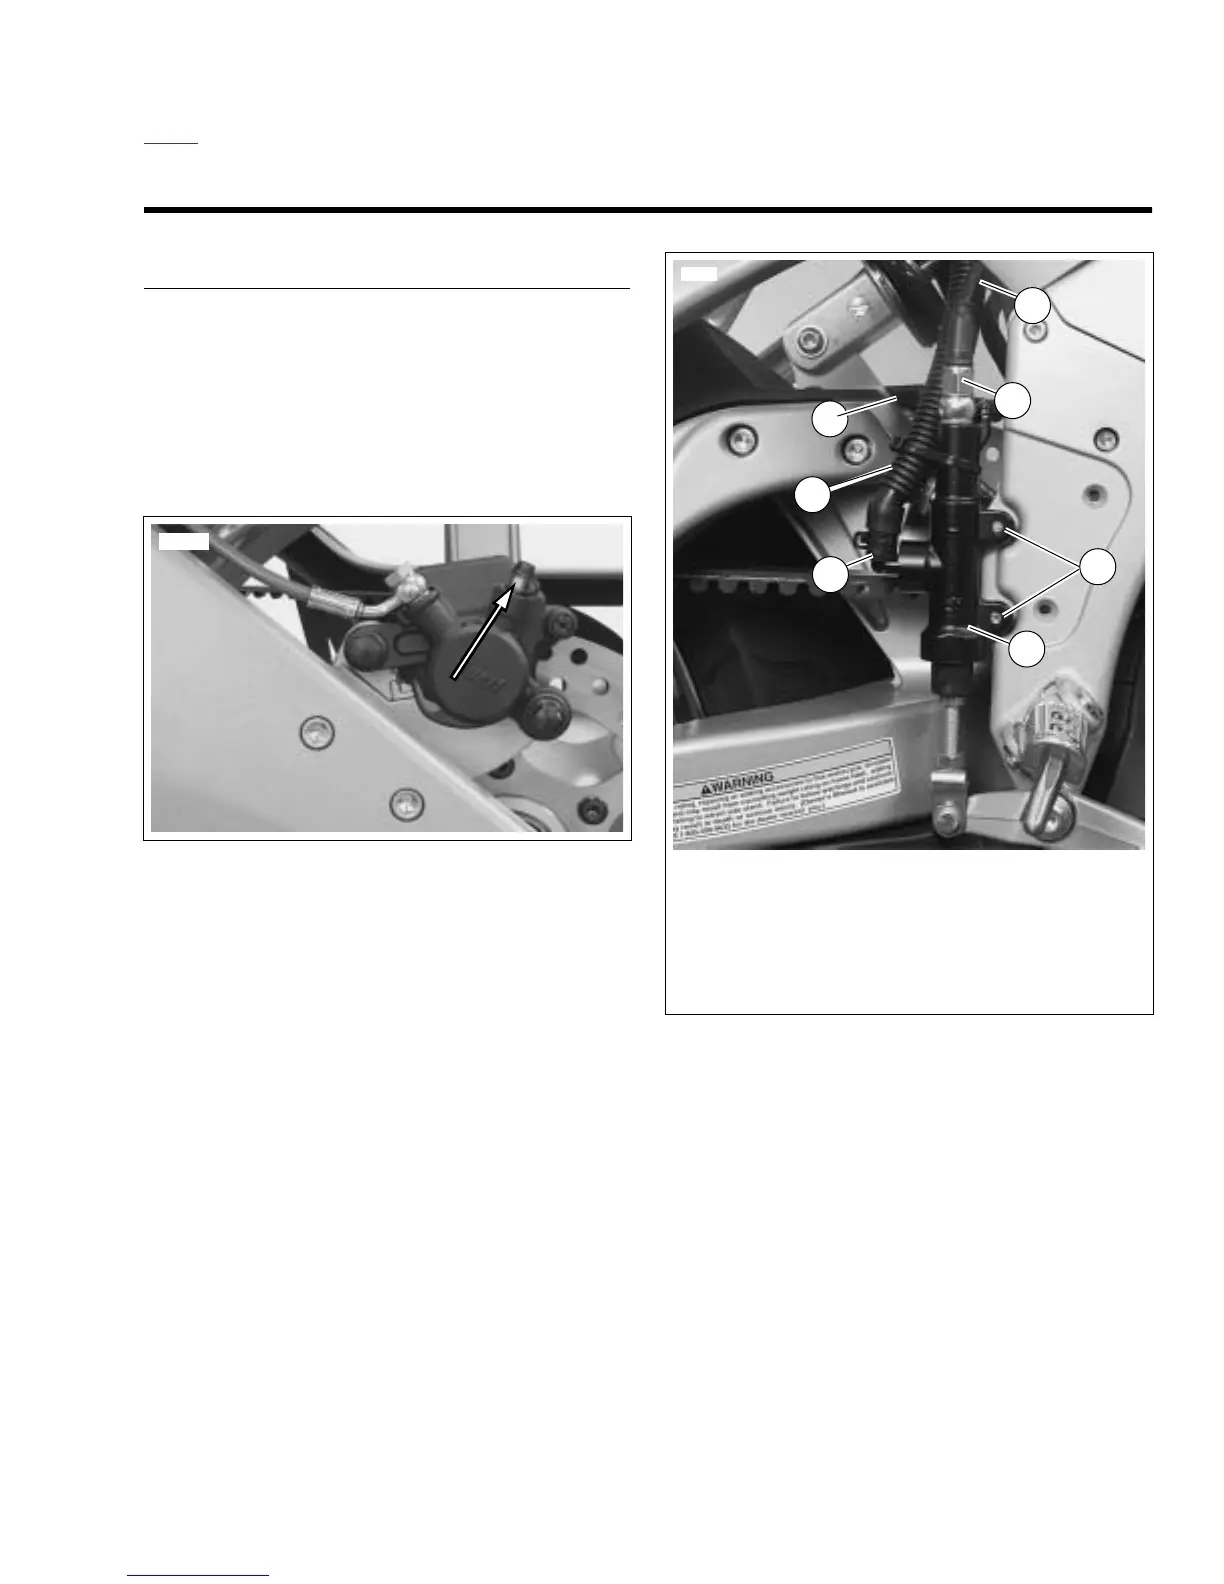
4. See Figure 2-50. Remove brake reservoir hose at master
cylinder.
5. Remove seat. See 2.43 SEAT.
Figure 2-49. Brake Bleeder Valve, Rear Caliper
8348
Figure 2-50. Rear Master Cylinder On Vehicle
12111
1. Banjo bolt (metric) and rear brake light switch
2. Brake light switch harness
3. Fasteners (2) (metric)
4. Master cylinder body
5. Clamp
6. Remote reservoir hose
7. Brake line
4
6
2
3
5
1
7