2006 Buell Lightning: Chassis 2-43
HOME
REAR BRAKE CALIPER 2.15
REMOVAL
NOTES
● Steps 1 and 2 are not required for detaching caliper from
rotor. Drain fluid only when disassembling caliper.
● Damaged banjo bolt seating surfaces will leak when
reassembled. Prevent damage to seating surfaces by
carefully removing brake line components.
1. Drain brake fluid into a suitable container. Discard used
fluid according to local laws.
a. Install a length of plastic tubing over caliper bleeder
valve. Place free end in a suitable container.
b. Open bleeder valve (metric) about 1/2-turn.
c. Pump brake foot pedal to drain brake fluid.
d. Tighten bleeder valve to 36-60 in-lbs (4-7 Nm).
2. Remove banjo bolt connecting brake line to rear caliper.
See 2.14 REAR BRAKE LINE.
3. See Figure 2-58. Remove caliper mounting fasteners (6
and 7).
DISASSEMBLY
1. See Figure 2-58. Remove pin plug (5) and pad hanger
(metric) to free brake pads.
2. See Figure 2-59. Remove spring clip (1).
3. See Figure 2-60. Remove piston (3) using BRAKE CALI-
PER PISTON REMOVER (1) (Part No. B-42887) with
adaptor (2).
4. Remove two o-rings from groove in caliper bore and dis-
card.
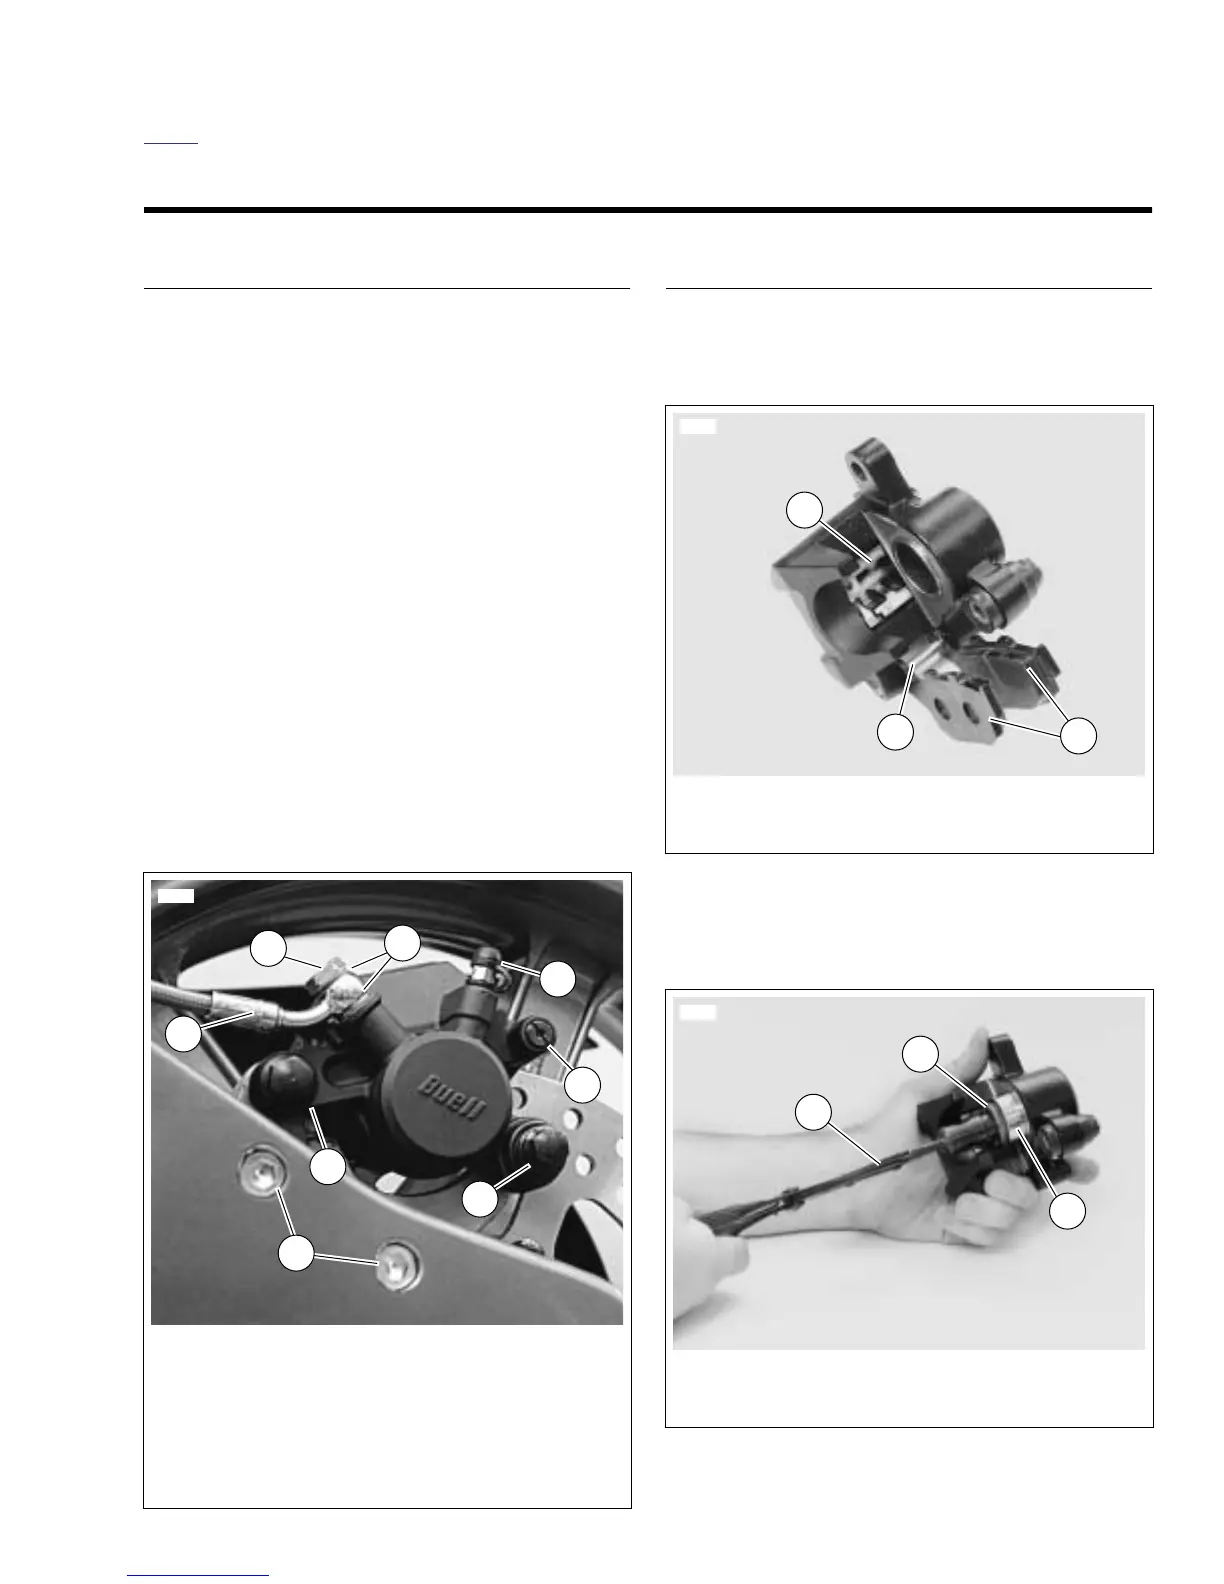
Figure 2-58. Rear Brake Caliper
8348
1. Brake line
2. Banjo bolt (metric)
3. Copper washers (2)
4. Bleeder valve (metric)
5. Pin plug
6. Small caliper fastener
7. Larger caliper fastener
8. Caliper mounting fasteners
1
2
4
8
5
7
6
3
Figure 2-59. Brake Pads
Figure 2-60. Removing Rear Brake Caliper Piston