2-32 2006 Buell Lightning: Chassis
HOME
FRONT BRAKE LINE 2.11
REMOVAL
1. Drain brake fluid into a suitable container. Discard of
used fluid according to local laws.
a. Install a length of plastic tubing over caliper bleeder
valve. Place free end in a suitable container.
b. Open bleeder valve (metric) about 1/2-turn.
c. Pump brake hand lever to drain brake fluid.
d. Tighten bleeder valve to 36-60 in-lbs (4-7 Nm).
2. Remove p-clamp attaching brake line to rear of right front
module. See 2.42 WINDSCREEN/2.28 FRONT MOD-
ULES.
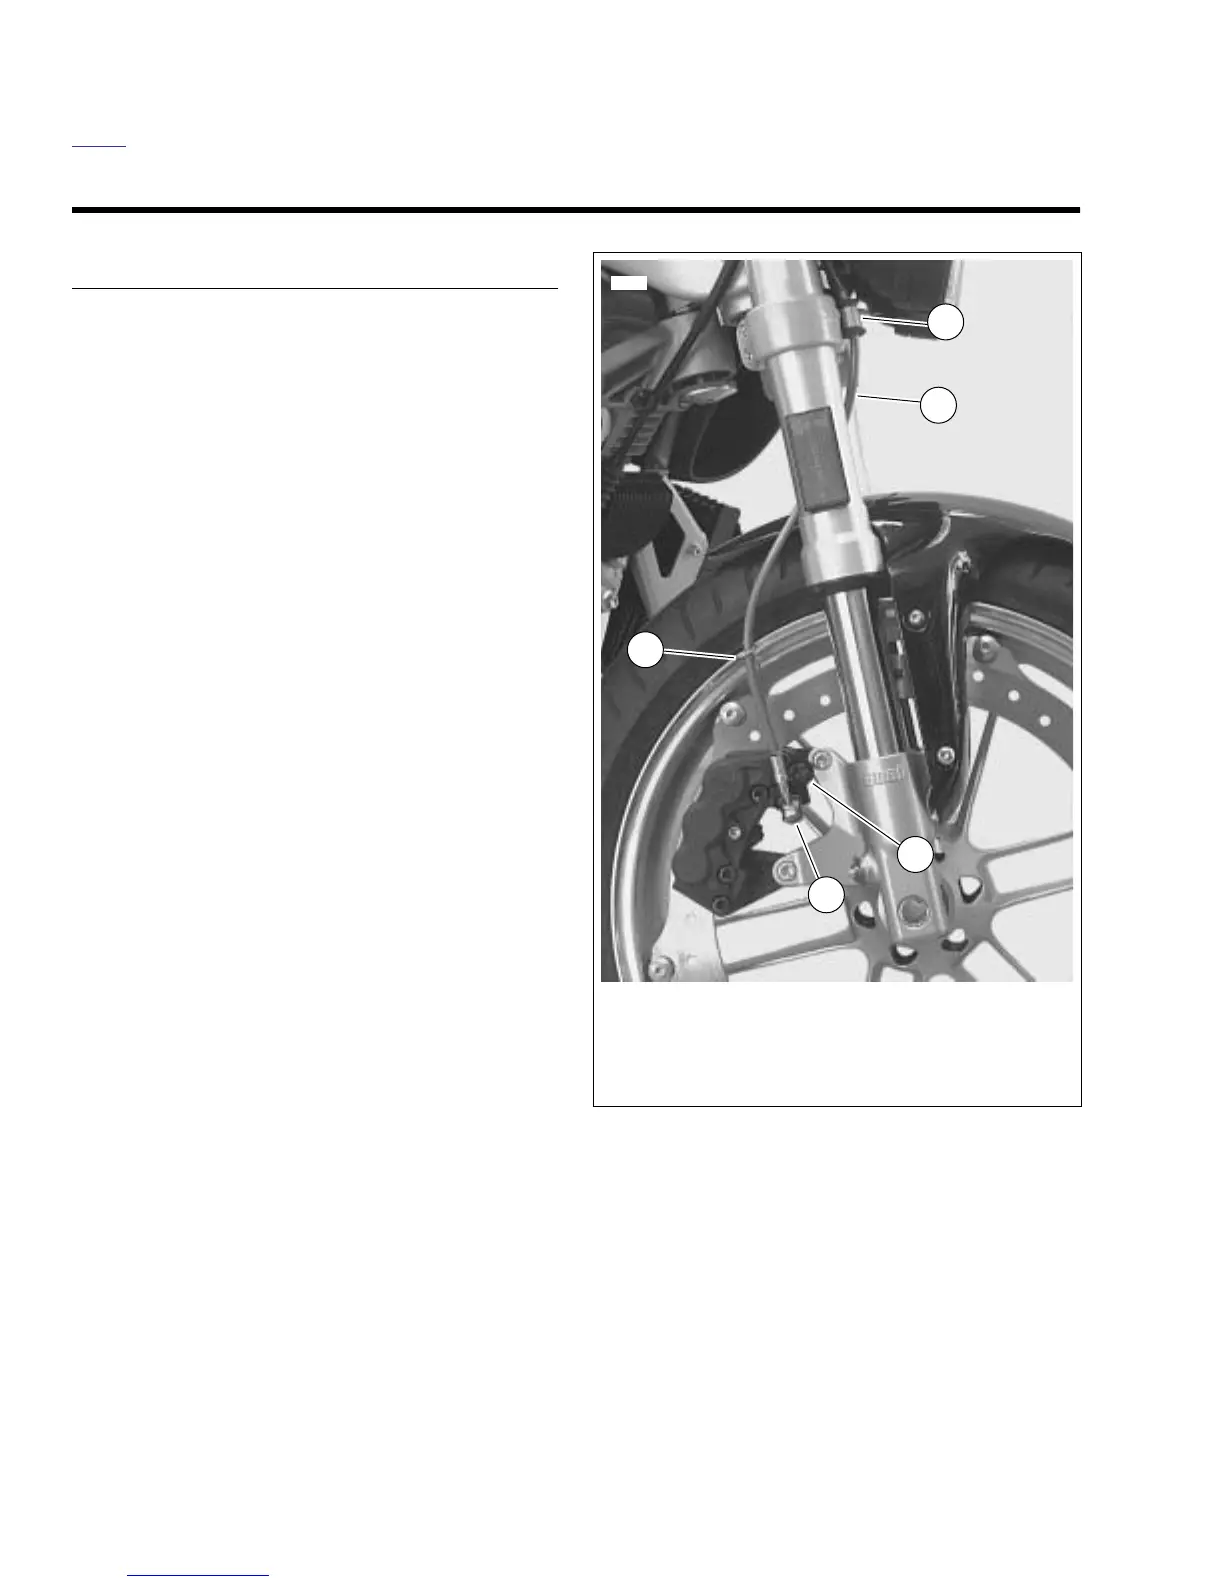
3. See Figure 2-43. Remove p-clamp (1) detaching brake
line from right side of lower fork clamp.
NOTE
Damaged banjo bolt seating surfaces will leak when reas-
sembled. Prevent damage to seating surfaces by carefully
removing brake line components.
4. See Figure 2-38. Remove master cylinder banjo bolt (13)
(metric) and two copper washers (15) to disconnect
brake line from master cylinder (4). Discard copper
washers.
5. See Figure 2-43. Remove caliper banjo bolt (5) (metric),
two copper washers and wire form (3) to disconnect
brake line (2) from caliper. Discard copper washers.
6. Carefully inspect the brake line for dents, cuts, chaffing
or other defects. Replace the brake line if any damage is
noted.
Figure 2-43. Front Brake Line
8429a
1. P-clamp
2. Brake line
3. Wire form
4. Bleeder valve
5. Banjo bolt
1
2
3
4
5