2006 Buell Lightning: Maintenance 1-19
HOME
BRAKE PEDAL ADJUSTMENT
1WARNING1WARNING
After repairing the brake system, test brakes at low
speed. If brakes are not operating properly, testing at
high speeds can cause loss of control, which could
result in death or serious injury. (00289a)
Before every ride, check rear brake pedal operation.
NOTES
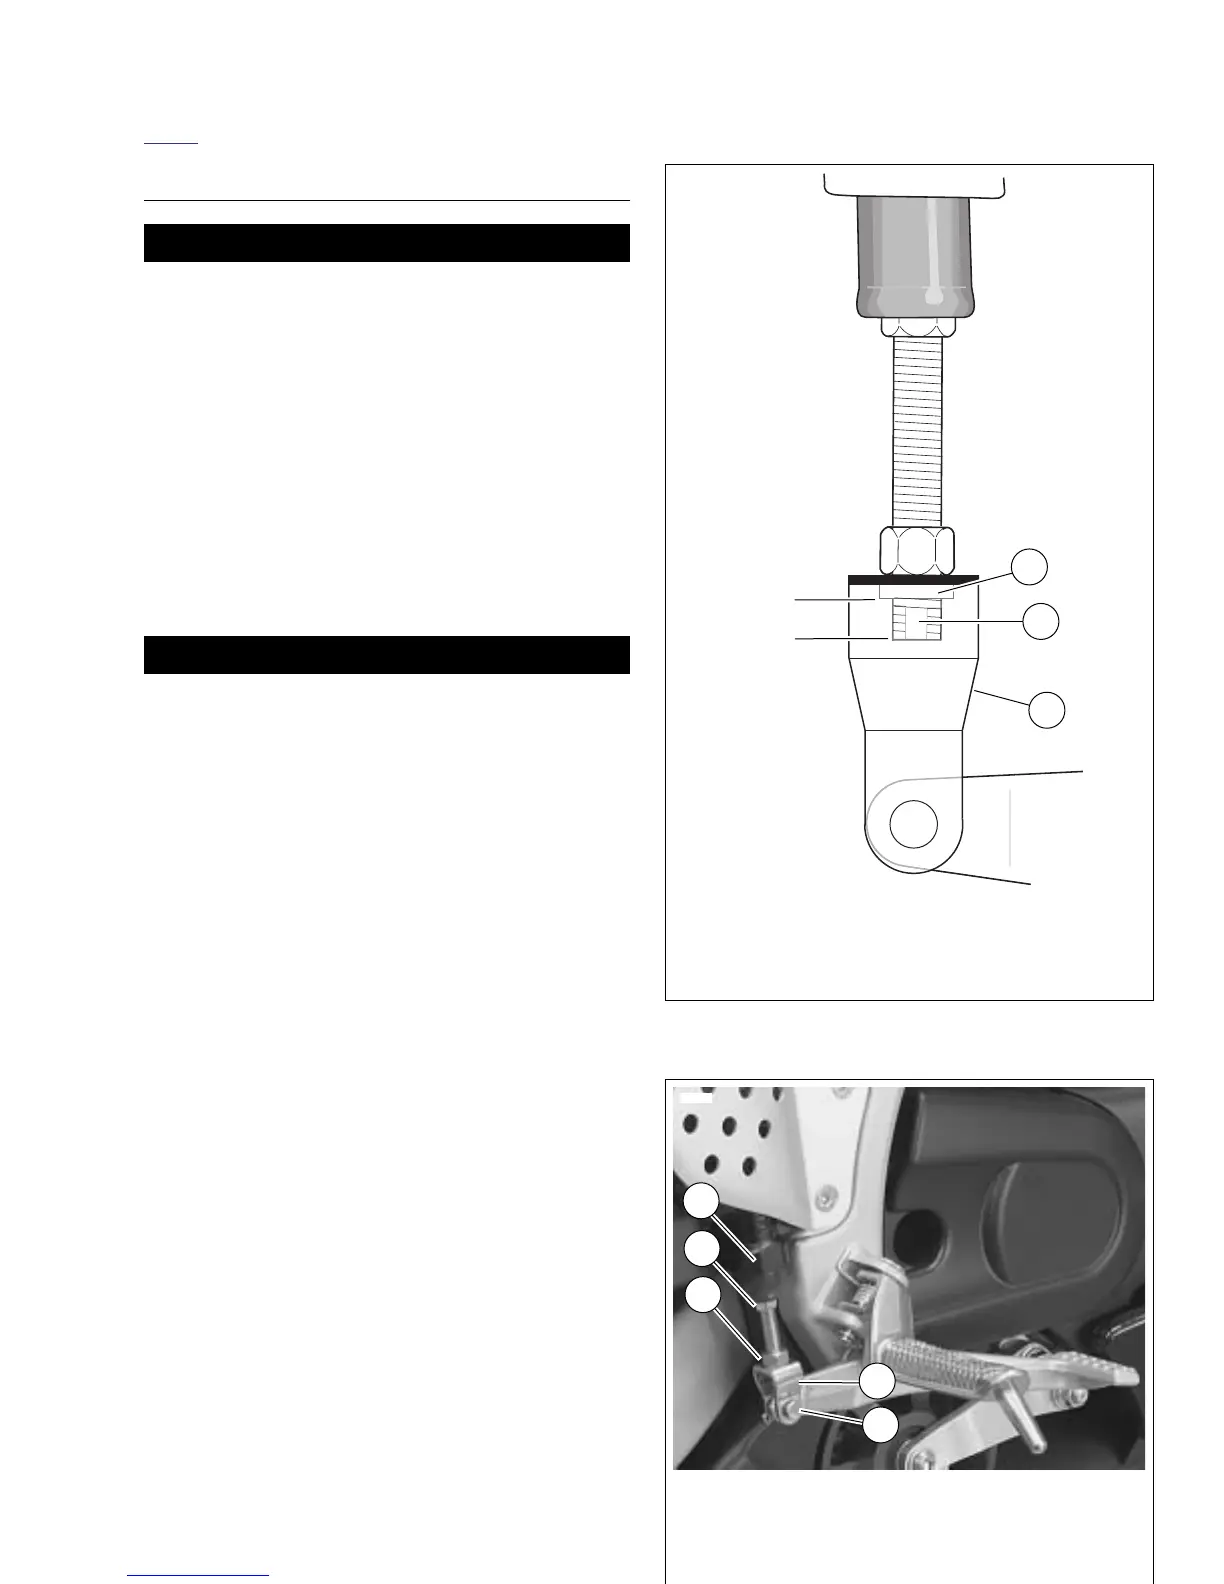
● See Figure 1-11. On the very end of the threaded brake
rod, are two flat sides (2). To ensure proper thread
engagement with the clevis (3), the flat sides must
extend below the extruded nut (1) in the clevis by at least
one full thread. This is the minimum rod engagement.
● Also, there should be a minimum of 0.030 in. (0.8 mm)
between brake rod end and brake pedal.
1WARNING1WARNING
Threaded rod should not be adjusted to the point of con-
tacting brake pedal. Improper adjustment could result in
death or serious injury.
1. See Figure 1-12. Inspect for minimum and maximum
brake rod engagement in brake clevis (4). Adjust as
required.
2. Adjust brake pedal.
a. See Figure 1-12. Loosen locknut (3) while holding
rod adjuster (2). Move locknut away from top surface
of clevis (4).
b. Turn rod adjuster to set pedal height.
c. Return locknut (3) to fit flush against top surface of
clevis and tighten to 130-173.5 in-lbs (14.7-19.6
Nm).
NOTE
Brake pedal has no free play adjustment.
Figure 1-11. Critical Measurements with Typical
Brake Pedal
Figure 1-12. Rear Brake Pedal Pushrod Adjustment