Chapter 5
5-30
COPIER>ADJUST>CCD
5.4.2.7 Points to Note when Replacing the CCD Unit
0009-0933
/ iR8070
1) Check to make sure that the Execute/Memory lamp in the control
panel is OFF, and turn off the main power switch.
2) Disconnect the power plug from the power outlet.
The machine remains supplied with power as long as its power plug is
connected to a power outlet even when its main power switch is turned
off. Be sure to disconnect the power plug.
3) Replace the CCD unit.
4) After assembling the machine, connect the power plug to the power
outlet, and turn on the main power switch.
5) Execute the following service modes in sequence:
1. COPIER>FUNCTION>CCD>CCD-ADJ
2. COPIER>FUNCTION>CCD>EGGN-POS
6) See that all items of COPIER>ADJUST>CCD is updated. Record the
results on the service label.
7) Turn off and then on the main power switch.
8) Make test copies in book mode and feeder mode, and check to make
sure that they are free of displaced images. Otherwise, execute the
following:
Book Mode
A: COPIER>ADJUST>ADJ-XY>ADJ-X
B: COPIER>ADJUST>ADJ-XY>ADJ-Y
F-5-62
Feeder Mode
C: COPIER>ADJUST>ADJ-Y-DF
F-5-63
9) Execute the following in service mode to generate a service label;
FUNCTION>MISCP> LBL-PRNT. Store the service label in the
service book case.
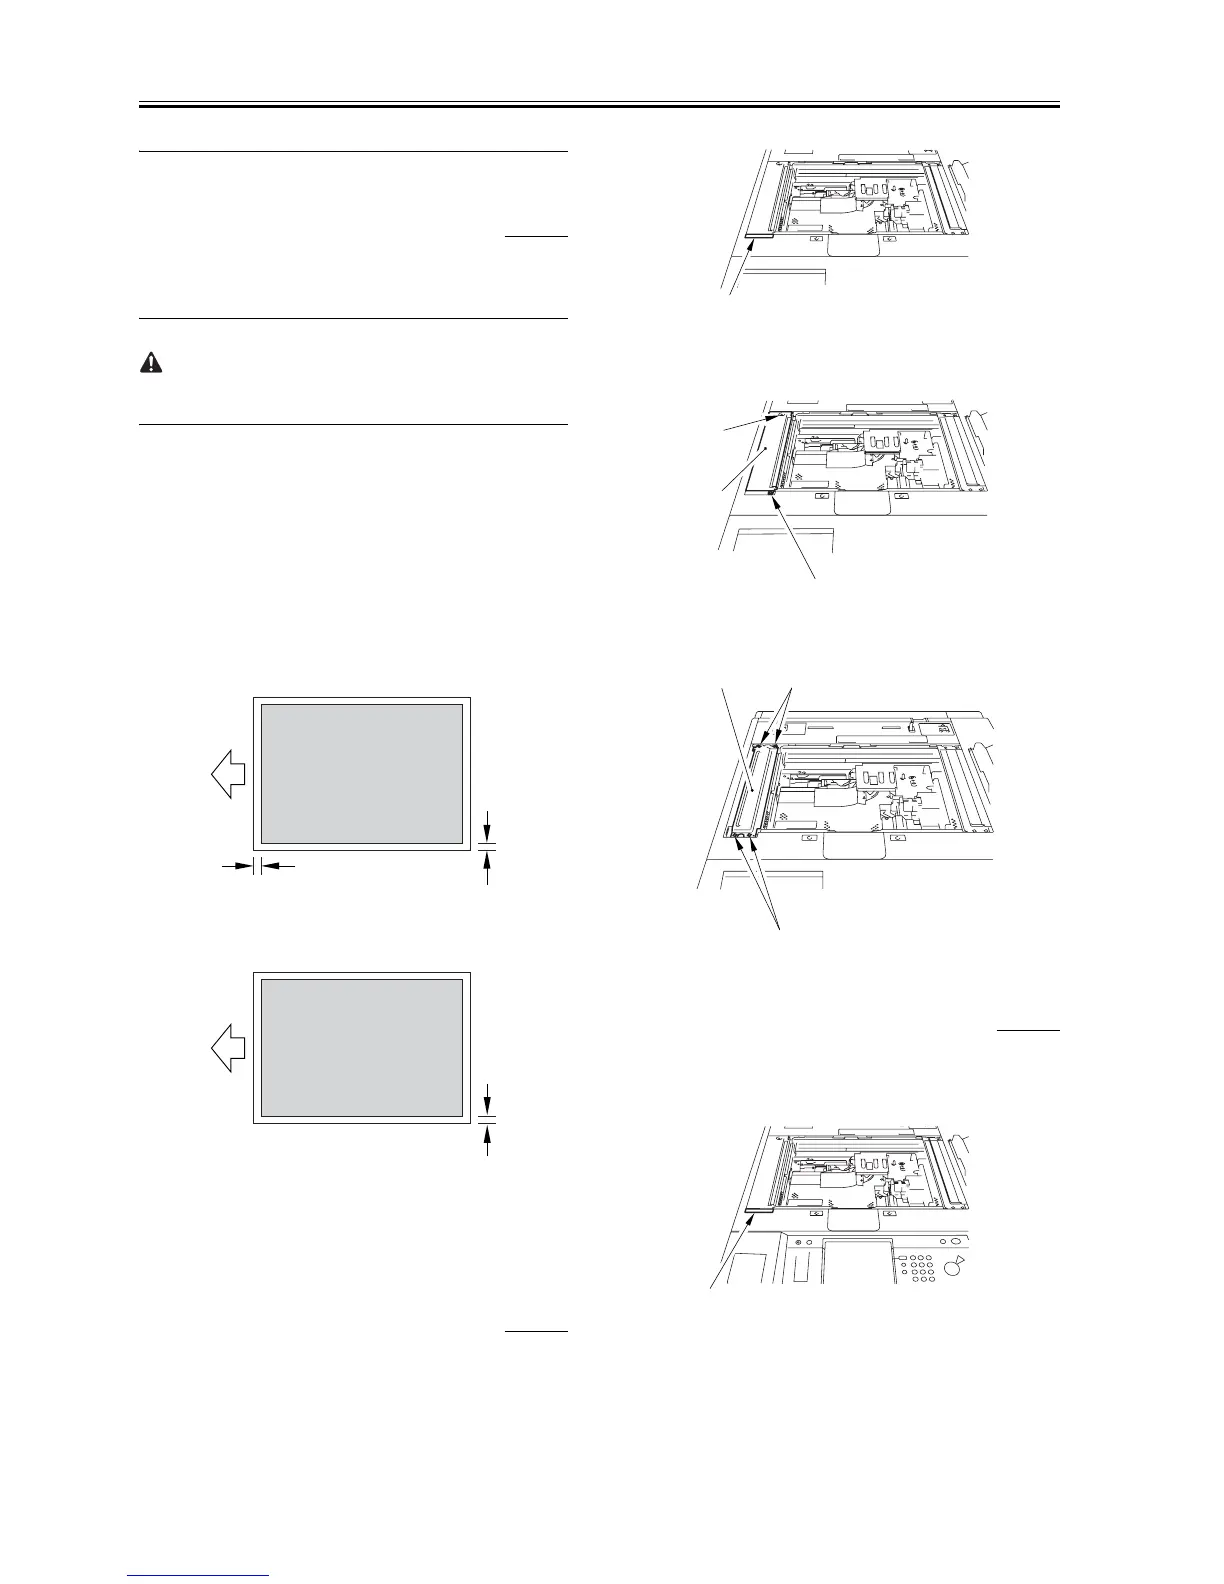
5.4.3 Standard White Plate
5.4.3.1 Removing the Standard White Plate
0007-2558
iR105i/iR105+ / iR9070
1) Remove the copyboard glass.
2) Remove the small cover [1] for the standard white plate with a flat-
blade screwdriver.
F-5-64
3) Remove the 2 screws [1], and detach the standard white plate cover
[2].
F-5-65
4) Remove the 4 screws [1], and detach the standard white plate [2].
F-5-66
5.4.3.2 Removing the Standard White Plate
0008-8027
1) Remove the copyboard glass.
2) Remove the small cover [1] for the standard white plate with a flat-
blade screwdriver.
F-5-67
3) Remove the 2 screws [1], and detach the standard white plate cover
[2].
B
A
C
[1]
[1]
[1]
[2]
[1]
[2]
[1]
[1]
 Loading...