Chapter 9
9-75
F-9-183
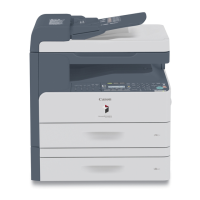
9.10.20.10 Removing the Deck (left) Draw- Out Clutch/
Lower Feeder Middle Clutch
0007-1424
iR105i/iR105+ / iR9070 / iR85+ / iR8070
1) Remove the duplexing unit from the main body.
2) Remove the front cover.
3) Remove the two set screws [2] to detach the locking ring [1]; then,
disconnect the connector [3], and detach the clutch [4]. (Be sure to
perform this for each pair.)
F-9-184
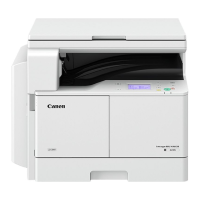
9.10.20.11 Removing the Lower Feeding Right Clutch
0007-1425
iR105i/iR105+ / iR9070 / iR85+ / iR8070
1) Remove the duplexing unit from the main body.
2) Remove the front cover.
3) Disconnect the connector [1], and remove the two screws [2]; then,
detach the latch plate [3].
F-9-185
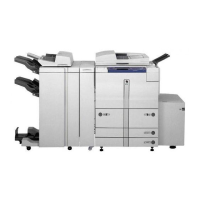
4) Remove the bearing [4] and spacer [5]; then, detach the lower feeding
right clutch [6].
F-9-186
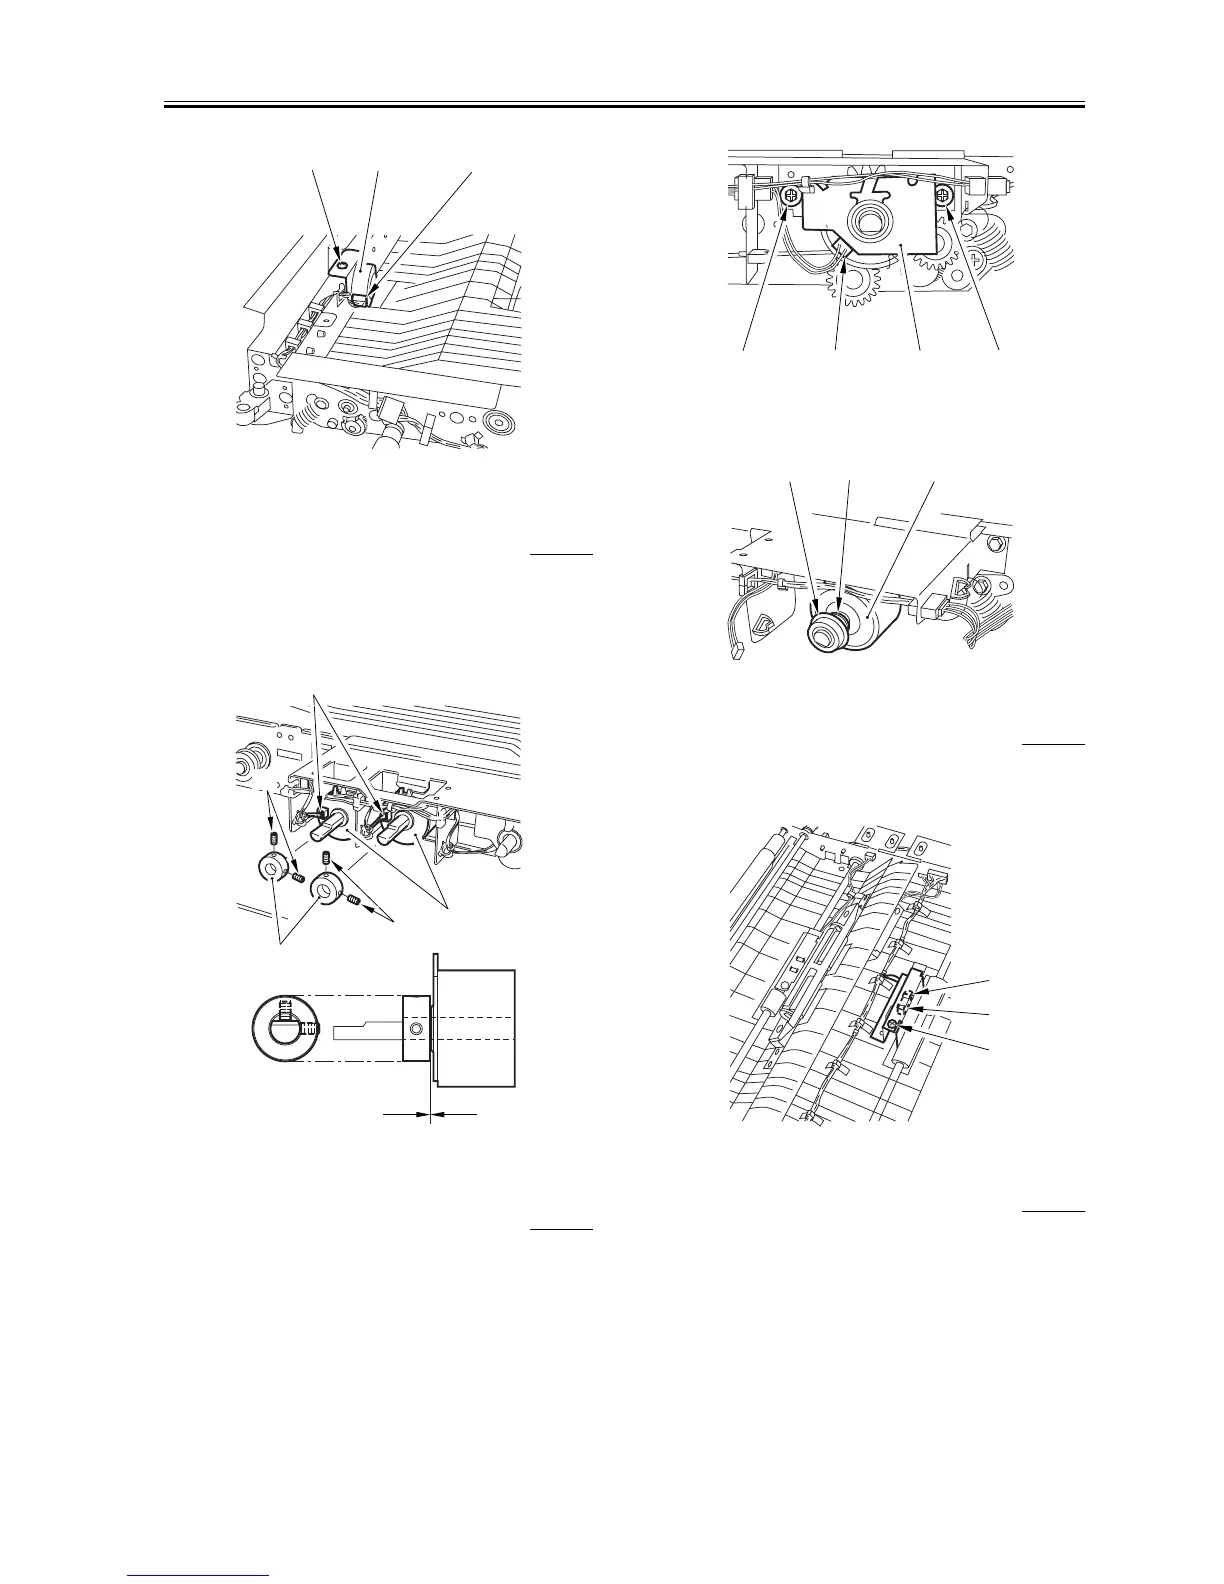
9.10.20.12 Removing the Pre-Confluence Sensor
0007-1452
iR105i/iR105+ / iR9070 / iR85+ / iR8070
1) Disconnect the connector [1] from the bottom of the duplexing unit;
then, remove the screw [2], and detach the preconfluence sensor [3].
F-9-187
9.10.20.13 Removing the Post-Confluence Sensor
0007-1454
iR105i/iR105+ / iR9070 / iR85+ / iR8070
1) Remove the two screws [1] from the bottom of the duplexing unit;
then, detach the left deck feeding roller assembly [2].
[4]
[3]
[5]
No gap.
[3]
[4]
[2]
[2]
[1]
[2]
[1]
[3]
[2]
[4]
[5]
[6]
[1]
[3]
[2]
 Loading...