Chapter 11
11-40
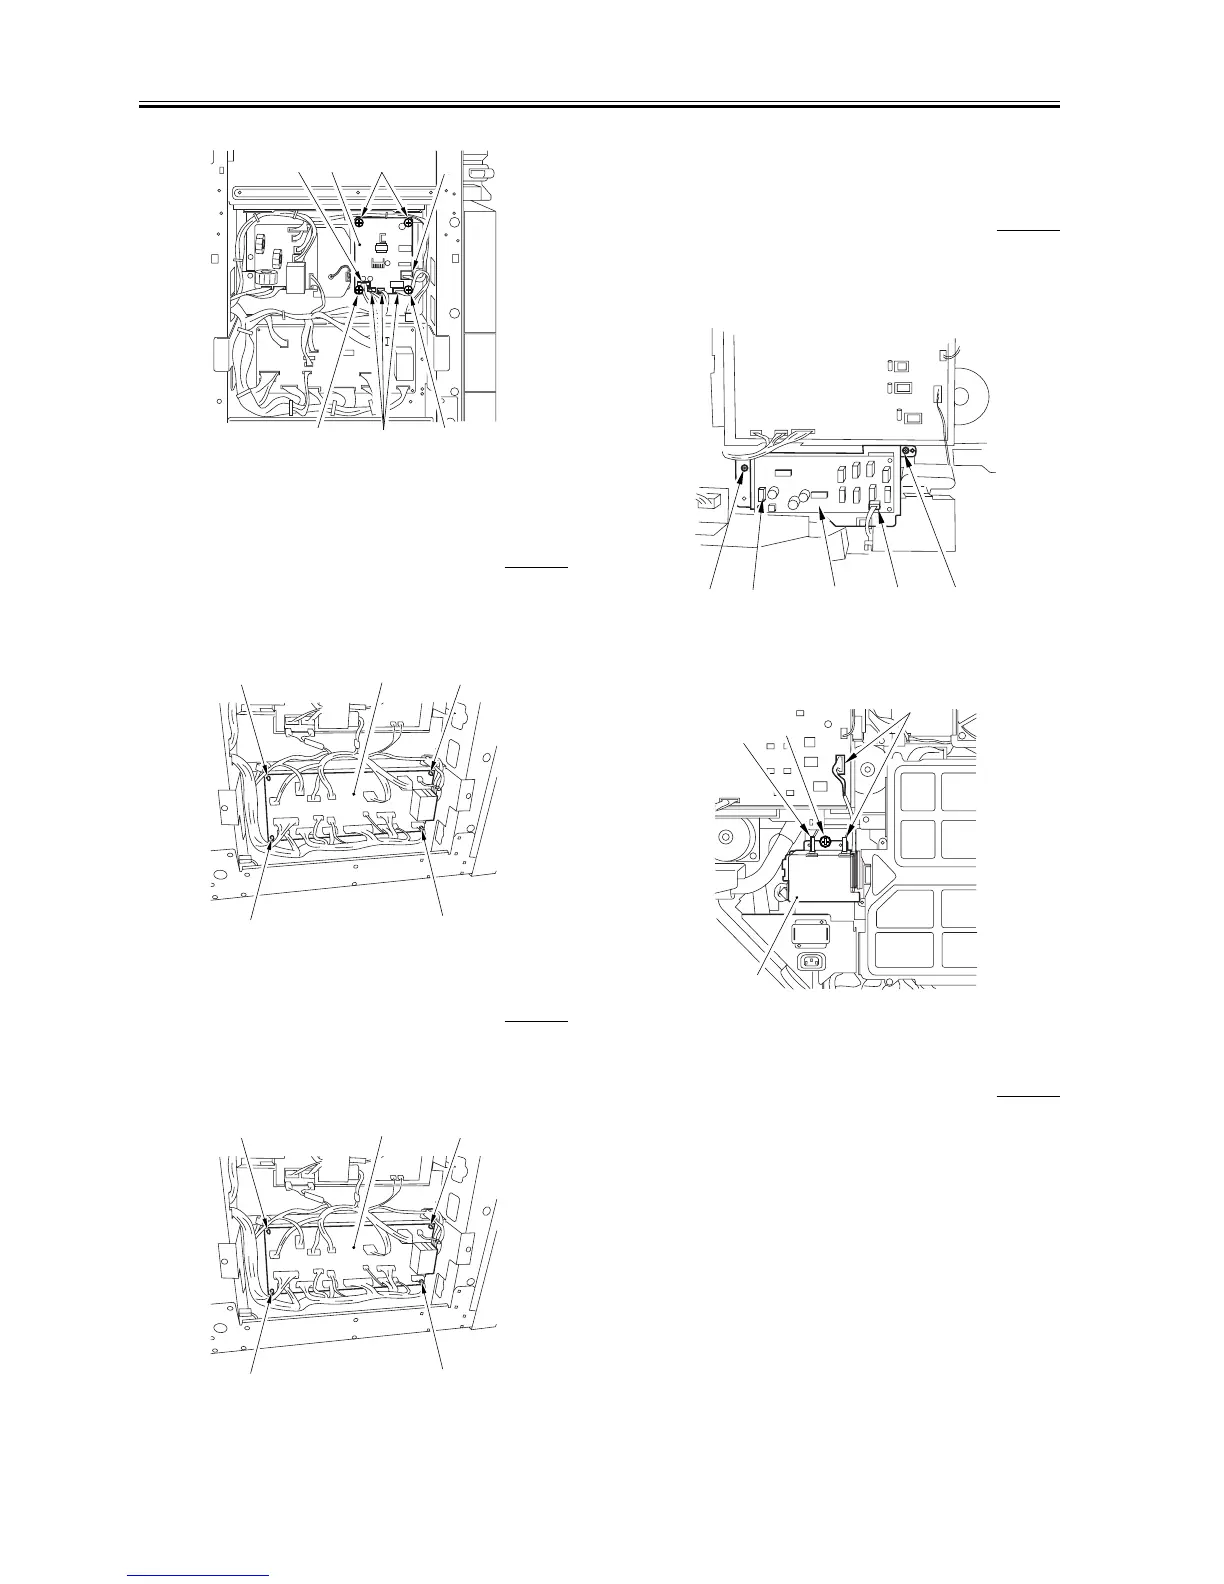
F-11-113
11.5.24 Relay PCB
11.5.24.1 Removing the Relay PCB
0007-3091
iR105i/iR105+ / iR9070
1) Remove the left lower cover. (4 screws)
2) Disconnect the connector from the PCB; then, remove the screw [1],
and detach the relay PCB [1] from the four PCB holders [2].
F-11-114
11.5.24.2 Removing the Relay PCB
0008-8340
/ iR85+ / iR8070
1) Remove the left lower cover (4 screws).
2) Disconnect the connector from the PCB; then, remove the screw [1],
and detach the relay PCB [1] from the four PCB holders [2].
F-11-115
11.5.25 High-Voltage Transformer (AC)
11.5.25.1 Removing the High-Voltage Transformer
Assembly (AC)
0007-3093
iR105i/iR105+ / iR9070
1) Remove the rear cover.
2) Disconnect the 2 connectors [1], and remove the 2 screws [2]; then,
detach the HV-AC PCB [3] together with the mounting base.
F-11-116
3) Disconnect the 3 connectors [1], and remove the screw [2]; then,
detach the high-voltage transformer assembly (AC) [3].
F-11-117
11.5.25.2 Removing the High-Voltage Transformer
Assembly (AC)
0008-8351
/ iR85+ / iR8070
1) Remove the rear cover (See 10.4.1.e.).
2) Disconnect the 2 connectors [1], and remove the 2 screws [2]; then,
detach the HV-AC PCB [3] together with the mounting base.
[1]
[1]
[1]
[2][2]
[2]
[3]
[1]
[2]
[2]
[2]
[2]
[1]
[2]
[2]
[2]
[2]
[1][3]
[1][2] [2]
[1]
[1]
[2]
[3]
 Loading...