Chapter 11
11-37
F-11-96
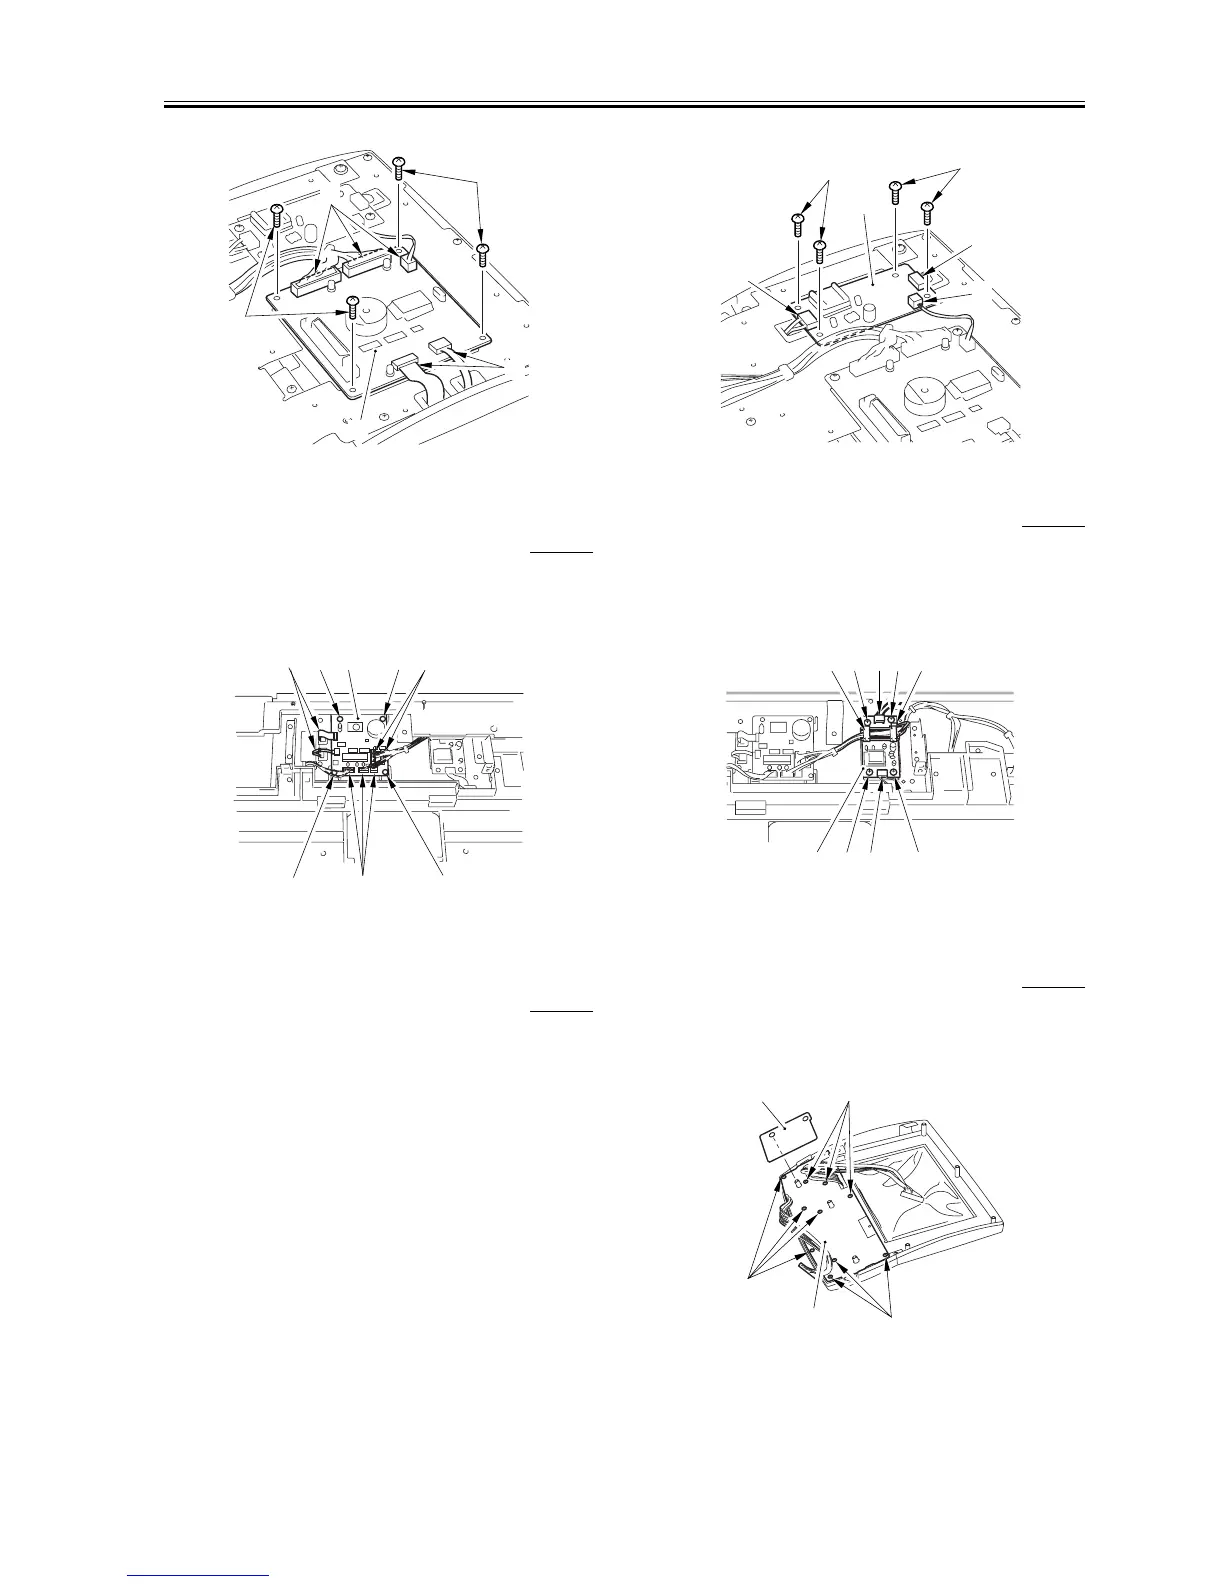
11.5.19.2 Removing the Control Panel Controller (CPU)
PCB
0008-8932
/ iR85+ / iR8070
1) Remove the 4 mounting screws [1], disconnect the 5 connectors [2],
and disconnect the 2 flat cables [3]; then, detach the control panel
controller (CPU) PCB [4].
F-11-97
11.5.20 Control Panel Inverter PCB
11.5.20.1 Removing the Control Panel Inverter PCB
0007-3009
iR105i/iR105+ / iR9070
1) Remove the control panel support unit.
2) Disconnect the 3 connectors [1].
3) Remove the 4 screws [2], and detach the control panel inverter PCB
[3].
F-11-98
11.5.20.2 Removing the Control Panel Inverter
0008-8934
/ iR85+ / iR8070
1) Remove the 3 screws, and detach the control panel lower cover [2].
2) Disconnect the 3 connectors [1], and free the harness from the harness
guide [2].
3) Remove the 4 screws [3], and detach the control panel inverter PCB
[4].
F-11-99
11.5.21 Control Panel PCB
11.5.21.1 Removing the Control Panel PCB
0007-3017
iR105i/iR105+ / iR9070
1) Remove the LCD panel unit.
2) Remove the harness sheet [1].
3) Remove the 10 screws [2], and detach the control panel PCB [3].
F-11-100
[1]
[2]
[3]
[3]
[4]
[4][1][3] [1]
[1][2][1]
[2]
[1]
[1]
[1]
[2]
[2]
[3]
[4] [3] [1] [3]
[2] [3] [1] [3] [1]
[3]
[2]
[2]
[1] [2]
 Loading...