step Action additional Info
3
Service screen
Wait until the 'Service Screen' is dis-
played.
The 3 blocks on the left are greyed-out,
meaning there is no connection with the
printer.
Start upgrade procedure
step Action additional Info
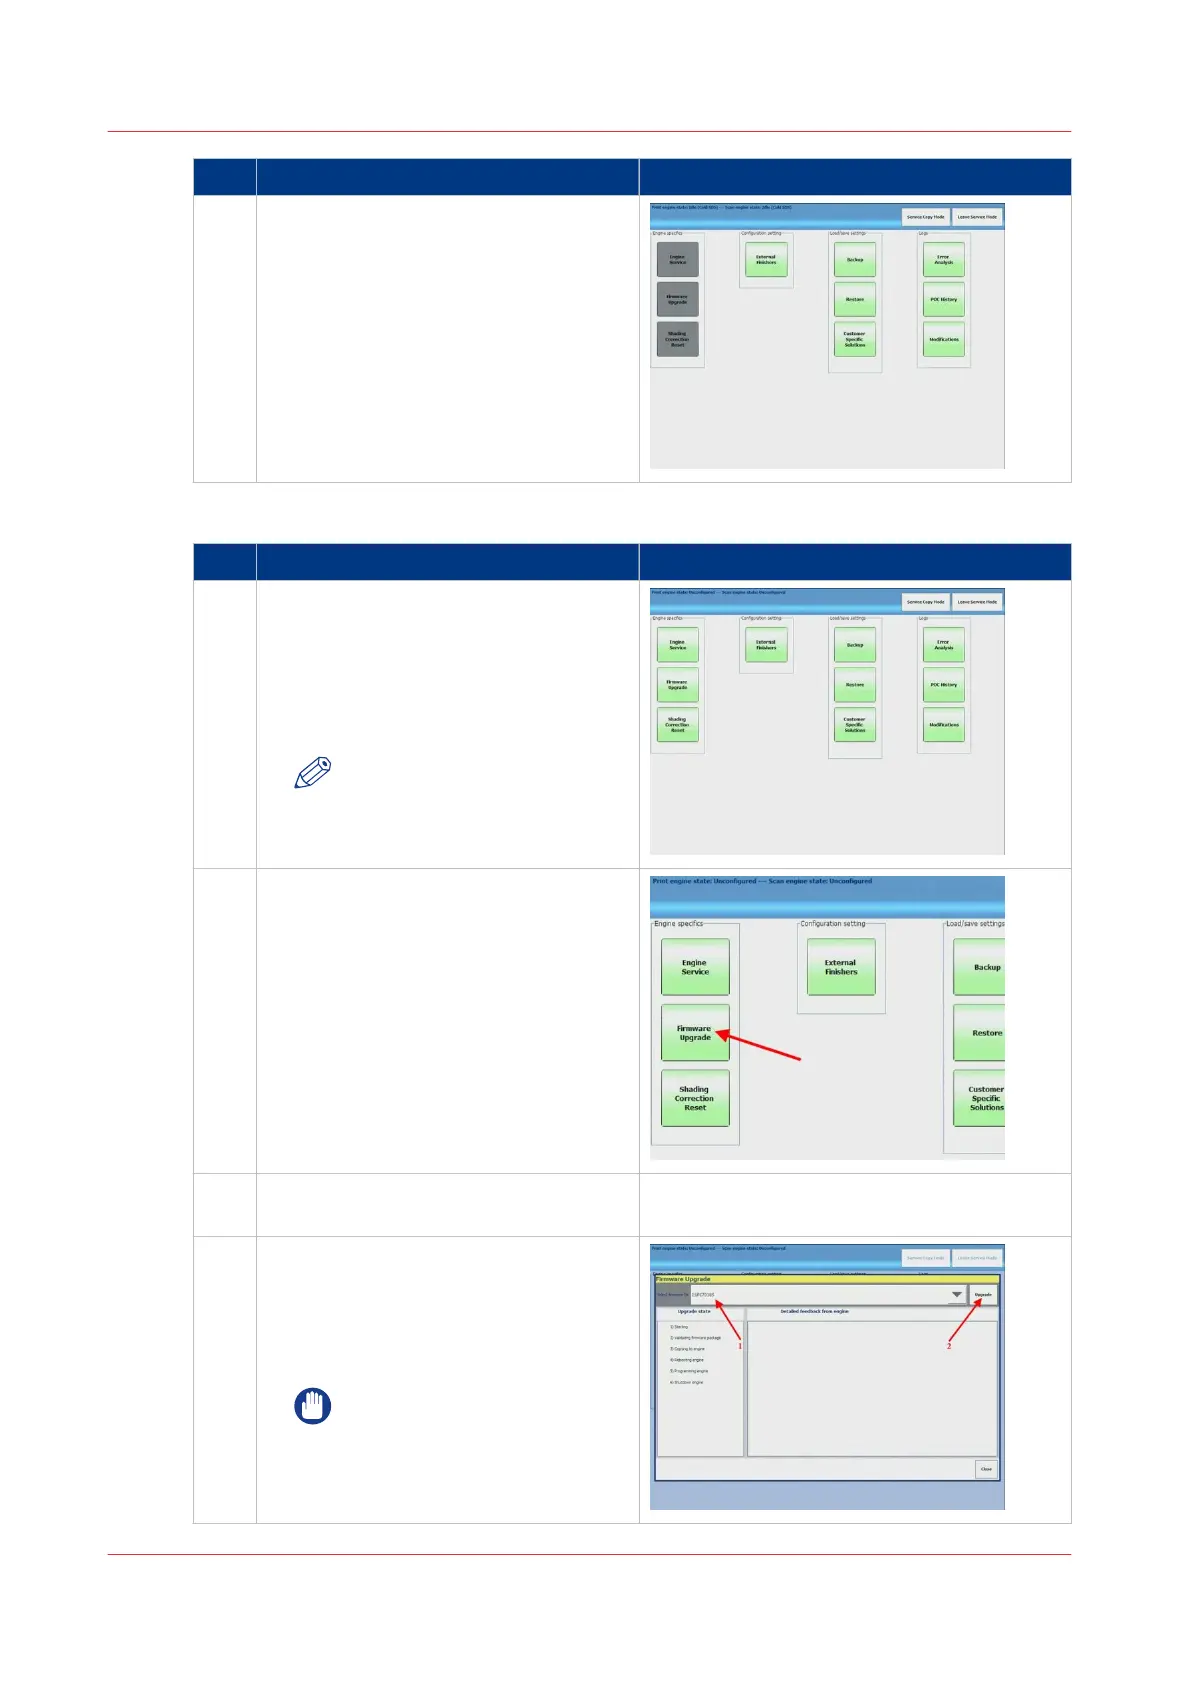
1
Switch on the printer
Switch on the engine with the power-
switch. When the connection between
the printer and the PRISMAsync is es-
tablished, the 3 blocks will become
green.
NOTE
Be sure to switch on the print-
er within 2 minutes after
switching on the PRISMAsync.
2
Firmware upgrade
Select [Firmware Upgrade].
3
Insert USB key with printer and options
firmware in the PRISMAsync
4
Firmware upgrade
1.
Select the correct firmware to install
(iPC7010S)
2. Press 'Upgrade' to start the upgrade
process.
IMPORTANT
Do not switch off the PRISMA-
sync and the printer during the
installation process.
4
Firmware upgrade of Engine and Accessories (safe download mode)
88 Chapter 8 - Firmware upgrades via PRISMAsync
PRISMAsync V3.2