33
5.1.6 Mode: Continuous Movement
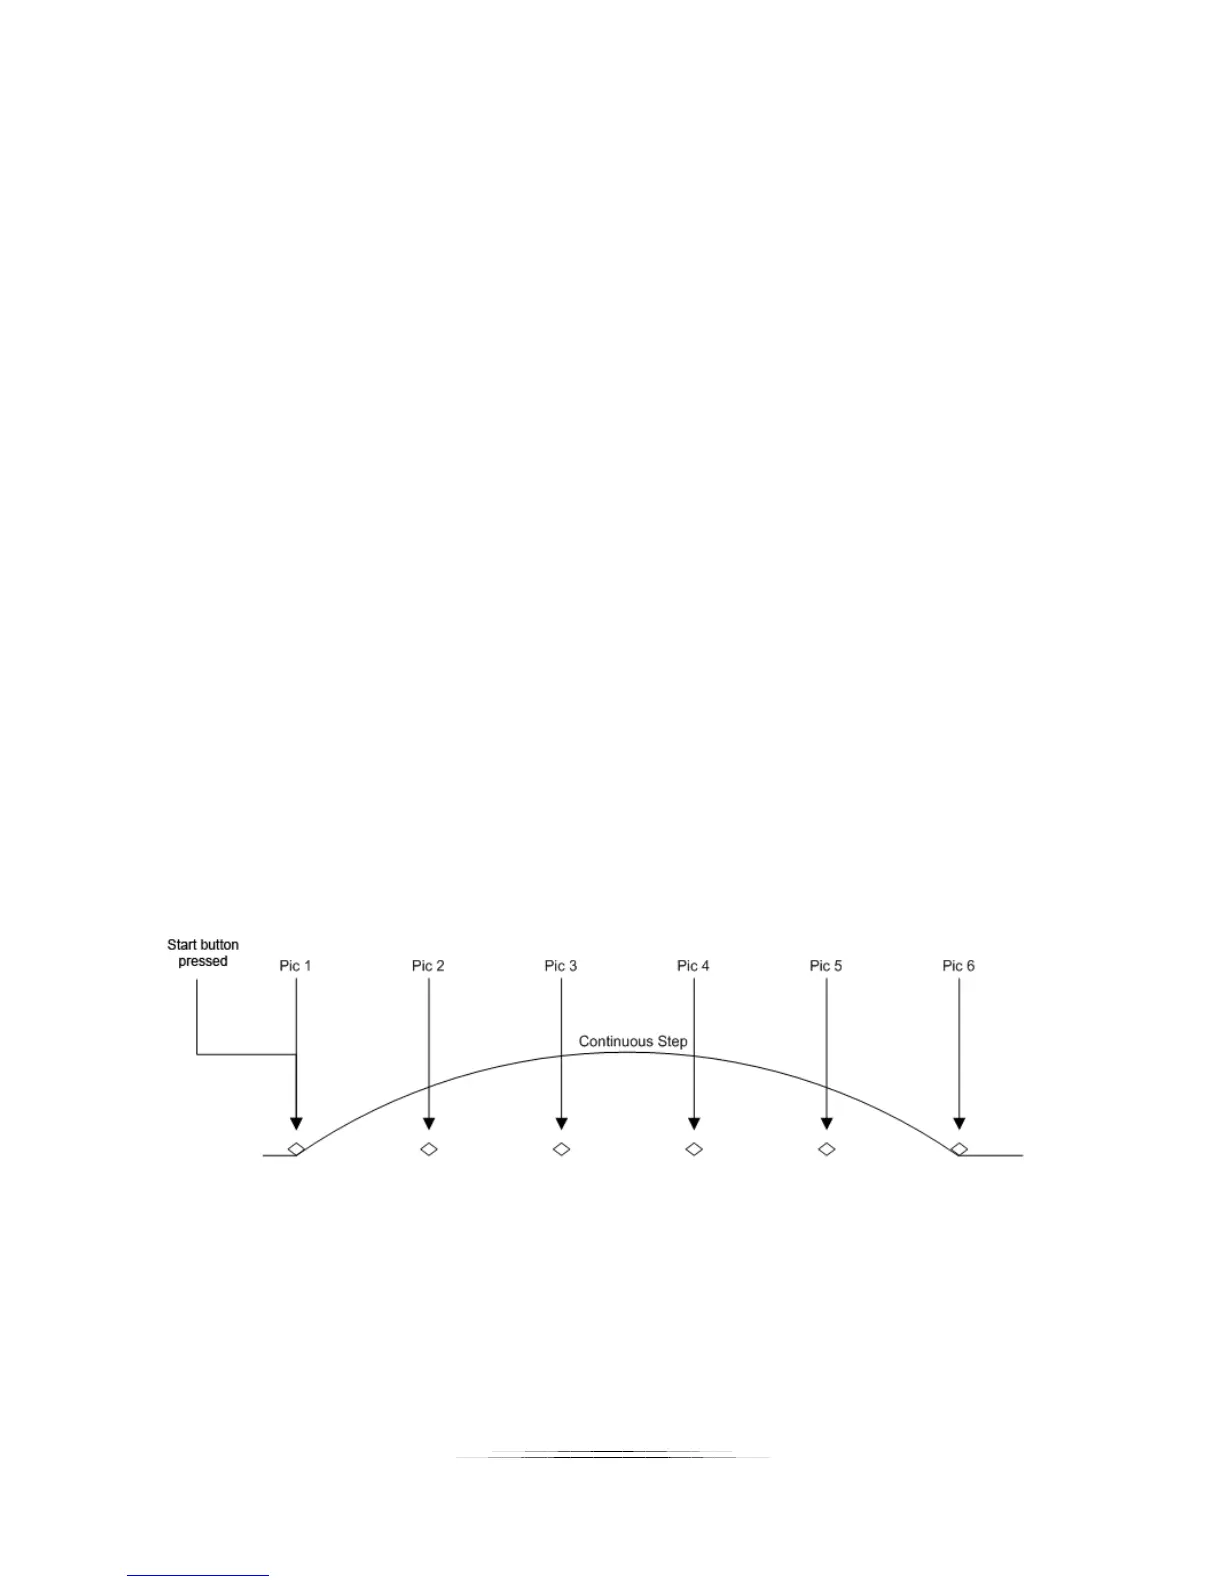
For Continuous mode (“Continuous”) you select the total distance the rail will travel. The rail
will not stop until it reaches its final position. During this time the shutter output(s) will fire
continuously. The shutter on and off time ultimately set the number of pictures that may be
taken during the rail move. Those parameters are available under the “Shutter Output
Settings”. See section “8.5 - Shutter Output Settings” for more details. Because the number of
pictures is dependent upon the time selected, a picture at the final position is not guaranteed.
Also keep in mind that the rail accelerates and de-accelerates. If the ramp time for this axis
(See section “8.2 – Axis settings“) is long it will affect the amount of distance traveled between
pictures (the time is fixed between pictures, not the distance).
5.1.6.1 Total Distance
Total distance (“Distance”) specifies the complete distance to move the rail.
5.1.6.2 Direction
The direction defaults to “Forward”. To change the direction the rail will travel simply press this
button to toggle between “Forward” and “Backward”.
5.1.6.3 Starting the Sequence
Press the “Start” button to begin the movement of the rail.
If you touch the screen any time during the stack it will stop the motor, abort the sequence, and
the display will show “Aborted” and give you the option to start the sequence again.
See Figure 7 below to show how “Continuous” mode operates.
Figure 7 - Continuous Mode
5.1.7 Mode: Auto/Manual Advance
Auto/Manual Advance mode is identical to “Automatic Distance” mode (see section 5.1.2)
except that each step must be manually advanced. This is useful for applications where the