36
5.1.9.4 Starting the Sequence
Exactly like “Auto-Step” mode, you press the “Start” button to begin the sequence.
If you touch the screen any time during the stack it will stop the motor, abort the sequence, and
the display will show “Aborted” and give you the option to start the sequence again.
5.2 Stacking: X-R – Stack/Rotate
This stacking mode combines a StackShot Macro Rail with a rotation stage to create high depth
of field images of an object taken at different angles. A rotary table is required for this mode.
Stacking takes place on the X-axis using the “Automatic Distance” method while the Y-axis is
used for controlling the rotary table. This mode is perfect for creating virtual objects or 3D
models of subjects.
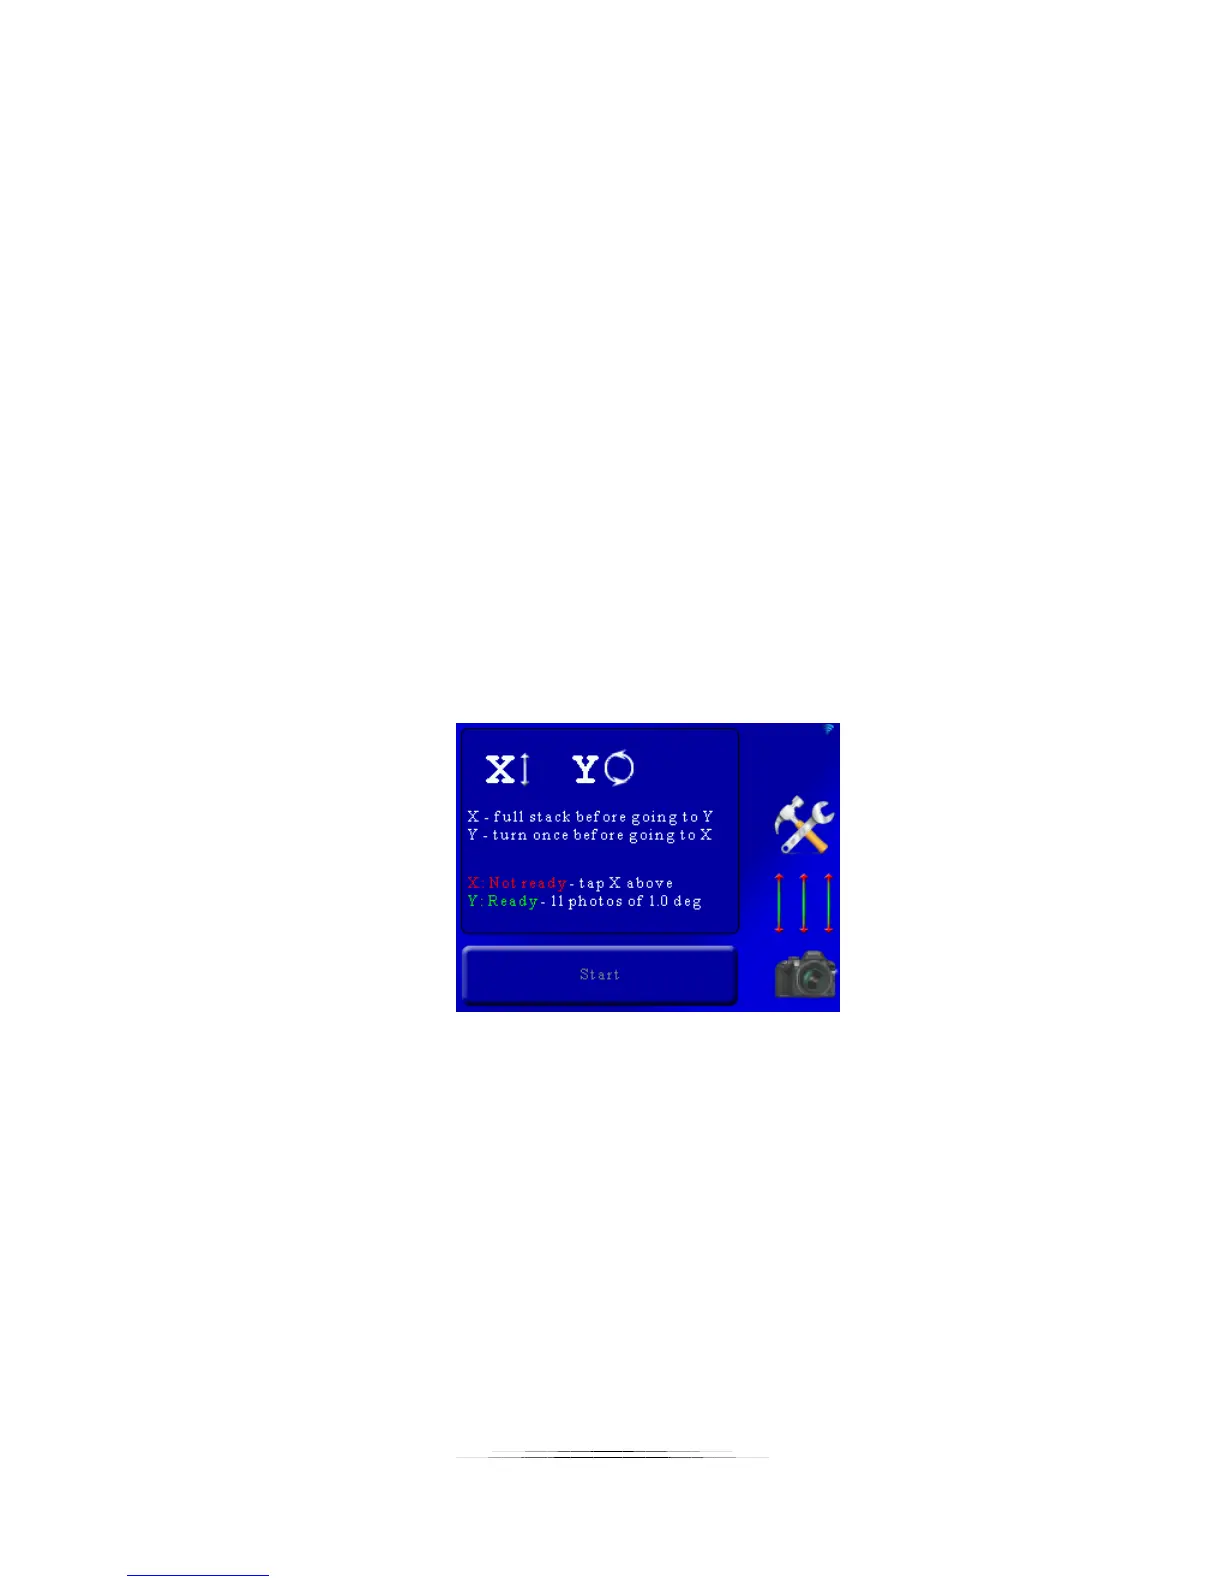
5.2.1 Stack/Rotate Main Screen
The main screen in this mode shows the number of pictures for each axis. Below is a screen-
shot:
Here the screen indicates that a full stack will be performed on the X-axis, then proceed to the
Y-axis for one move, and then return back to the X-axis for another full stack.
As you can see, the X-axis status is colored red saying that it is not ready. That is because a start
and end position have not been chosen. The Y-axis is ready to start since it has a default of 10
motor moves (11 photos) each of one degree. You’ll likely want to adjust that to your specific
requirements and is discussed below.
5.2.2 Adjusting/Setting the X-axis
To originally set the X-axis stacking position or to modify the current settings simply press the
“X” at the top of the main screen: