24
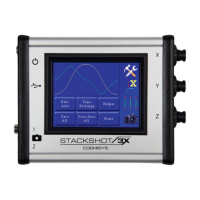
Pictures Taken
Step 1 Step 2 Step 3 Step 4 Step 5
Pic 1 Pic 2 Pic 3 Pic 4 Pic 5 Pic 6
Figure 2 - Steps Vs. Pictures
5.1.1.2 Selecting the Start/End Positions
In this mode you are first prompted to select the start position. Use the slider on the left to
move the rail to the starting position of the stack. Once the position is correct for your setup,
press the “Set” button.
You are then prompted to select the end position. Once again use the slider on the left to adjust
the position of the rail to the end position of the stack. Press the “Set” button to select the end.
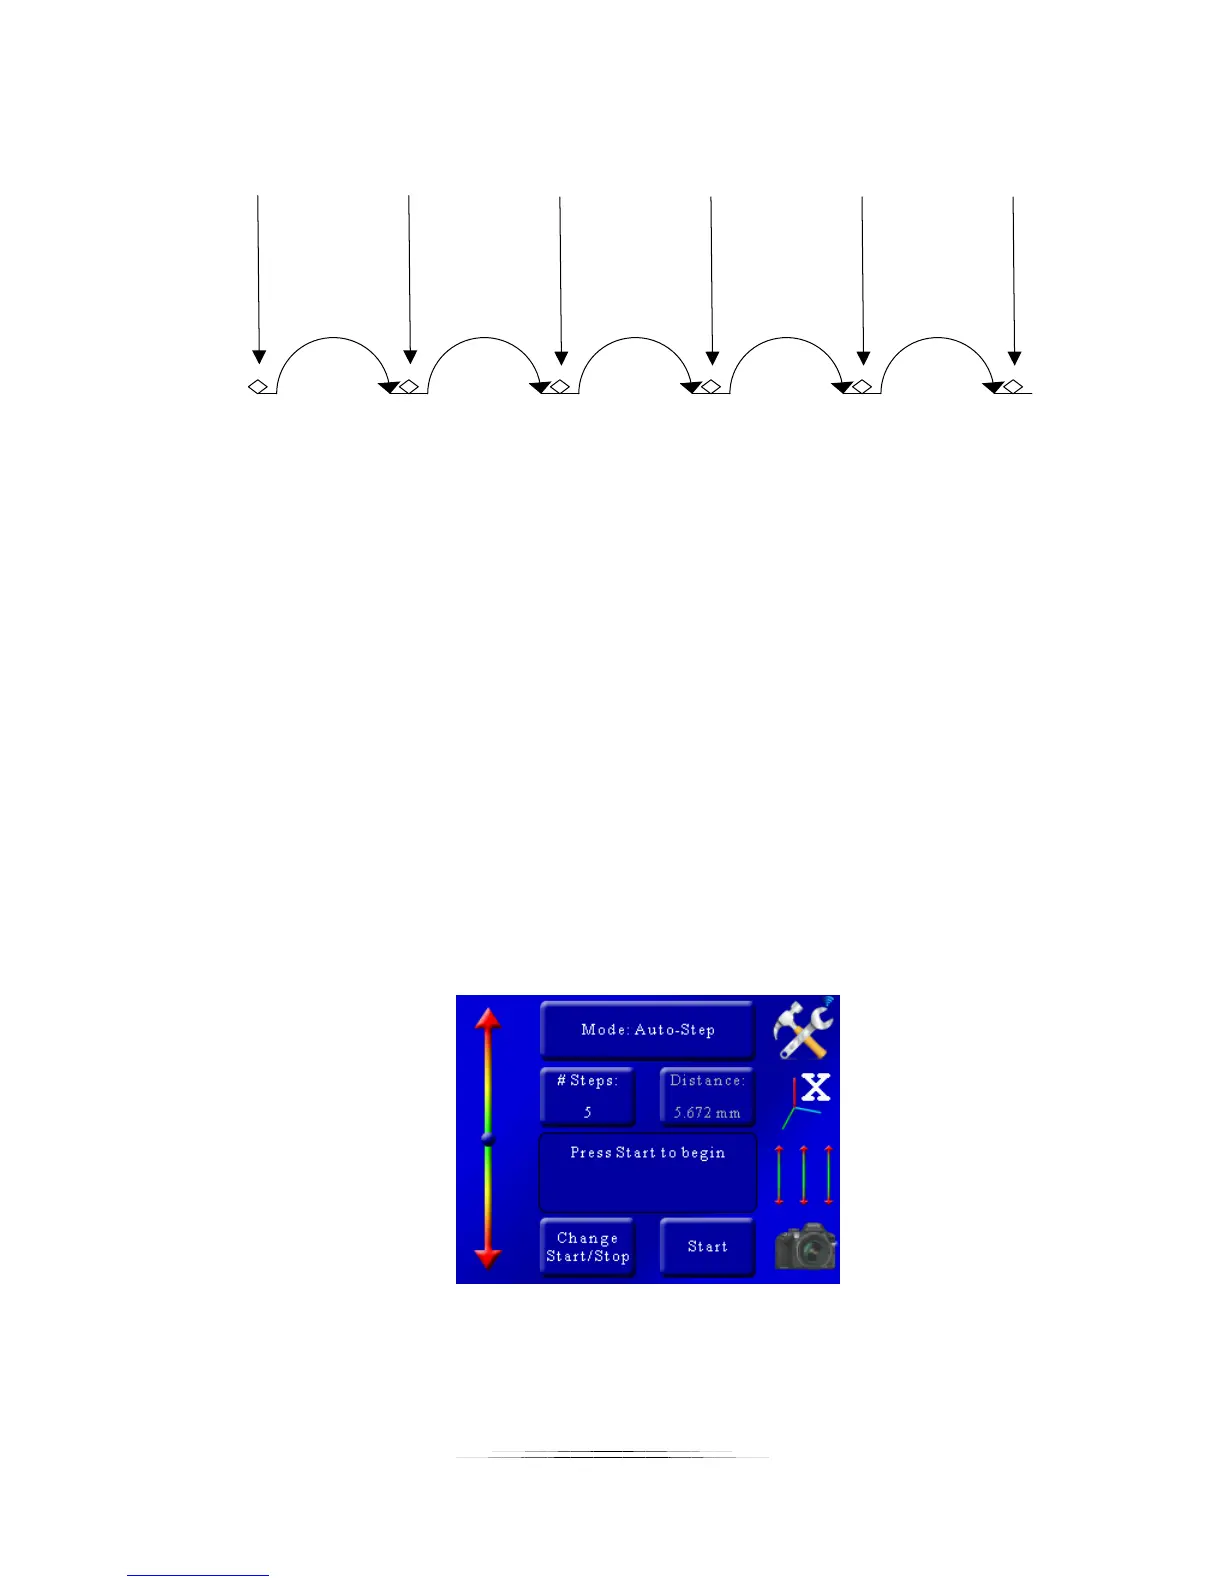
5.1.1.3 Starting the Sequence
Once you have selected the start and end position you’ll see the following screen:
In this example the number of steps was set to five. You’ll notice that the “Distance” button is
grayed out because in Auto-Step mode you choose the number of steps, not the distance. It
does, however, show you the total distance the rail will travel.