43
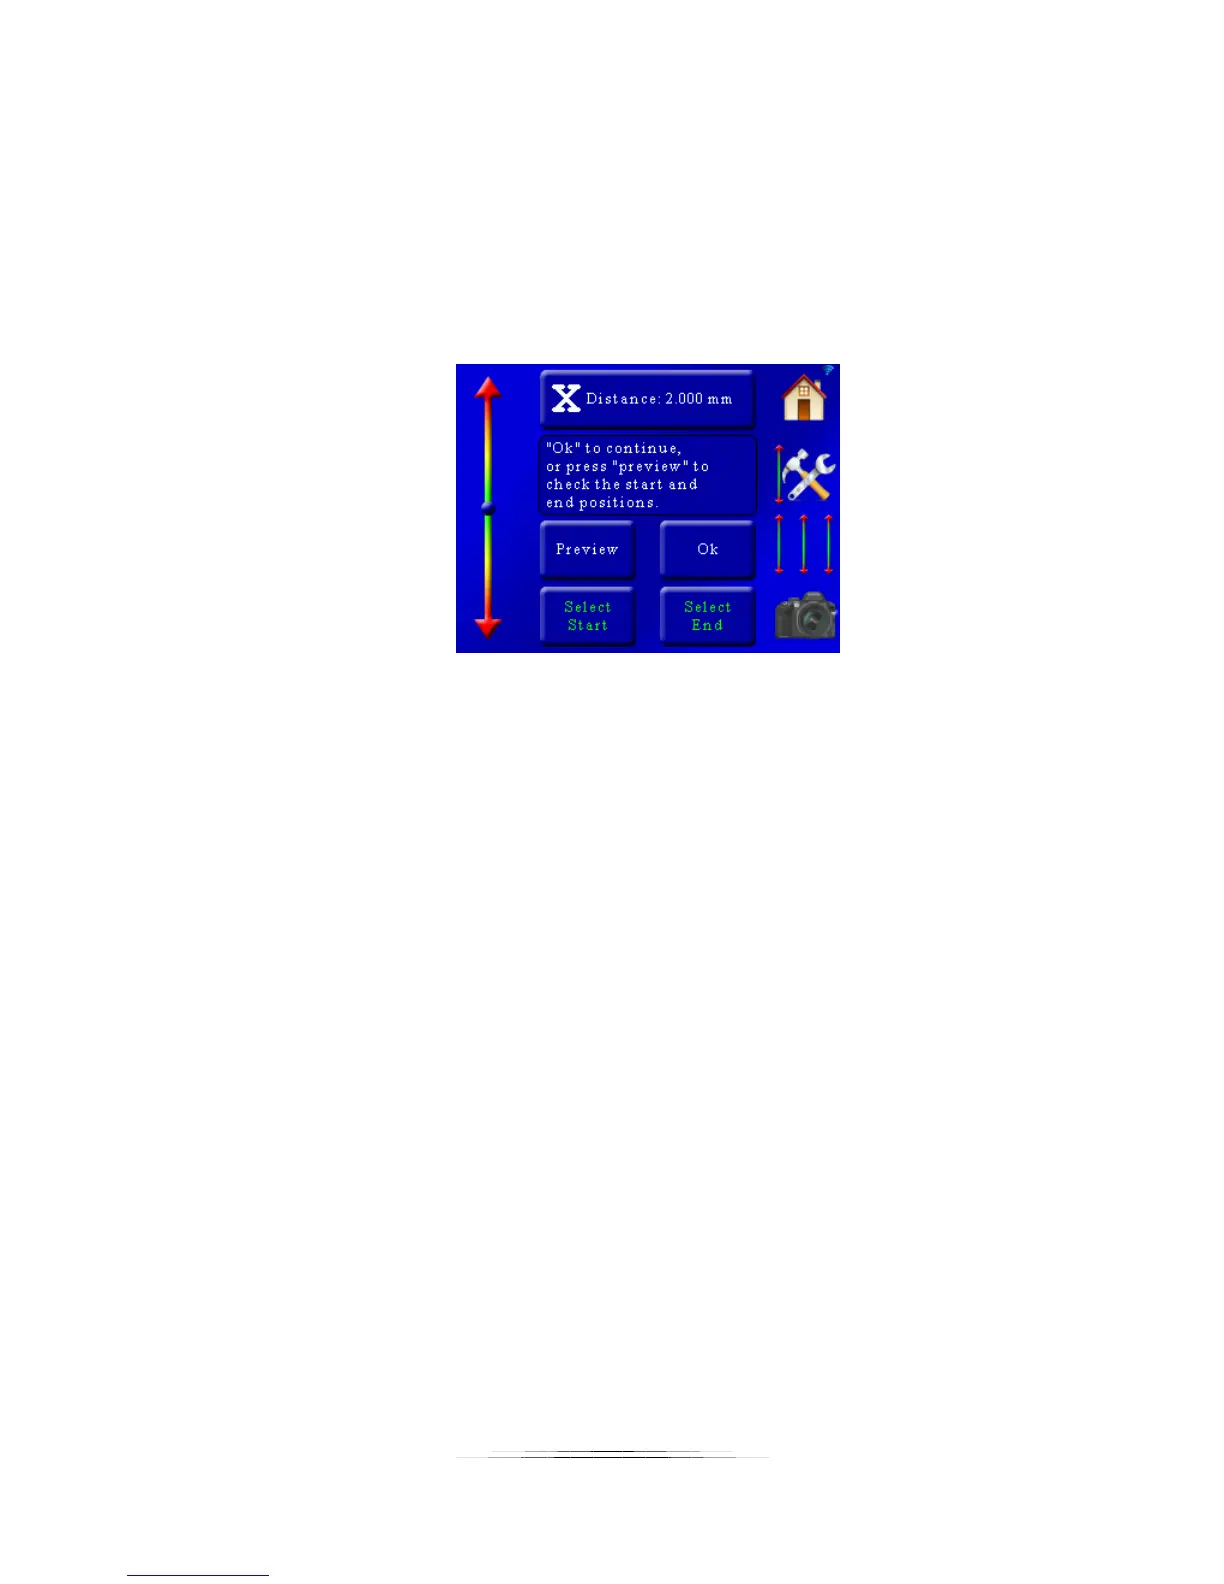
You are also prompted to choose the start and stop position. First let’s choose the starting
position of this stack. Use the slider on the left side of the screen to position the rail at the
starting position of the stack and then press the “Select Start” button. The “Select Start” button
text will turn green.
Next use the slider on the left of the screen to move the rail to the end position of the stack.
Once at the required position press the “Select End” button. It will then turn green indicating
that it is confirmed.
From here you can press “Ok” to return to the main screen. You can optionally press the
“Preview” button. This will take a single picture at the beginning and the end of the stack/scan
to verify your composition. If everything looks good press the “Ok” button.
You can also return to this screen later to adjust the move distance and start/end positions if
needed.
You will also need to set the Y-axis using this exact same process before you can start the
stack/scan.
5.3.2 Starting the X-Y Scan
Once you have selected the parameters for the X and Y-axis in the above section you will see a
screen similar to the following (depending on the distances and parameters you selected):