63
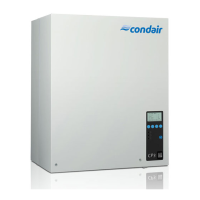
5. Carefullyliftsteamcylinderawayfromthecylinderreceptacle,thenremoveittothefront.
CAUTION!
Putsteamcylinderdowncarefullytoavoiddamagetothelowerconnectionpiece!
Installation
ofthesteamcylinderfollowsthereversesequence.Observe the following:
–
Beforeinstallingthesteamcylinderintheunit,checktheO-ringofthecylinderreceptaclefor
damageandreplaceifnecessary.
– MoistentheO-ringofthecylinderreceptaclewithwater(donotusegreaseoroil),theninsert
steam cylinder into the receptacle and push it down to the stop.
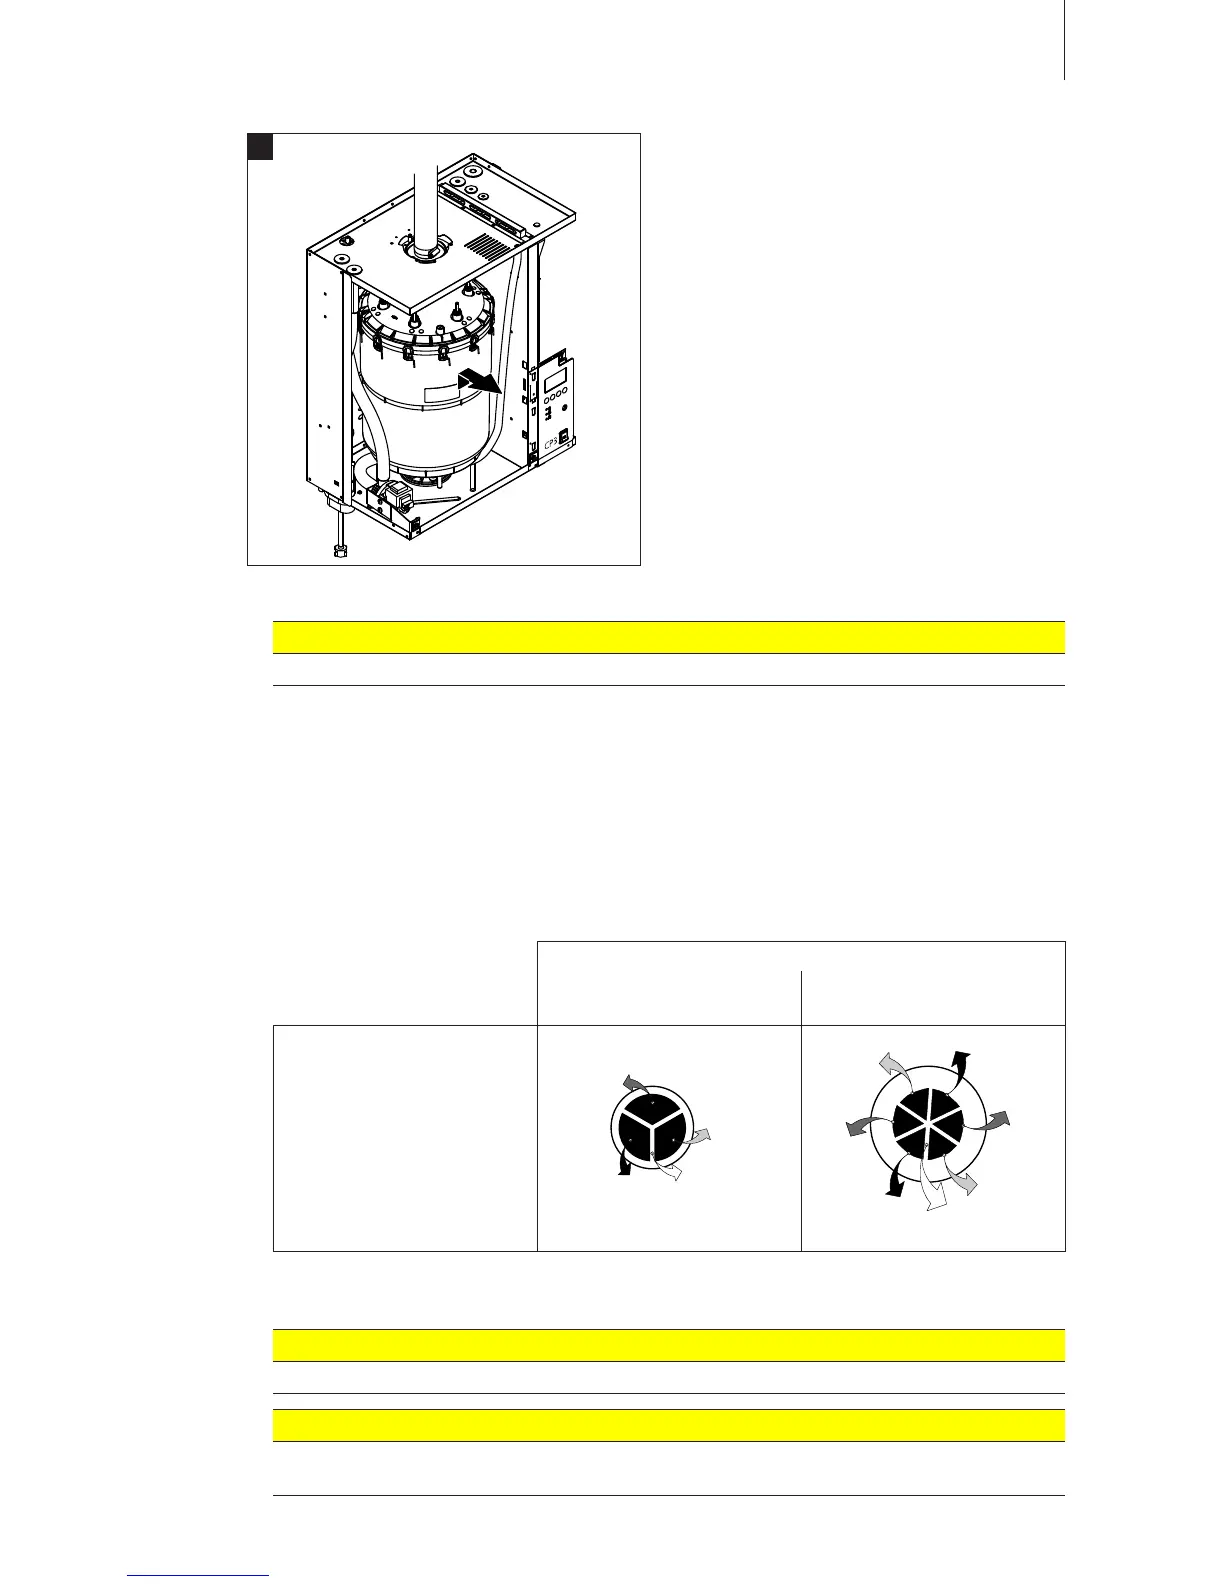
– Attach the electrode plugs and the level sensor plug to the respective electrode and sensor con-
nectionsaccordingtothefollowingtable.
Steam cylinder type
A363 / D363
A464 / D464
A664 / D664
A674 / D674
Cableconguration
5
Sensor
white
brown
red
black
Sensor
white
brown
red
black
brown
red
black
– Fastensteamhoseontheconnectorintheunitcoverandonsteamconnectorofthecylinder
with hose clamps.
CAUTION!
Aleakysteamhosecancausedamageduetomoistureinsidetheunit.
CAUTION!
Theoutletconnectorofthesteamcylinderismadeofplastic.Do not overtighten the hose
clamponthesteamconnectorofthesteamcylinder.