Scanning 45
Book scanning using Nextimage
Book scanning using Nextimage
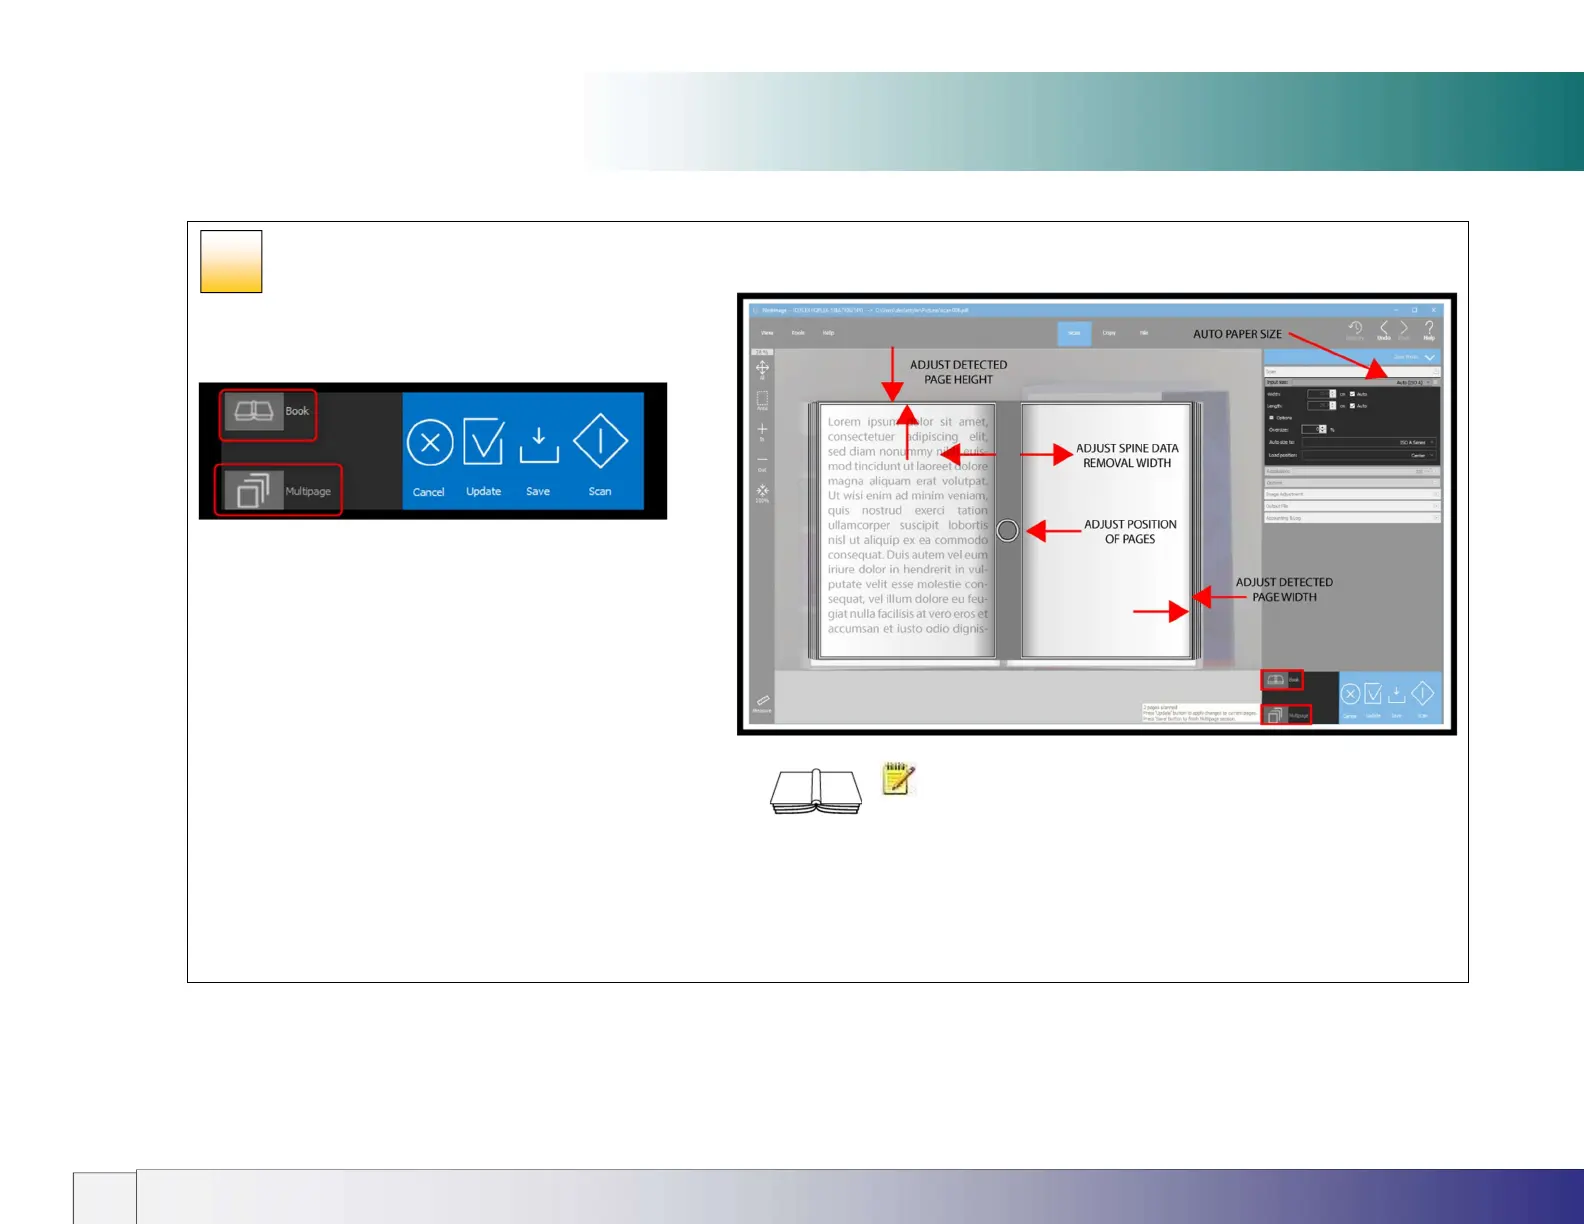
In Nextimage click the Book icon. The icon will change to a gray
background. Choose Multipage if required.
Now place the book face-down on the scanner glass with the
book spine in-line with the white arrow and book icon along the
lower edge of the scan area. Set the NI input size for Auto. Now
lower the lid and press the scan button.
Nextimage will attempt to automatically determine the size of the
combined pages on the scanner. Adjust the crop boundaries,
spine removal width and position of the scan if necessary then
click Update. To finish a multipage session click Save.
A single scan wil display in Acrobat as two separate pages when
Multipage is selected.
When Nextimage is used with IQ FLEX no user input is required
at the scanner display. During Nextimage scanning the scanner
display will show ‘Scanner used by IP xxx.xxx.xxx.xxx.
NOTE: Thick books can be accommodated in the scanner by raising
the lid hinges before lowering the lid. This will ensure the scanner white
background remains parallel with the object to be scanned and operates to prevent
light from outside and spoiling the scan.
37