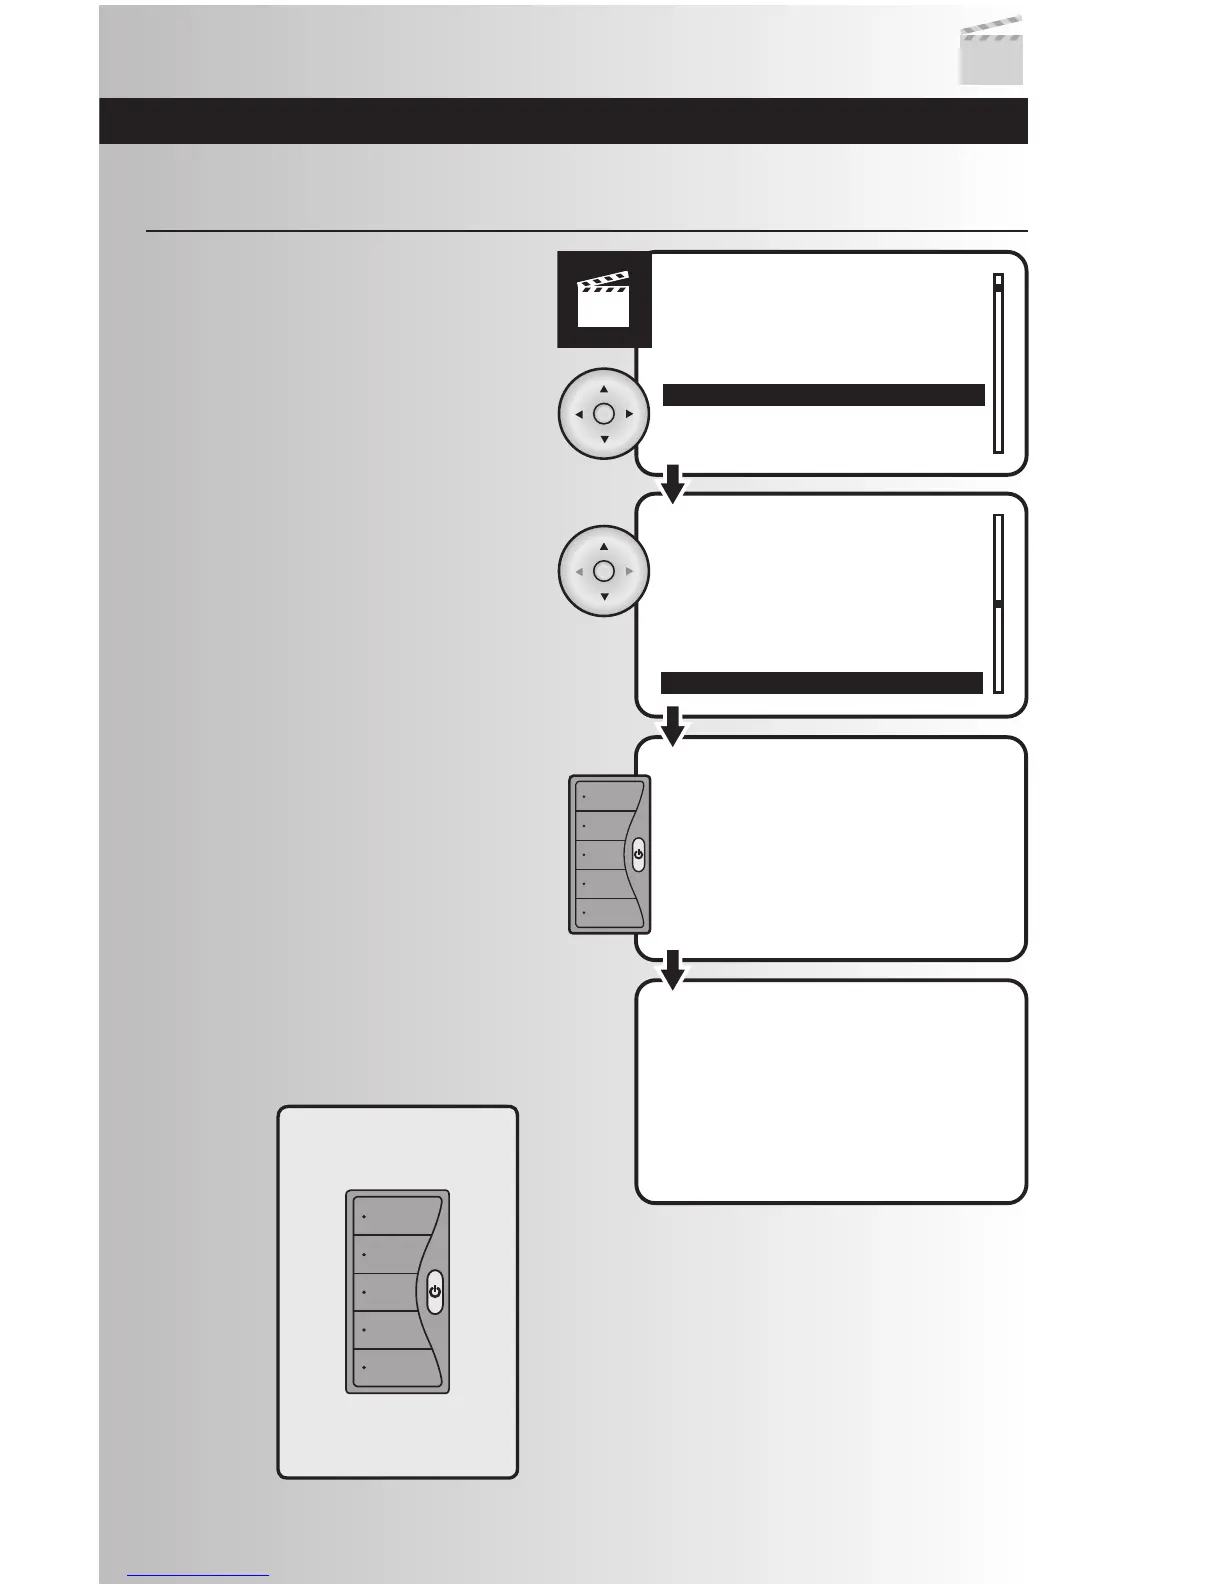
1. Select the “Transfer to WDC” option from the
Scenes menu. Press the OK button.
Transfer a Scene to Wall Mount Controller
2. Use the up or down arrows and scroll to
highlight the scene to be transferred. Press
the OK button.
3. Press and hold the desired scene button on
the Cooper scene controller for approximately
5 seconds. A LED on the scene controller will
flash when it is receiving information.
Release the button.
4. A window will momentarily display a
message saying that the operation was
successful. The LED on the Scene controller
will also continue to blink for a few seconds.
When the LED stops blinking the process is
complete.
39
Wall Mount
Scene Controller