Getting Started
Chapter 2 15
Introduction
This chapter covers basic information for configuring the Digi CM. Included in
this chapter is information on assigning IP settings, enabling the web interface
for secure access, accessing the unit through SSH, and adding or removing
users. The default IP address for the Digi CM is 192.168.161.5.
Assigning IP Settings
The initial setup of the Digi CM, including attaching it to the network, is
described in the Quick Start Guide included with the product packaging. A
copy of the Quick Start Guide is also available online at http://cm.digi.com. The
Digi CM can also be assigned IP settings through the console port located on
the rear panel. To use the console port to assign IP settings, do the following:
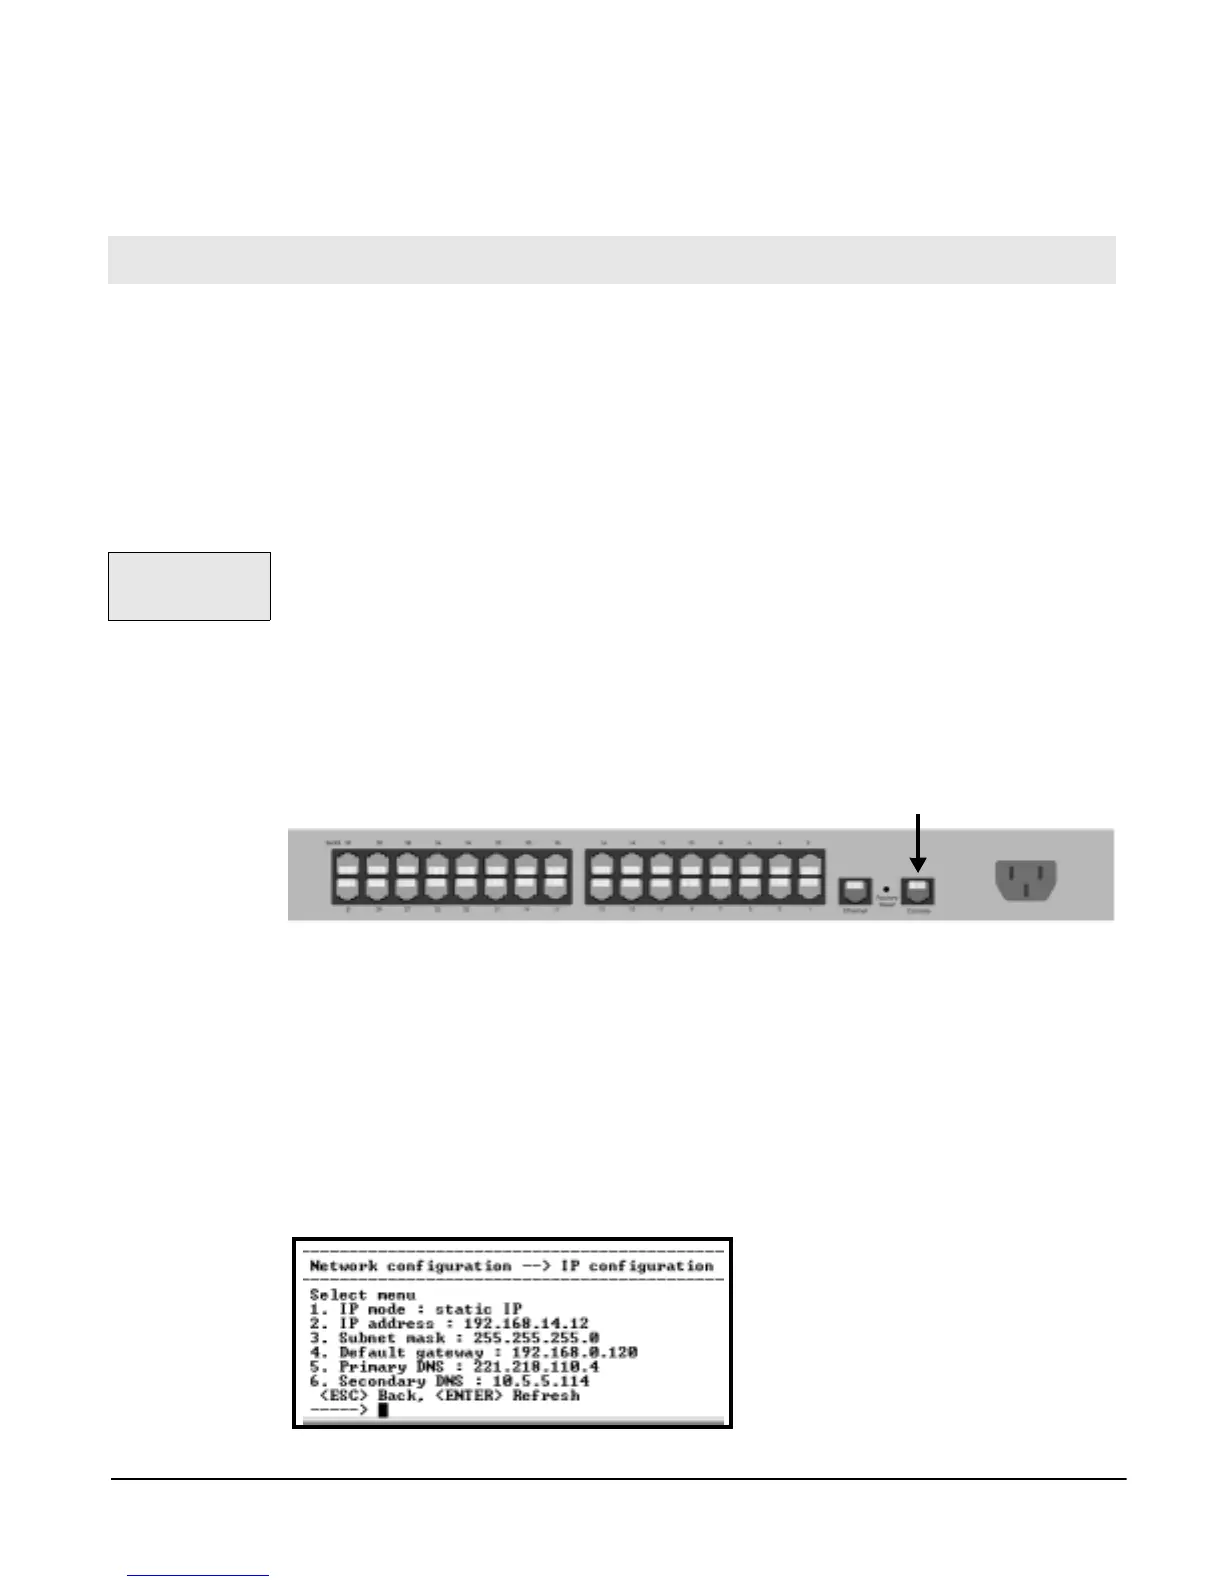
1. Connect the Ethernet cable from the console port on the rear panel of the
Digi CM to a serial port on a workstation. Use the Ethernet cable packaged
with the Digi CM and attach the DB-9 adapter. The arrow in the following
graphic points to the console port.
2. Setup a terminal emulation program, such as HyperTerminal, using the
following port parameters: bps=9600, data bits=8, parity=none, stop bits=1,
and flow control=none.
3. Press Enter to get a command prompt.
4. The username is admin and the default password is admin.
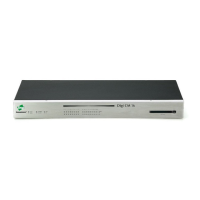
5. From the configuration menu, enter the number 1 for Network configuration
> enter 1 for IP configuration > enter the numbers for the individual IP set-
tings when the following menu is displayed.
.
Chapter 2
Getting Started
The default IP
address is
192.168.161.5.
console port