Installation and Setup WinAQMS Mini DAS User manual 1.0
6
3. In the "Local Polices" section double-click on "User Rights
Assignment"
4. Find "Log on as a service" and double click on it.
5. Click on "Add User or Group", click on "Advanced", click on
"Find Now"
6. Select the WinAQMS user from the group then click on "OK",
click on "OK" and click on "OK" again.
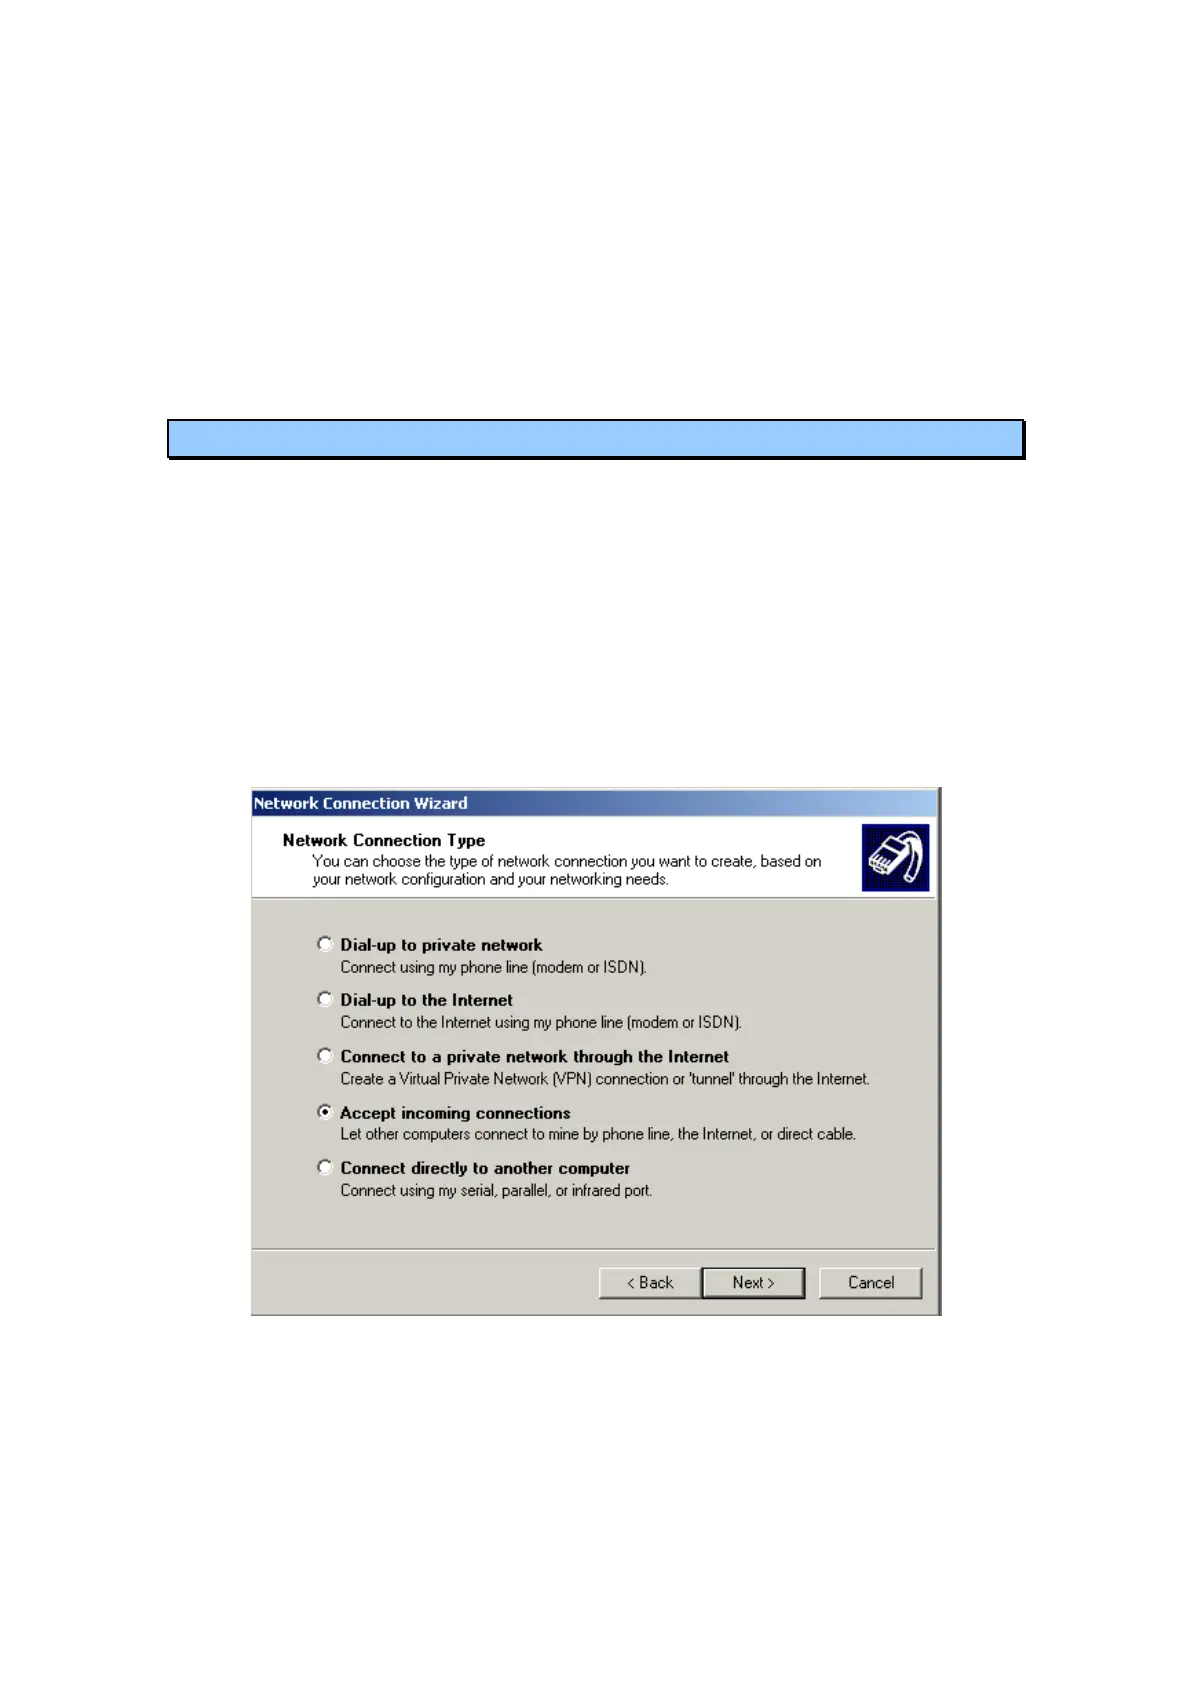
2.2 Setting Windows XP to accept dialup connections
Windows XP can be set to automatically answer a dialup connection request through
a modem, but a modem must be installed on the WinAQMS Mini DAS to allow this
to occur. To accept incoming connections click on Start, Settings, Control Panel. This
will open the control panel window. Double click on the Network and Dial-up
Connections (Network Connections in Windows XP) and then on Make New
Connection (New Connection Wizard in Windows XP). The Network Connection
Wizard will start. Click on Next to proceed with making a new connection. In the
Network Connection Type window choose Accept Incoming Connections (or Set up
an advanced connection, hit next, then choose Accept Incoming Connections in
Windows XP) as shown in Figure 6 below and click on Next.
Figure 6 Adding a modem dialup support to Windows 2000.
You will then see a window similar to Figure 7 below asking you to choose the device
to accept the incoming connection. Choose the modem you have installed and click on
Next.