Installation and Setup WinAQMS Mini DAS User manual 1.0
8
Figure 9 Setting the incoming connection properties
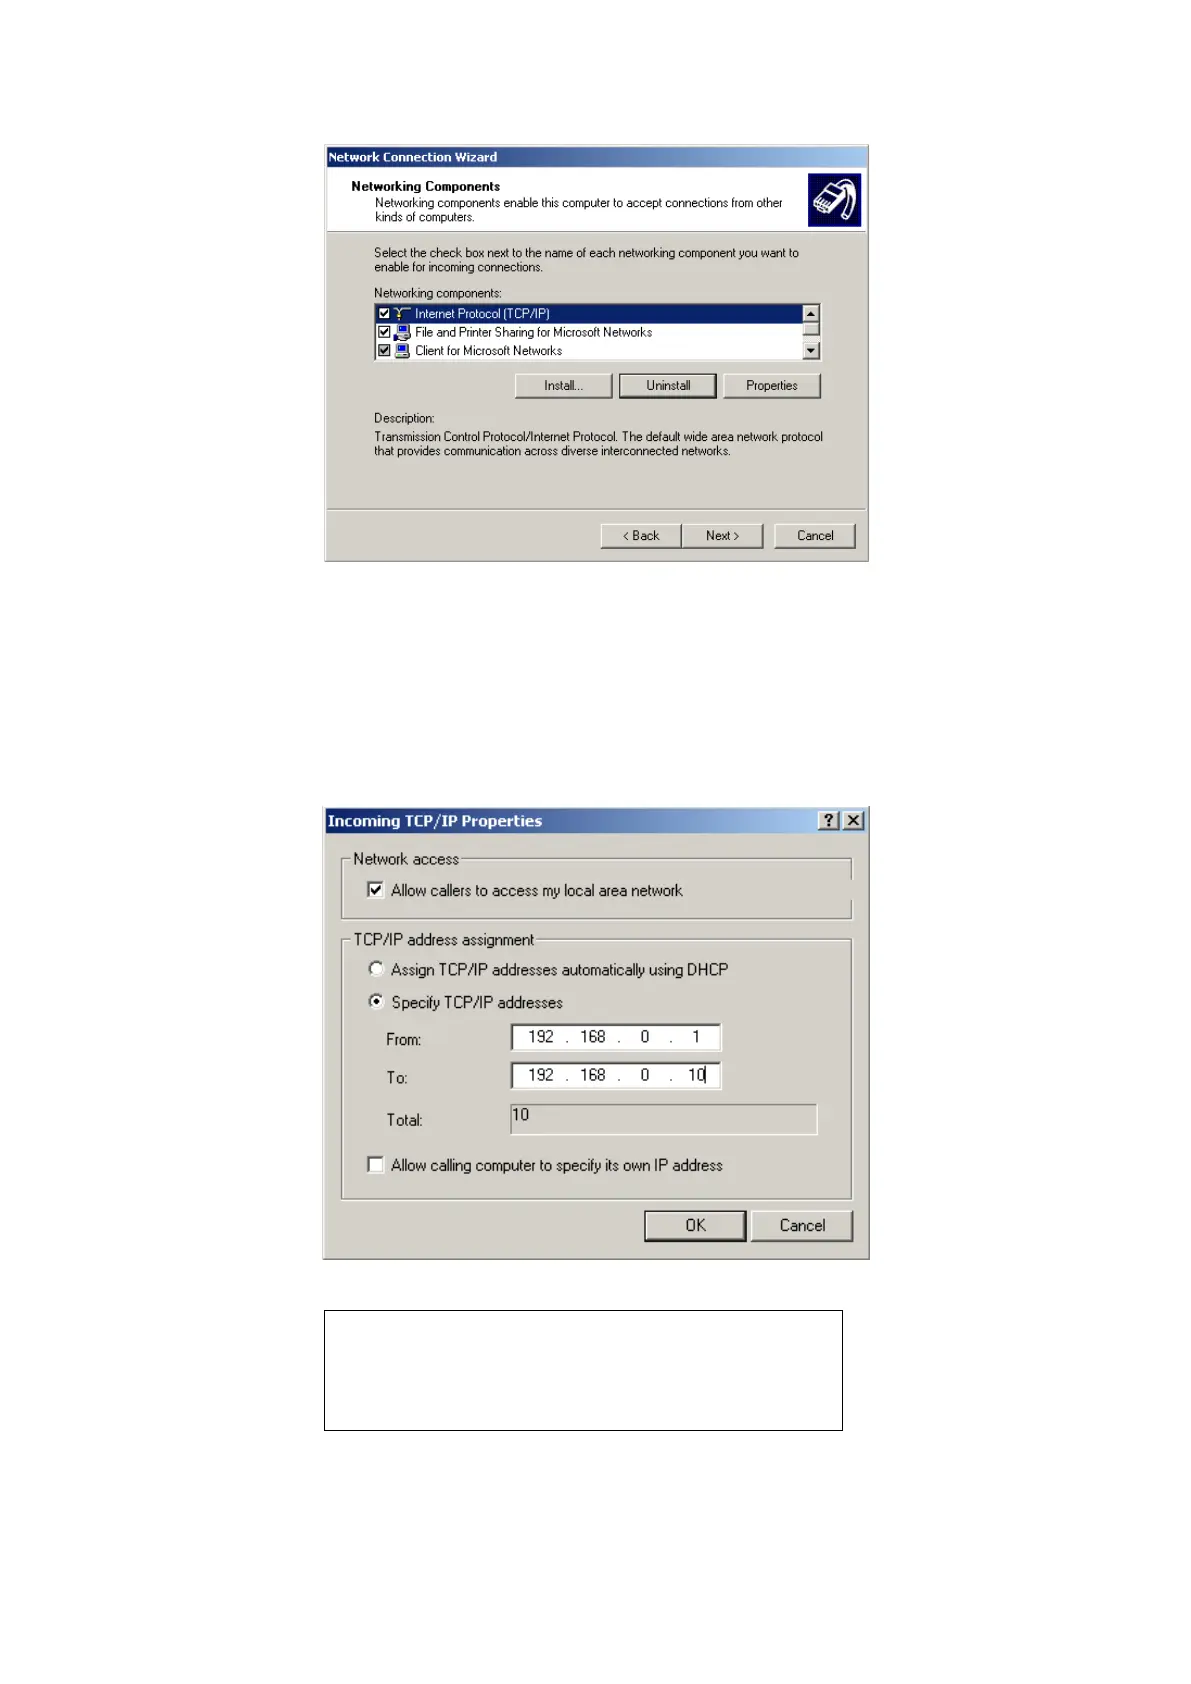
In the TCP/IP properties window select the specific TCP/IP addresses and set the
range from 192.168.0.1 to 192.168.0.10 as shown in Figure 10. Click OK and then
Next.
All that remains is for the Incoming connections to be named and then the process is
finished.
Figure 10 Setting the incoming connection IP addresses.
Note: The TCP/IP range 192.168.X.X (also 10.X.X.X)
will not appear on the internet and can be safely used
for local area networks. When dialing in to a WinAQMS
Mini DAS it will always assign itself the IP address
shown in the “From” field of Figure 10.
Go to the Control Panel and double click on Users Accounts as shown in Figure 5.
Click on the Advanced tab, click Advanced in the Advanced User Management. In