DCM00002 REV. 16 65
5.23 Teach Mode Setup Screen
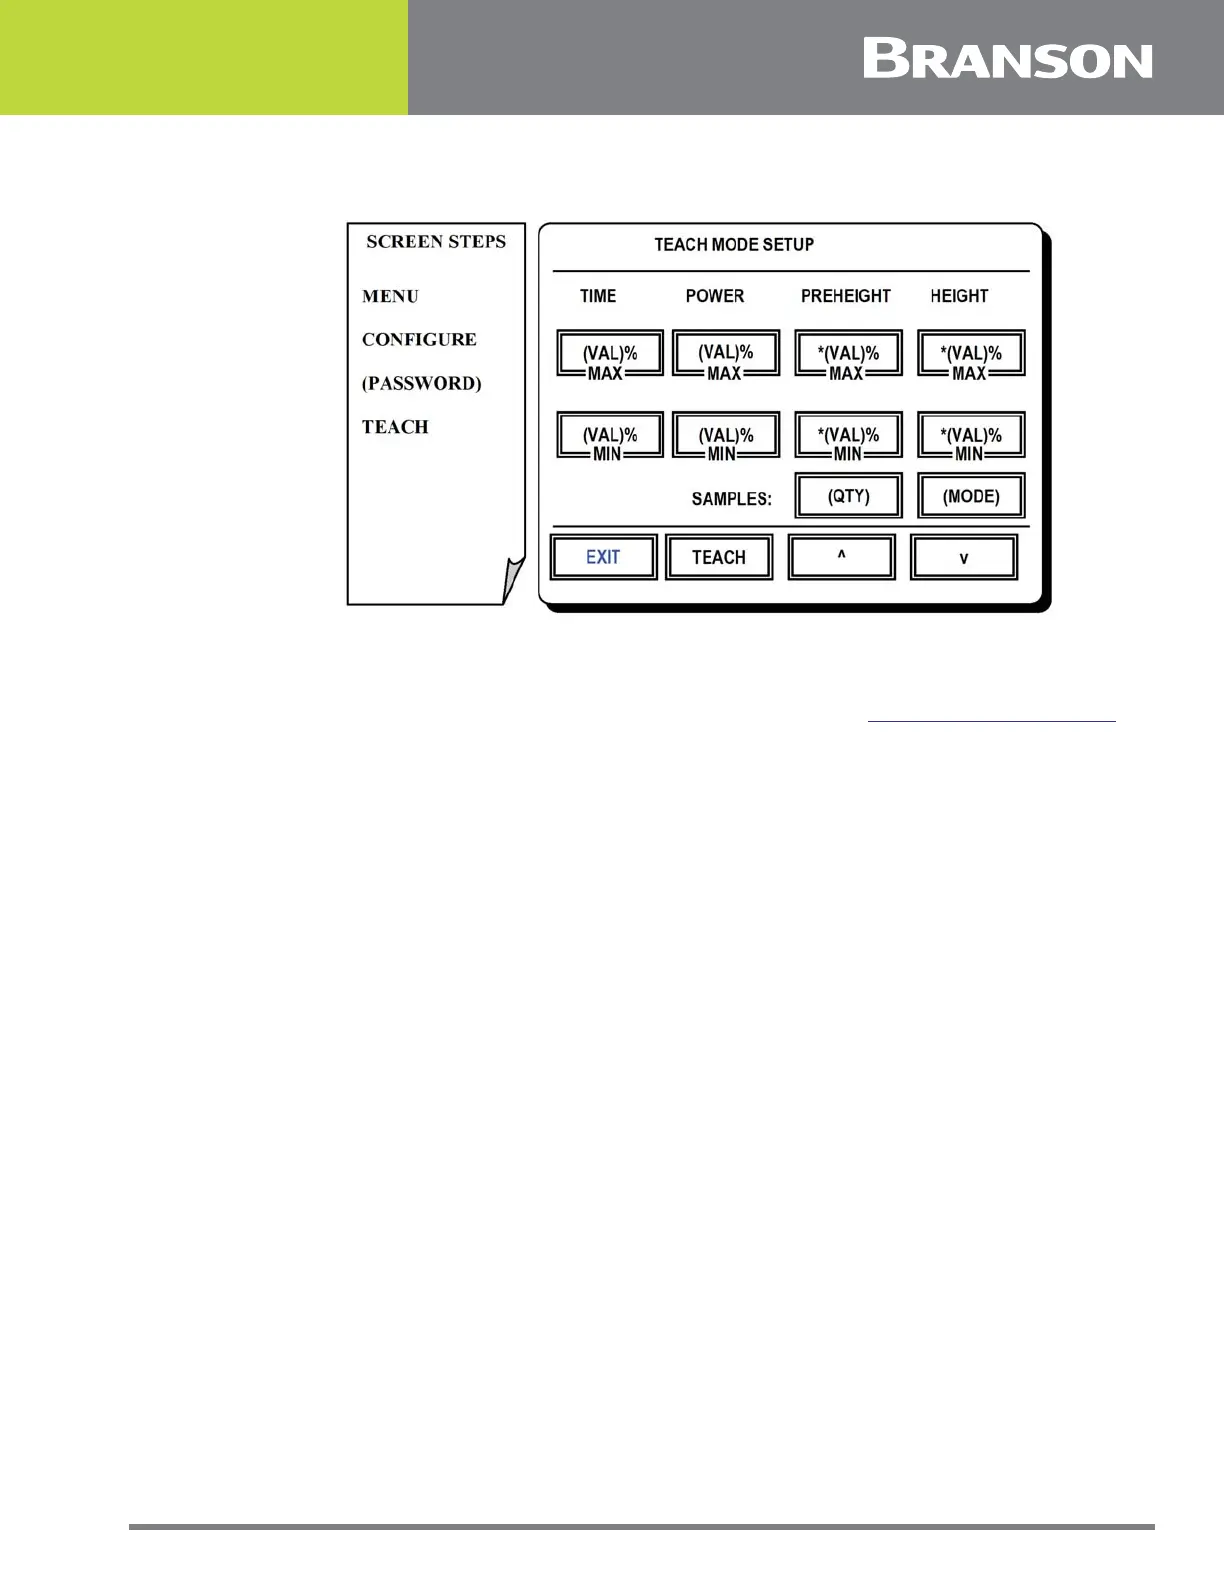
Figure 5.22 Teach Mode Setup screen
Teach Mode Setup Screen
The teach feature may be used to establish weld limits (see 5.15 Weld Limits Screen for
reference) from a series of sample welds made by the user. Upon successful completion of
the sample set the controller does the following:
• Calculates average values for Time, Power, Preheight and Height variables
• Factors the allowable min/max deviation percentages as entered in this screen
• Uses the resultant values to create the weld limits
There are two teach modes available as means to do sampling. The mode in use will be
displayed at the top of this screen. These modes area as follows:
In the Standard Teach Mode the user may accept or reject each weld as part of the sample
set. The button to accept the samples will appear to the right of the TEACH button on the
Run Screen. Sample sets of 1 to 50 may be used.
In the Auto Teach Mode the user may not reject samples. Instead, the first five welds form
a basis using the averaged values for Time, Power, Preheight and Height. A plus or minus
ten percent tolerance is added to these averages which are used to evaluate the
acceptability of the remaining samples. If a remaining sample falls outside of this range it
is rejected and an alarm occurs. A teach session may encounter up to three errors in the
first 15 welds made after which the sampling must be started over. Once completed the
preset must be saved. When the preset is recalled again the controller will use the saved
quality windows for the first five welds, after the first five welds are made, the controller
will recalculate the windows to plus or minus ten percent and follow the same routine as
stated above for the auto teach mode. Auto Teach mode will automatically reactivate
when you change any of the weld parameters, quality windows or recall a new preset.
Once the teach mode sample size and variation criteria has been established, a sample
run may be initiated by pressing the TEACH button on this screen or on the Run Screen.
 Loading...