Troubleshooting Proline Promag 53 MODBUS RS485
114 Endress+Hauser
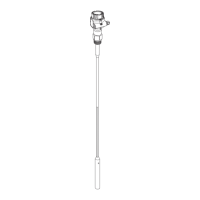
Removing the electrode Fitting the electrode
1 Release the socket head cap screw (1) and remove
the cap.
1 Insert the new electrode (5) from underneath into
the retaining cylinder (7). Ensure that the seals at
the tip of the electrode are clean.
2 Unscrew the electrode cable (3) secured on the
rotary handle (2).
2 Attach the rotary handle (2) to the electrode and
secure with the locking bolt (8).
"
Caution!
Ensure that the coil spring (11) is inserted to
guarantee perfect electrical contact and thus correct
measuring signals.
3 Release the knurled nut (4) by hand.
This knurled nut serves as a counter nut.
3 Pull the electrode back until the tip is no longer
protruding from the retaining cylinder (7).
4 Unscrew the electrode (5) using the rotary handle
(2). It can now be pulled out of the retaining
cylinder (7) up to a defined point.
#
Warning!
Risk of injury!
The electrode can bounce back to its stop under
process conditions (pressure in the pipe). Exert
counter pressure against it when releasing.
4 Screw the retaining cylinder (7) onto the ball valve
housing (9) and secure tightly by hand.
The seal (10) at the retaining cylinder must be fitted
and clean.
!
Note!
Ensure that the rubber hoses attached to the
retaining cylinder (7) and stop cock (6) are the same
color (red or blue).
5 Close the stop cock (6) after you have pulled out the
electrode as far as it will go.
#
Warning!
Do not open the stop cock after this to ensure that
no fluid comes out.
5 Open the stop cock (6) and screw the electrode as
far as it will go into the retaining cylinder using the
rotary handle (2).
6 You can now unscrew the entire electrode with the
retaining cylinder (7).
6 Now, screw the knurled nut (4) on the retaining
cylinder. This secures the electrode in position.
7 Remove the rotary handle (2) from the electrode (5)
by pushing out the locking bolt (8). Ensure that you
do not lose the coil spring (11).
7 Secure the electrode cable (3) on the rotary handle
(2) once more using the socket head cap screw.
"
Caution!
Ensure that the socket head cap screw of the
electrode cable is securely tightened. This
guarantees perfect electrical contact and thus correct
measuring signals.
8 Now replace the old electrode with the new one.
You can order replacement electrodes separately
from Endress+Hauser
8 Refit the cover and tighten the socket head cap
screw (a).
 Loading...
