Maintenance
Eppendorf Xplorer
®
/Eppendorf Xplorer
®
plus
English (EN)
69
7.4 Replacing O-rings
The 100 µL, 300 µL and 1 200 µL multi-channel lower parts are equipped with O-rings.
They are wear parts. Replace old, worn or damaged O-rings. Defective O-rings cause the
incorrect positioning of the tips and dispensing errors.
7.4.1 Removing the O-ring
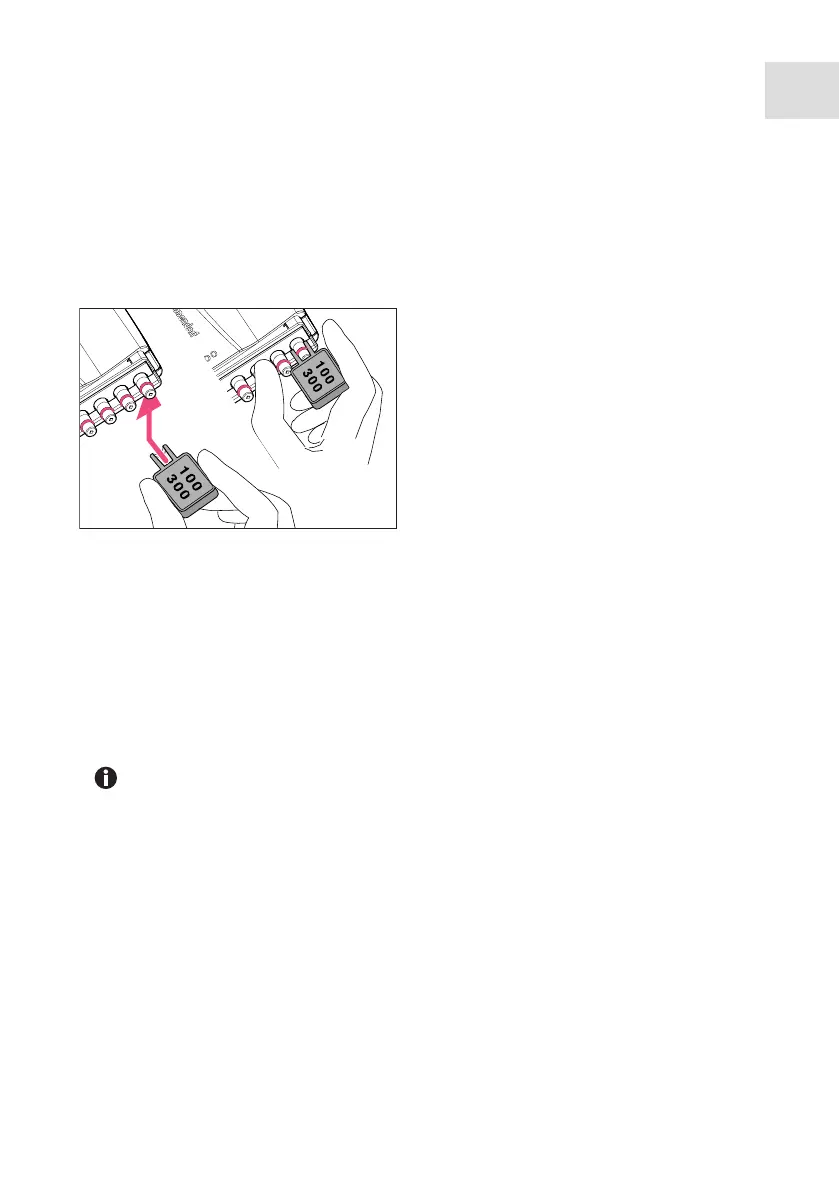
1. Push the opening of the multi-channel tool (included in the delivery package) against
the tip cone from the side so that the sharp edge in the opening of the multi-channel
tool is on top of the O-ring. Do not slide the multi-channel tool onto the cone! The
figure shows the multi-channel tool for 100 µL and 300 µL. A separate multi-channel
tool is available for 1 200 µL.
2. Supporting the multi-channel tool with your thumb, push it firmly against the tip cone.
The O-ring is cut at one location.
3. Remove the multi-channel tool and the O-ring from the tip cone.
7.4.2 Mounting a new O-ring
1. Fit the assembly aid (shortened pipette tip, included in the O-ring delivery package) on
the tip cone.
2. Push the new O-ring over the tip and onto the tip cone.
3. Check that the pipette tips are correctly positioned. Ensure that the tips are tightly
sealed and properly aligned.
The assembly aid is only required for 100 µL and 300 µL multi-channel lower
parts (smaller O-rings) and is therefore not included with the O-rings for
1200 µL.