L1800 Revision A
Disassembly And Assembly Disassembling the Printer Mechanism 83
Confidential
9. Remove the two C.B.S. M3 x 6 screws that secure the Ink System Unit.
Figure 3-112. Screws that Secure the Ink System Unit
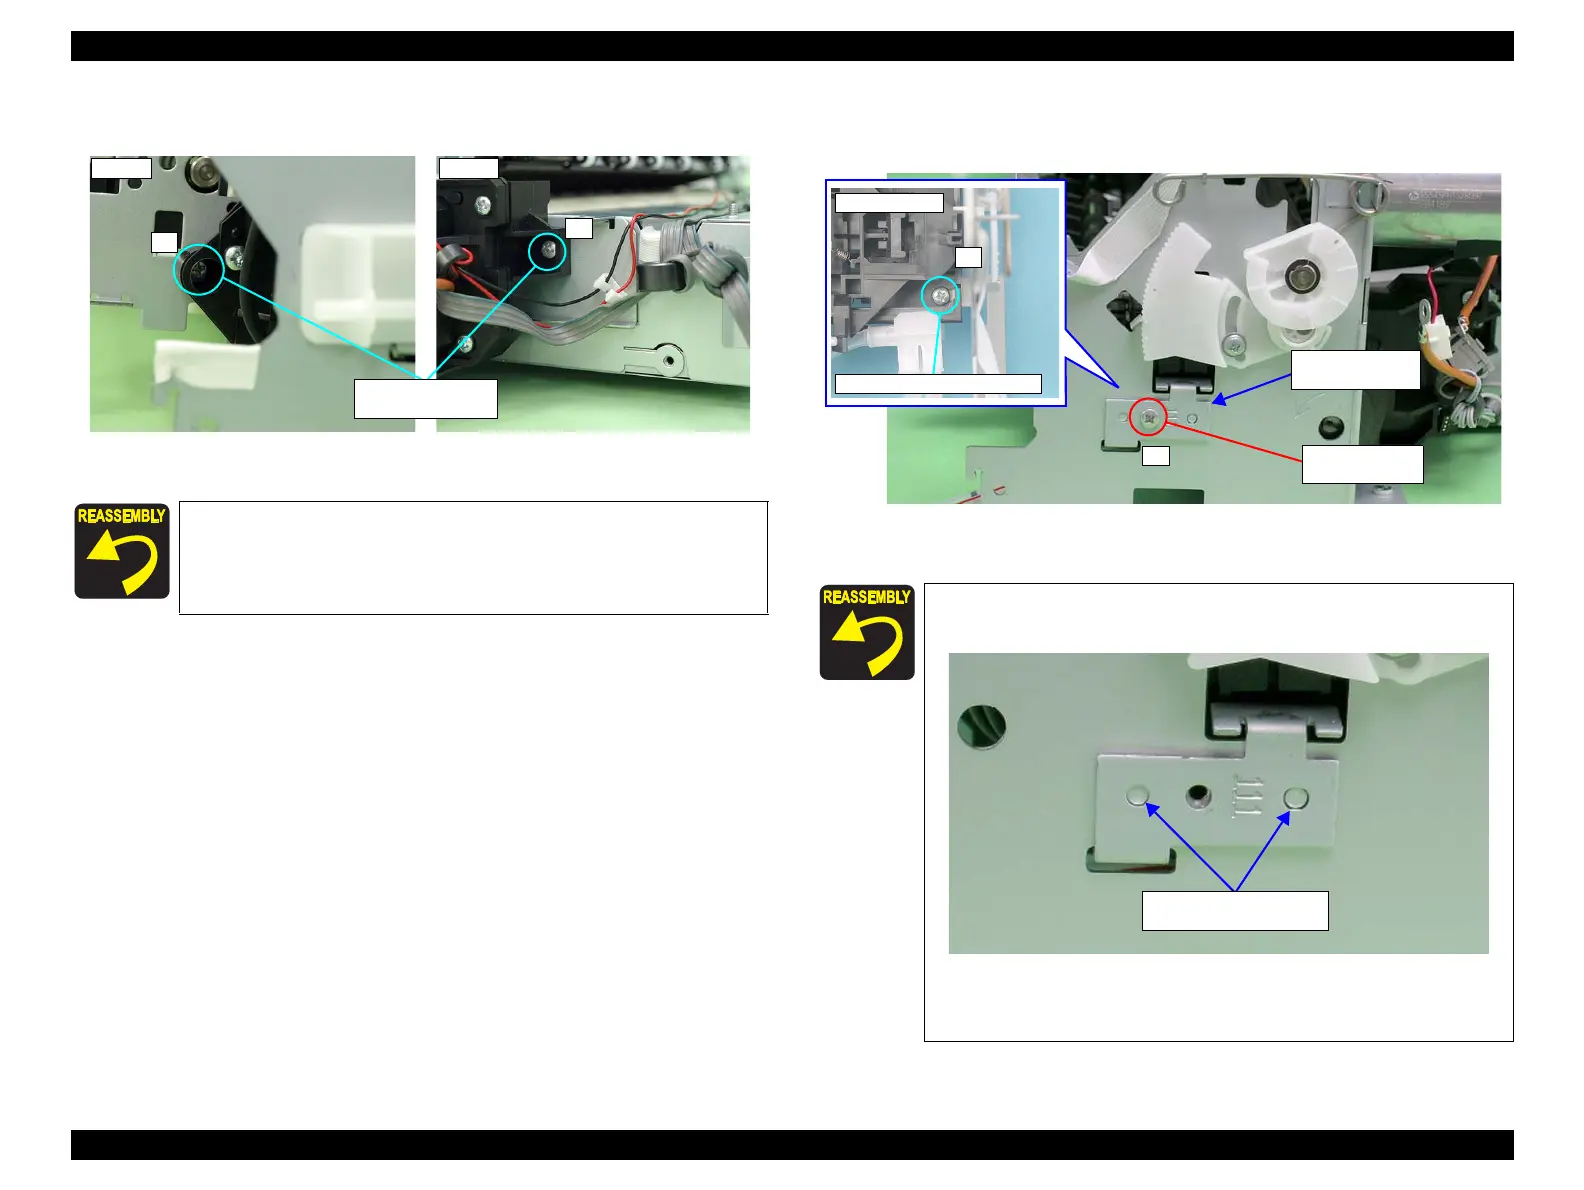
10. Remove the two C.B.S. 3x6 screws that secure the Right Support Frame, and
remove the Right Support Frame from the Main Frame.
Figure 3-113. Removing the Right Support Frame
Tighten the screws in the order shown in Figure 3-112
2) C.B.S. M3x6
(8±1 kgf.cm)
Align the positioning holes on the Right Support Frame with
the guide pins on the Main Frame.
Figure 3-114. Installing the Right Support Frame
Tighten the screws in the order shown in Figure 3-113.
2
Upper surface
2) C.B.S. M3x6 (8±1 kgf.cm)
1
2) C.B.S. M3x6
(8±1 kgf.cm)
Right Support
Frame
Positioning holes and
Guide pins

 Loading...


