SMP111 • Web-Based User Interface 35
NOTE: The front panel buttons also indicate the recording state, mirroring the
AVControls panel indicators (see Front Panel Features on page 16).
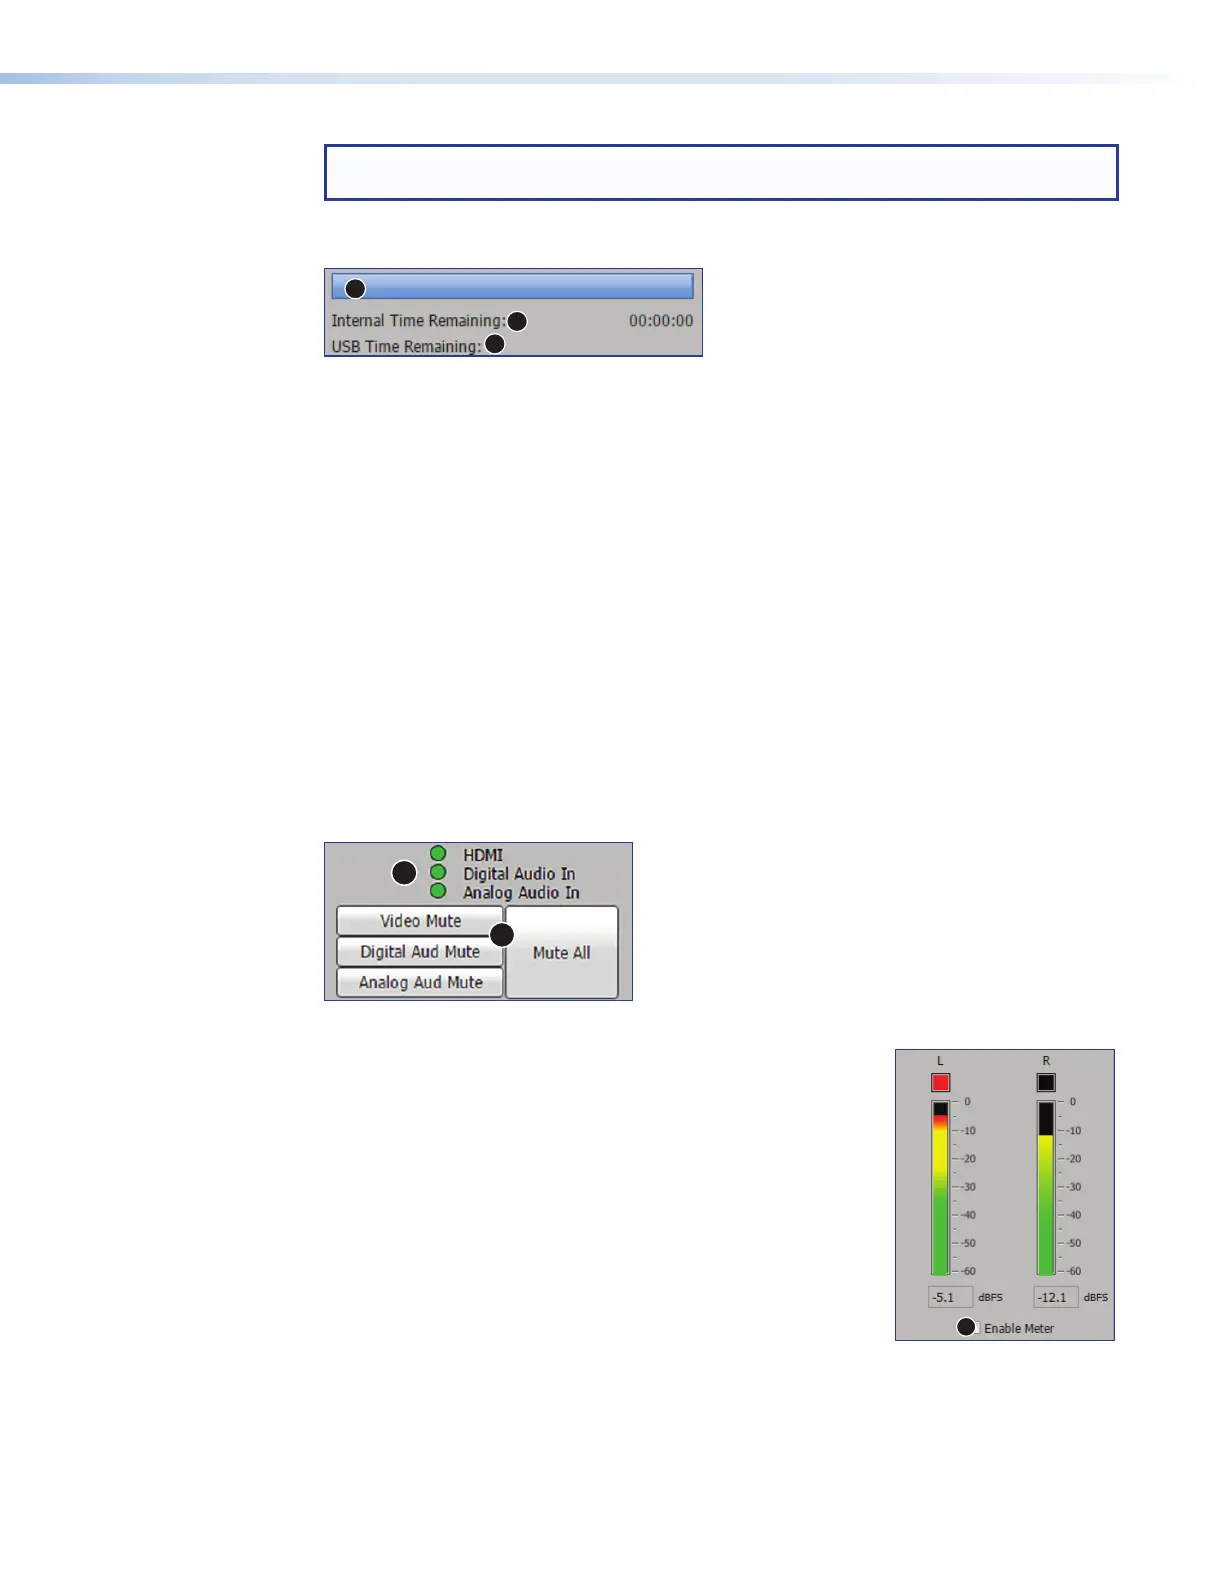
Progress bar
1
2
3
Figure 14. Progress Bar and Record Time Available
A progress bar (see figure 14,
1
) below the recording control buttons is a horizontal bar
graph that shows how much recording time has elapsed. Initially, the progress bar shows a
five minute duration. The displayed duration increases in five-minute increments as the ad
hoc recording progresses.
Recording time available
Recording time remaining (
2
) is indicated below the progress bar in the format
HHH:MM:SS. The estimate of how much time remains available is based on the
combination of available storage space and the current stream resolution and bit rate.
During an ad-hoc recording, the calculated time is displayed.
If secondary recording mode is enabled, the remaining time is listed first for the
internal storage drive and then for the selected secondary external USB drive (
3
,
132:46:27*00:03:44, for example).
Mute controls, video and audio indication LEDs
HDMI video can be configured for digital audio (embedded in HDMI) or a shared analog
input. The three LEDs indicate an HDMI signal and the audio types selected
(see figure 15,
1
).
1
2
Figure 15. Active Inputs, Mute, Audio, and Auto-image
Mute buttons — Click the desired button (
2
) to mute video only
(Video Mute), digital audio only (Digital Aud Mute), analog
audio only (Analog Aud Mute), or both audio and video (Mute
All).
When a mute mode is selected (active), the corresponding button
or buttons are red. Click the buttons to toggle mute status, use
the front panel controls, or send SIS commands to the unit via
RS-232 or USB control.
When unmuted, the button changes from red to gray.
Audio Output Meter — Left and right channel indicators display
the audio output level (in dBFS) when there is an active audio
output. The boxes at the top of the meters are red when audio
clipping occurs and black when audio is not clipped. To enable the meters, select (check)
the Enable Meter checkbox (
1
) below the meters.
figure 14
figure 15
1