72 FCP-300/FCP-300ECS Manual — P/N LS10145-002FK-E:A 3/12/2021
Fike and SWIFT SLC Device Installation Addressing the Fike SLC Devices
7.5 Addressing the Fike SLC Devices
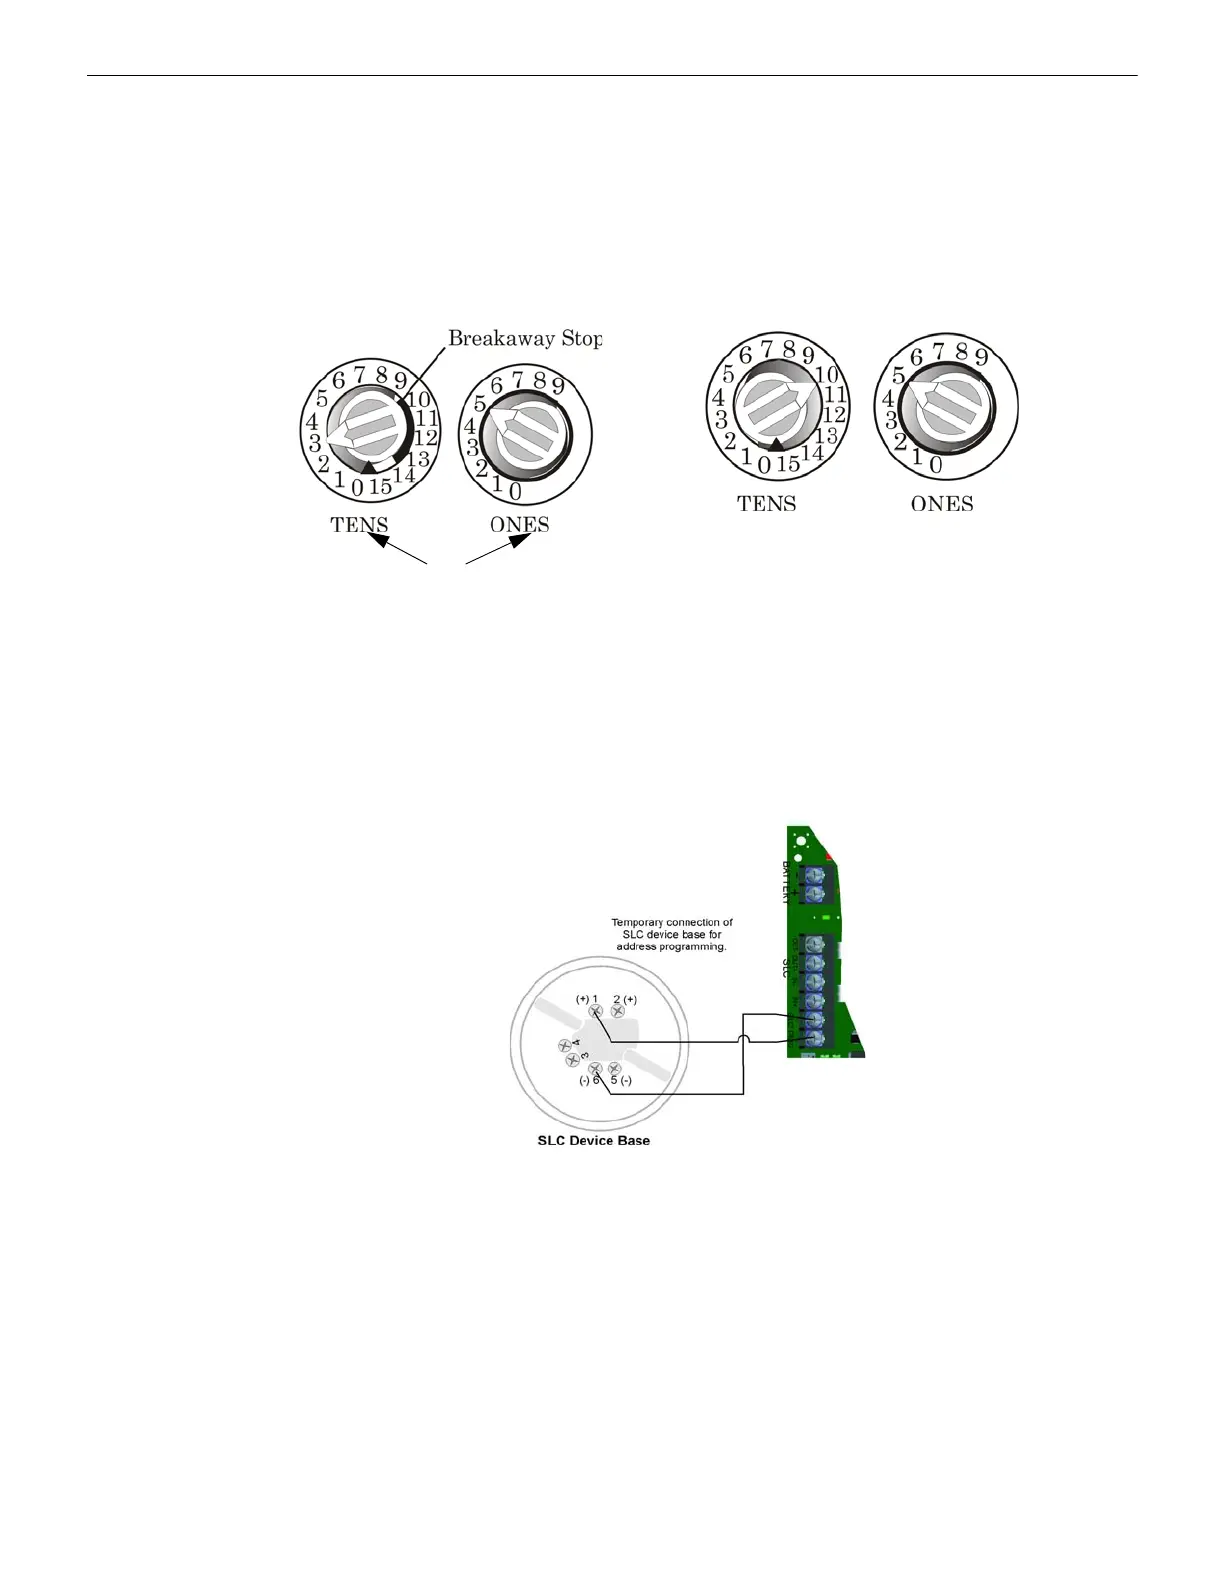
All devices are addressed using the two rotary dials that appear on the device board. Use the ONES rotary dial to set the ones
place in a one or a two digit number, and use the TENS rotary dial to set the tens place in a two or a three digit number.
The control panel recognizes when a detector or module is installed. For this reason, the detectors can be assigned any unique
address from 1 to 159, and the modules can be assigned any unique address from 1 to 159. There can be a detector using
address 1 and a module using address 1. The 0 is an invalid address. In order to set the sensor above the address 99, carefully
remove the stop on the upper rotary switch as shown in Example 2.
Example 1: To select device address 35, turn the ONES rotary dial to 5 and the TENS rotary dial to 3 as shown in Figure 7.4.
Example 2: To select device address 105, turn the ONES rotary dial to 5 and the TENS rotary dial to 10 as show in Figure 7.4..
Figure 7.4 SLC Device Addressing Using the Rotary Dials
7.6 Addressing SD Devices
This Section describes how to address the detectors and the modules. See Table 7.1 for a list of detectors that are easily
addressed at the FACP. The Installer Code is required to perform this task.
To address, do the following.
1. Connect a detector base temporarily to the programming terminals as shown in Figure 7.5. (You can use the same base for
each detector.)
Figure 7.5 Temporary Connection of Detector Base to Panel for Addressing
2. Enter the Installer code, then press ENTER.
3. Select 2 for Point Functions.
4. Select 3 for Set SLC Dev Address.
5. Select “Yes” by pressing the up arrow, then press ENTER. (The panel will go into trouble at this point. You can use the
SILENCE key to stop the PZT. The trouble will clear automatically when the panel reinitializes when you finish
programming.)
6. When the wait message clears, the following options display:
1- for Read Address. Use to read (or check) a single detector’s address.
2- for Write Address. Use to program a single detector’s address.
3- for Seq. Programming. Use to program more than one detector in sequential order.
7. If you are changing addresses, write the programmed address on the back of the device.
8. To exit press left arrow until fully exited.
Example 2: Device Set to 105.
All dials labeled for ONES
or TENS position.