2.3 Mounting and Removing the Keypad
2-43
2.3 Mounting and Removing the Keypad
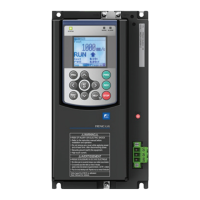
The keypad can be removed from the inverter unit, and installed on the panel, or used for remote manual operation.
Fig. 2.3-1 If installing the keypad on the panel
The following parts are necessary if mounting the keypad on locations other than the inverter unit.
Table 2.3-1
Extension cable for remote
operation (Note 1)
Three lengths available (1 m, 3 m, 5 m) (3.3 ft,
9.8 ft, 16.4 ft)
2 screws required (prepared by user)
(Note 1) When using a commercially available LAN cable, use a 10BASE-T/100BASE-TX straight cable (within 20
meters (65 ft)) which meets the ANSI/TIA/EIA-568A category 5 or higher standards of the US.
(Note 2) When attaching to the cabinet, use a fixing screw of appropriate length to the cabinet thickness.
(The keypad screw hole depth is 11 mm (0.43 in).)
■ Removing and mounting the keypad
Pull the keypad toward you to remove while pressing down on the hook indicated by the arrow. Use the opposite
procedure to mount the keypad.
Fig. 2.3-2 Keypad removal
Extension cable for
remote operation

 Loading...