CHAPTER 6
Installing/Removing Modules, Filler Panels and Plug-In Units
Installing/Removing SFP Modules in a Muxponder or Flexponder™ Unit
FNC-7500-0061-200
Issue 1, May 2009
FLASHWAVE 7500 Release 6.1
Equipment Installation
6-16
Fujitsu and Fujitsu Customer Use Only
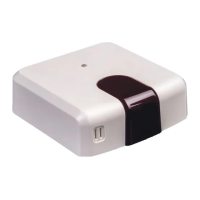
8 To remove the SFP module from the plug-in unit, press the detent button on the left side of
the SFP module (see Figure 6-10 [p. 6-16]) to release the module from the plug-in unit, and
then pull the module straight out.
9 Carefully install an optical connector cover into the SFP module.
10 Set the SFP module aside for repair paperwork processing.
11 Is another SFP module being installed in the same position?
If YES:
Continue with Step 12 [p. 6-16].
If NO:
Proceed to Step 13 [p. 6-16].
12 If necessary, record the serial number and issue number of the replacement module, and then
proceed to Section 6.5.2 [p. 6-17].
13 For a muxponder plug-in unit, close the stainless steel client connection drawer (see
Figure 6-8 [p. 6-14]), and gently tighten the two thumb screws that secure it on the front of
the muxponder plug-in unit. For a Flexponder plug-in unit, lower the hinged door to cover
the front of the plug-in unit, if present.
Note: Older versions of the IFMA-BUC1 unit have the hinged door. Newer versions of the IFMA-BUC1
unit do not have a hinged door. The IFMA-BXC1 unit does not have a hinged door.
This procedure is complete.
Figure 6-10: Detent Button on Front of SFP Module Installed in IFMA-8TCx Unit