80 0000010291
001
Attention!
Make sure that there is power supplied to the sensor for at least ten seconds
after releasing the edit-button, this to store the current pressure in the sen-
sor.
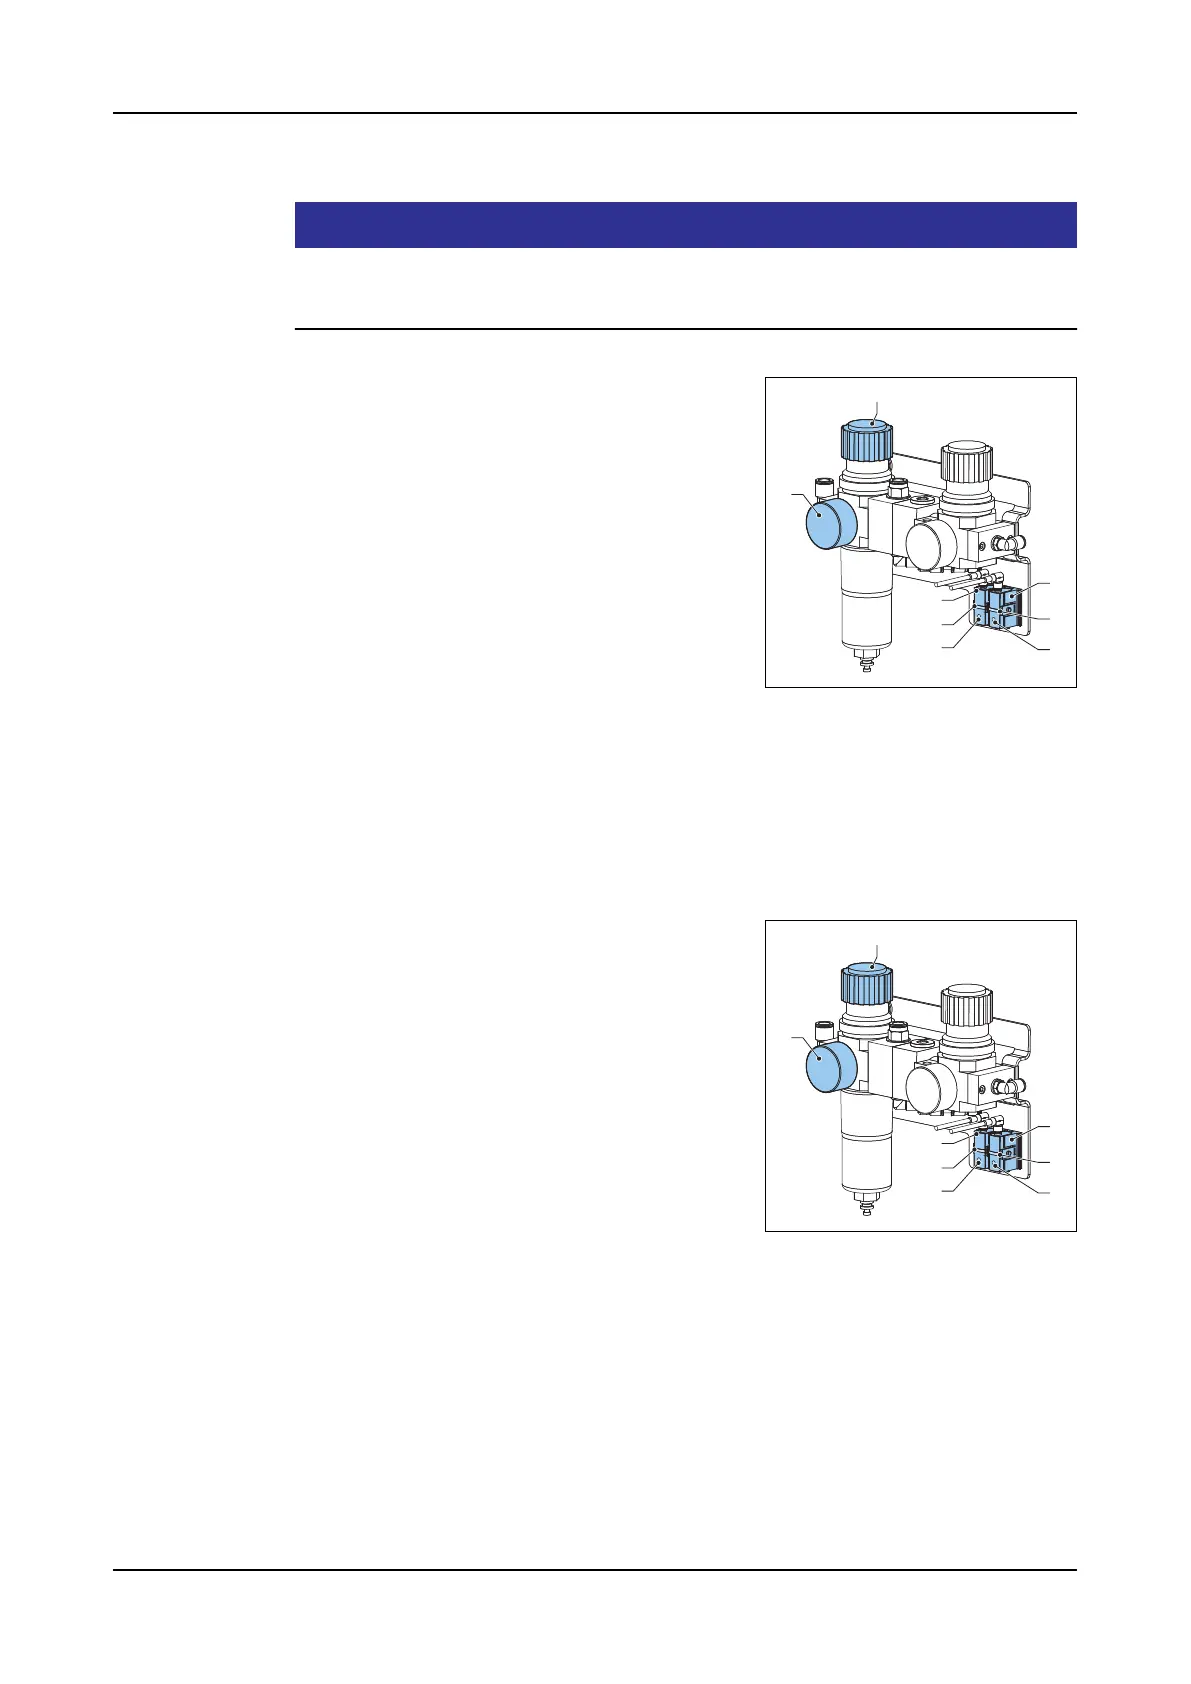
Adjustment of
the pressure
switches
Overall machine pressure
1. Switch on the machine.
2. Set the air pressure to 4 bar, by turning the
knob (H) on the main pressure regulator.
Use the pressure gauge (G) to read the
pressure.
3. Press the edit-button (C) of the pressure
switch (A) for more than two seconds, until
the LED (B) flashes.
4. Release the edit-button (C). The current
pressure is saved as the switching pressure.
5. Do a test-run wit different pressures to as-
certain whether the pressure sensor switches as required. At an active switch-
ing signal, the LED illuminates.
6. Set the air pressure of the main pressure regulator back to 6 bar. Using the
knob (H) and the pressure gauge (G).
Foot-pedal pressure switch
This test has to be done with two persons, one to operate the foot-pedal and one
to adjust the pressure switch.
1. Switch on the machine.
2. Operate the foot-pedal by pushing it in total-
ly, keep it pushed in for the time of the ad-
justment
3. Press the edit-button (F) of the pressure
switch (D) for more than two seconds, until
the LED (E) flashes.
4. Release the edit-button (F). The current
pressure is saved as the switching pressure.
5. Release the foot-pedal.
6. Operate the foot-pedal several time to as-
certain whether the pressure sensor switches as required. At an active switch-
ing signal, the LED illuminates.
H
G
A
C
B
D
F
E
H
G
A
C
B
D
F
E