8003 Precision Scalar Analyzer
2-72 Manual 20791, Rev. C, June 2001
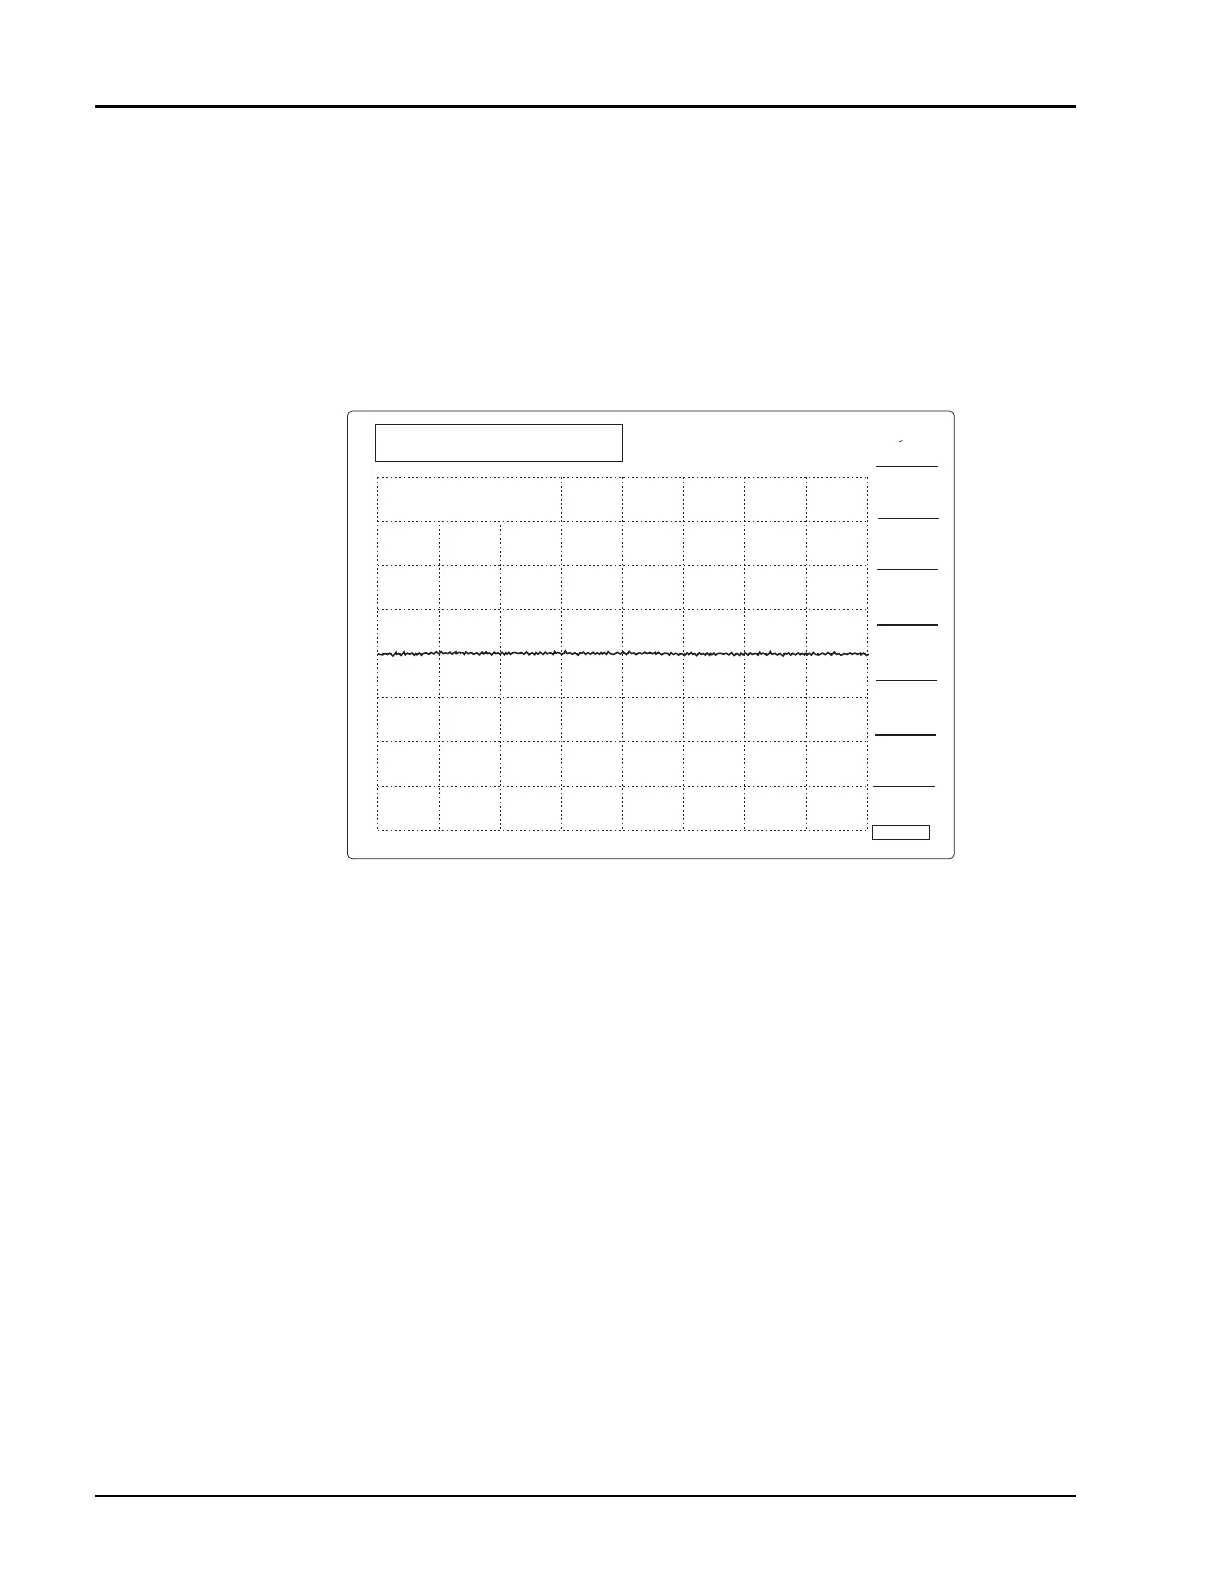
Press
[
STORE THRU A
]
. The analyzer will display the message
PREPARING SOURCE FOR
‘A ’ THRU
. When it is done, the analyzer will display
‘A’ THRU PATH CAL DONE
. Press
[
SCALE
]
then
[REF LEVEL], and then press the digit
0
on the numeric keypad followed by the
[GHz/dB]
units key. You should now see a straight line trace in the middle of the screen. If the
resulting line has more than
±
0.1 dB of ripple, press [A FULL BND Y/N]. The ‘Y’ should turn dark blue,
and the ‘N’ should be light blue. This causes the sweeper to perform a path calibration over the
displayed range instead of the full frequency range of the sweeper. Press
[
STORE THRU A
]
to path
cal again. You should get a straight line trace. The analyzer is now ready for fully corrected, accurate
insertion loss measurements.
Remove the power sensor from the bridge. Attach a short to the bridge test port. Press Channel
[2]
to
make channel 2 the active entry channel. Note on the analyzer screen that the box around the channel
1 summary area now moves around the channel 2 summary area to indicate that it is the active channel.
The channel 2 trace shows the reflected power coming back from the test port. To calibrate out the
frequency variations in the reflected path, press Function
[CAL]
, then press [SHORT/OPEN] followed
by [STORE SHORT B]. After the analyzer calibrates with the short, it will ask you to connect an open
Figure 2-25: Calibrated Path Display
B FULL
BND Y/N
A FULL
BND Y/N
STORE
THRU C
STORE
THRU B
STORE
THRU A
C FULL
BND Y/N
CAL
RETURN
STRT
8.000 GHz
STOP
12.400 GHz
CH1:SWA -PC
0.1 dB/ REF 0.00 dB
'A' THRU
PATH CAL DONE
1
 Loading...